Lighting / Outdoor Lighting
Installation Manual for SOLTECH MORAGA 18W Smart Solar Light
Comprehensive installation and operation guide for the SOLTECH MORAGA 18W smart solar light. Includes mounting instructions, battery maintenance, remote control settings, and lighting modes.
Quick answers from the manual
Quick answer
- The MORAGA 18W is a solar-powered LED light. Installation involves mounting the light head to the holder (4x M8*40mm screws) and then to the pole (2x M8*16mm screws). It is operated via remote control with various motion sensor, constant, and timer modes. p. 8, 9, 10
Key actions
- Mounting the light head p. 8, 9
- Battery maintenance p. 4, 6
First start
- Press the ON/OFF button on the light head to turn it on, then use the remote control to set the lighting mode. p. 9
Problems and fixes
Light not working
Check if the battery is charged and the solar panel is exposed to sufficient sunlight.
p. 4, 7Maintenance and reset
- Recharge the battery every 4 months during storage. p. 4, 6
Technical specifications
| Parameter | Value | Meaning | Pages |
|---|---|---|---|
| Solar Panel | 42W | High efficiency solar panel. | p. 4 |
| Battery Runtime | 12-14 hours | Continuous operation at full power. | p. 6 |
Where to find it in the PDF
- Installation p. 8, 9
- Remote Control Guide p. 10, 11, 12, 13
Table of contents
Manual images
Click an image to enlargeQuick Guide
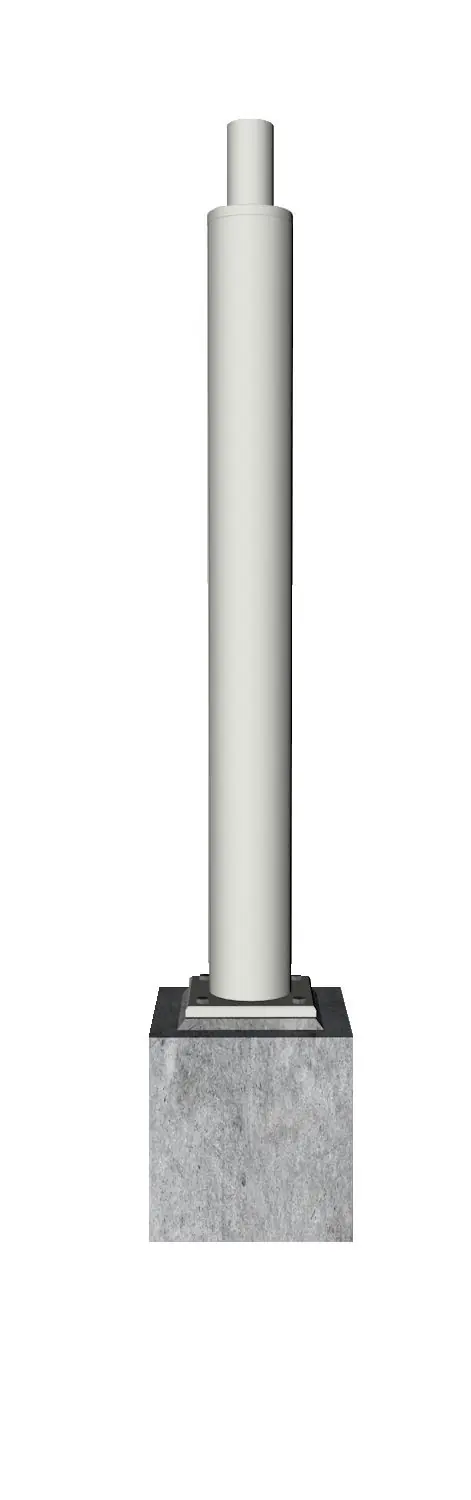
The SOLTECH MORAGA 18W is a solar-powered LED lighting fixture. Before installation, ensure the light pole foundation is solid and the battery is fully charged. The light requires a minimum of 3.5 hours of direct sunlight per day for optimal performance. Always orient the solar panel toward the equator (south in the northern hemisphere) and avoid shaded areas.
Installation
The installation process involves mounting the light head to the pole:
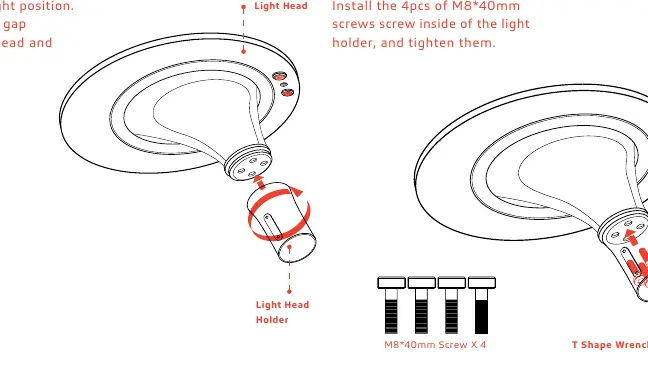
- Step 1: Connect the light head holder to the light head. Ensure there is no gap between them.
- Step 2: Tilt the light head and install the 4pcs of M8*40mm screws inside the light holder using the T-shape wrench.
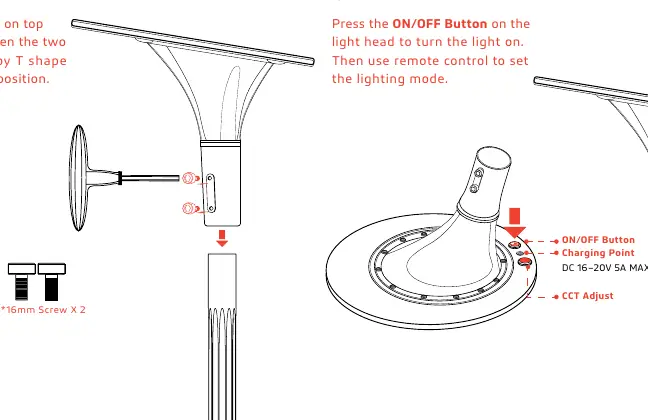
- Step 3: Place the light head on top of the pole and tighten the two M8*16mm screws using the T-shape wrench.
- Step 4: Press the ON/OFF button on the light head to turn it on, then use the remote control to set the desired lighting mode.
Important: When the solar panel is exposed to sunlight, it generates electricity. Cover the panel with an opaque material (like paper or cloth) during installation to avoid shock hazards.
Remote Control and Lighting Modes
The remote control allows you to configure various lighting modes. The operating range is 16ft during the day and 33ft at night. Modes include:
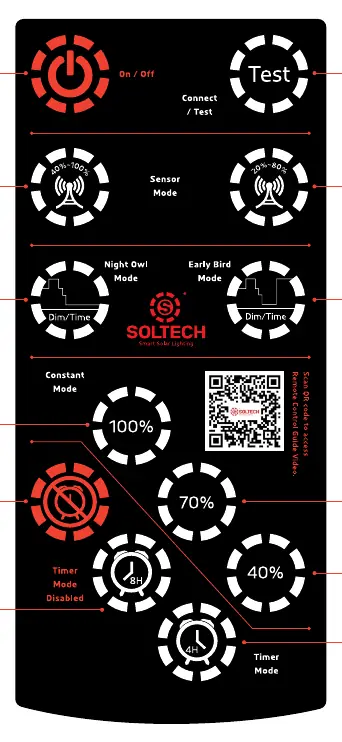
- Motion Sensor Modes: 40%~100% or 20%~80% (default). The light stays at a lower brightness and increases when motion is detected.
- Constant Modes: 100%, 70%, or 40% brightness from dusk to dawn.
- Timer Modes: 4 hours or 8 hours, which can be combined with other modes.
- Special Modes: Night Owl Mode and Early Bird Mode, which adjust brightness based on the time of night.
Battery Maintenance
To prevent deep discharge during storage, the battery must be fully recharged every 4 months. The battery will stop charging if the ambient temperature is below -30°C (-20°F) or above 140°C.
Practical help
Common problems
Light does not turn on
Ensure the battery is charged, the solar panel is not covered by shadows, and the ON/OFF button on the light head has been pressed.
Battery storage issues
Recharge the battery every 4 months to avoid deep discharge.
Before use
- Ensure the light pole foundation is solid.
- Fully charge the battery before installation.
- Cover the solar panel with an opaque material during installation.
- Orient the solar panel toward the equator.
- Verify the installation area receives at least 3.5 hours of sunlight per day.
Specs in practice
- 3.5 hours/day
- Minimum average sunshine required for full function.
Images and diagrams
- The pole mount diagram illustrates the connection of the light head to the holder using 4 screws, and the subsequent mounting of the assembly to the pole using 2 screws.
Model compatibility
- For outdoor use only.
- Do not install in unventilated areas.

Manual page author
Emily Carter
User documentation editor
Prepares concise manual descriptions and highlights the most useful setup, operation, and maintenance information for readers.