Toys / RC Components
User Manual for Lucci Air Summit 54 DC Ceiling Fan
Quick guide for installing and operating the Lucci Air Summit 54 DC Ceiling Fan. Includes wiring diagrams, remote pairing instructions, and maintenance tips.
Table of contents
Manual images
Click an image to enlargeQuick guide from the manual
This ceiling fan is designed for indoor and alfresco areas (fully undercover). It requires installation by a licensed electrician. The fan features a 6-speed remote control and a DC motor for energy efficiency. Ensure an all-pole disconnection switch is incorporated into the fixed wiring as per local rules.
Parts list
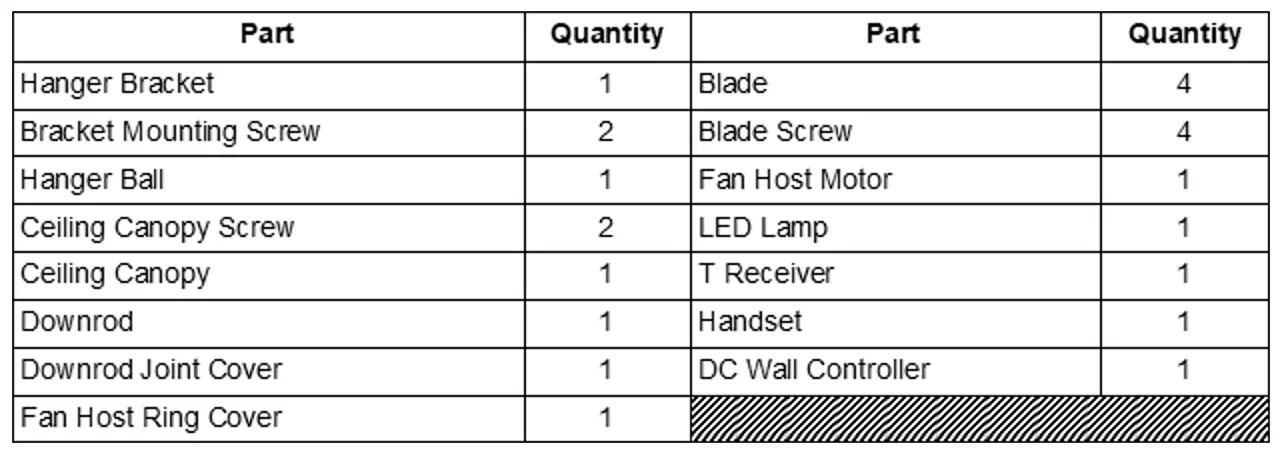
Before assembly, ensure you have all components:
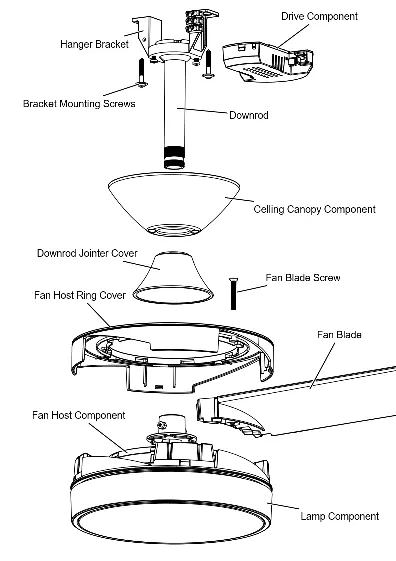
- Hanger bracket and mounting screws
- Hanger ball
- Ceiling canopy and screws
- Downrod and joint cover
- Fan host motor and ring cover
- Fan blades and screws
- LED lamp
- T receiver, handset, and DC wall controller
Installing the fan
Mounting Bracket: Install the bracket to a structure capable of supporting four times the weight of the fan. Use the provided long screws for wooden structures; use appropriate screws for other materials. Ensure at least 30mm of the screw is threaded into the support. The fan is for flat ceilings only.
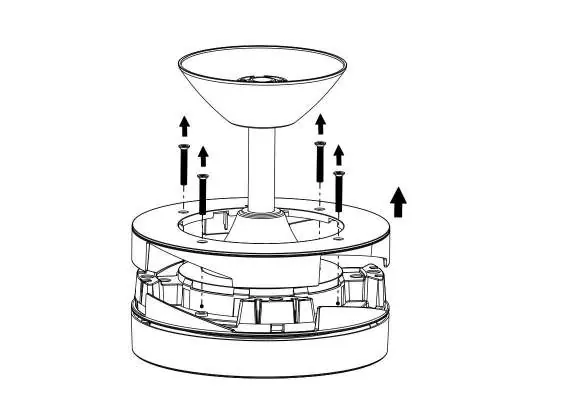
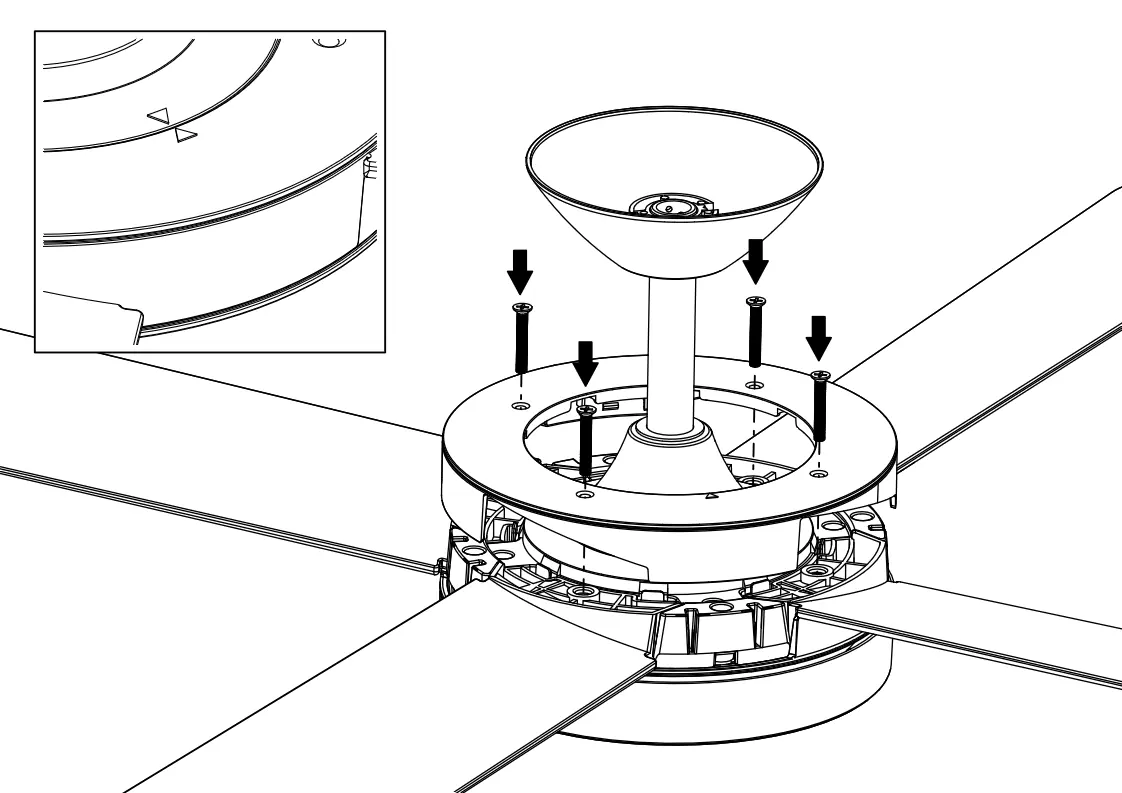
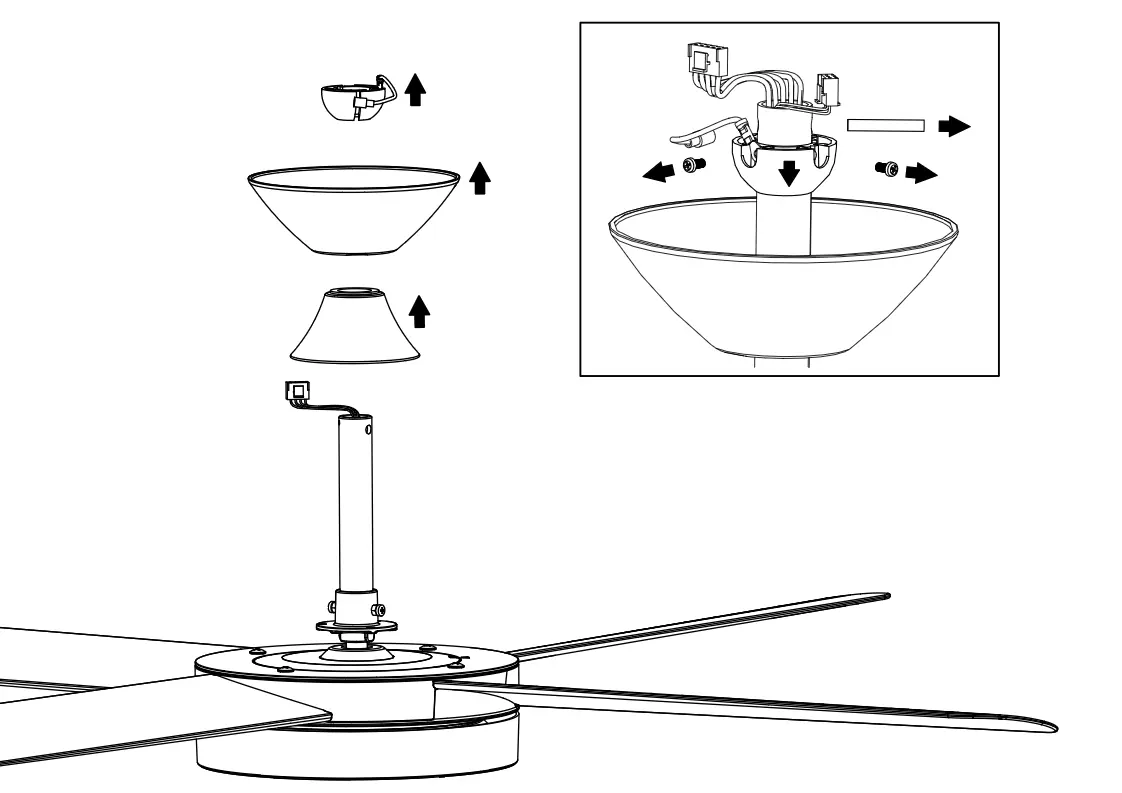
Blade Installation: Unscrew the 4 screws from the fan blade cover, lift the cover, install the blades onto the motor assembly, and re-secure the cover.
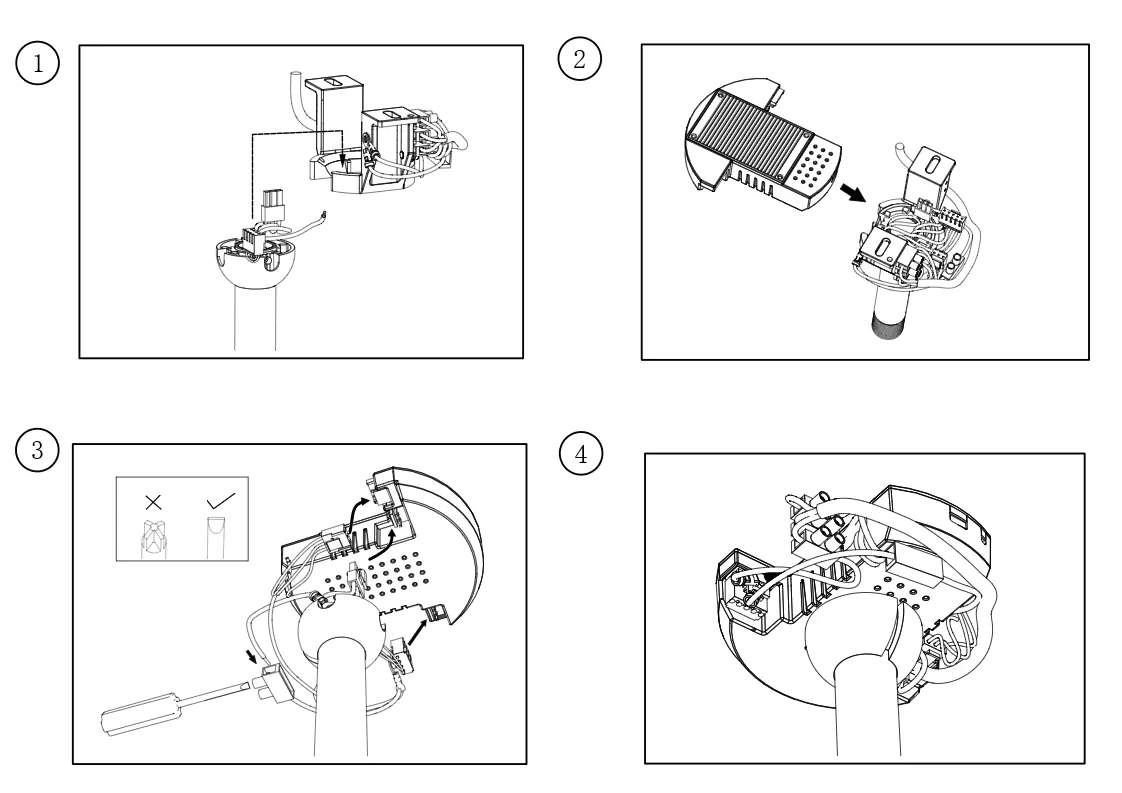
Hanging the Fan: Place the hanger onto the mounting bracket, ensuring the key slot of the hanger ball aligns with the key pin on the bracket. Install the drive component onto the hanger.
Wiring diagram
All electrical connections must be performed by a licensed electrician. Connect the mains supply (Live, Neutral, Earth) to the terminal block on the mounting bracket. Connect the output of the mounting bracket terminal block to the input of the DC motor driver remote receiver, and the output of the receiver to the fan motor input.
Using your ceiling fan
Remote Control: The remote controls fan speed (1-6), light on/off/dimming, forward/reverse direction, and a timer (1h, 2h, 4h). It uses 2 x 1.5V AAA batteries.
Pairing: If the remote loses control, or for initial setup: Turn off the mains power, turn it back on, and within 30 seconds, press and hold the "Forward/Reverse" button for 10-15 seconds until the receiver beeps.
Care and cleaning
Turn off power at the mains before cleaning. Clean every 6 months using a soft brush or lint-free cloth. Do not soak or immerse the fan in water. Do not use organic solvents or cleaners. The motor has permanently lubricated bearings and does not require oiling.
Technical information
The fan operates on 220-240V~ 50Hz. The motor wattage is 25W, and the light wattage is 18W. The light provides CCT 3000K-6000K with 1503 lm output. The total weight is 7.2kg.
Practical help
Common problems
Fan wobbling or oscillating
Check that all screws fixing the mounting bracket and downrod are secure.
Loss of control / Remote not working
Switch off main power, then switch on and follow the pairing procedure (press and hold Forward/Reverse button for 10-15 seconds within 30 seconds of power-on).
Noise during operation
Allow a 24-hour settling-in period for new fans. Ensure screws are tight.
Before use
- Ensure installation is performed by a licensed electrician.
- Verify the ceiling structure can support four times the weight of the fan.
- Ensure an all-pole disconnection switch is included in the fixed wiring.
- Check that blades are at least 2.1m above the floor.
- Ensure batteries are inserted in the remote with correct polarity.
Specs in practice
- Rated Voltage
- 220-240V~ 50Hz
- Motor Wattage
- 25W
- Light Wattage
- 18W
Images and diagrams
- Fig 1: Exploded view of fan components.
- Fig 5: Wiring diagram showing connections from mains to mounting bracket and receiver.
- Fig 7: Remote control button layout and functions.
Model compatibility
- Suitable for indoor and alfresco areas (fully undercover).
- Not waterproof; must be protected from water, wind, dust, and salt.
- Only suitable for flat ceiling installation.

Manual page author
Michael Turner
Technical manual editor
Reviews PDF manuals for structure, safety notes, and practical product details so readers can find the right information quickly.