Lighting / Fixtures
Installation Guide for Tecnolite 12PTLLEDR30MVB Indoor Light
Quick installation guide for the Tecnolite 12PTLLEDR30MVB indoor light. Includes mounting steps, wiring instructions, safety precautions, and technical specifications.
Table of contents
Manual images
Click an image to enlargeImportant Information
This guide provides installation instructions for the Tecnolite indoor light series. Ensure the power is disconnected before starting any work. The fixture must be installed at a minimum distance of 0.50m from any combustible material to prevent fire hazards.
Installation Steps
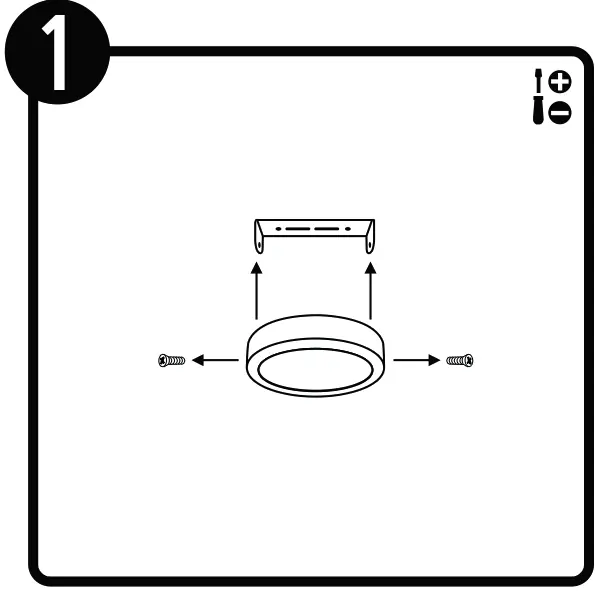
- Prepare the fixture: Remove the mounting bracket from the main light fixture.
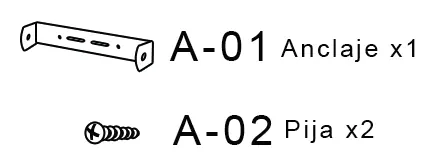
- Mount the bracket: Drill holes in the ceiling or wall and secure the mounting bracket (A-01) using the provided screws (A-02) and appropriate anchors (not included).
- Wiring: Connect the power supply wires (Line and Neutral) to the fixture's input terminals. Ensure all connections are secure.
- Final Assembly: Attach the light fixture to the mounted bracket and secure it with the screws.
Technical Specifications
- Voltage: 100V - 240V
- Frequency: 50Hz / 60Hz
- Power: 12W
- Current: 0.12A - 0.05A
Safety and Maintenance
Safety: Do not install the fixture near combustible materials. Maintain a minimum distance of 0.50m. If the lamp or parts of the luminaire heat up, handle with care using gloves or a clean rag.
Maintenance: Disconnect the power source before performing any maintenance. Clean the luminaire and its internal parts with a dry rag and check connections periodically.
Manufacturer information
Tecnolite
Practical help
Common problems
Light does not turn on
Check the power supply and ensure all electrical connections are secure.
Overheating
Ensure the light is not covered and is installed at least 0.50m away from any combustible materials.
Before use
- Ensure power is disconnected before installation.
- Verify voltage compatibility (100V-240V).
- Check for combustible materials within 0.50m of the installation site.
- Gather necessary tools: drill, screwdriver, and protective gear.
Specs in practice
- Voltage: 100V-240V
- The fixture supports a universal voltage range.
- Safety Distance: 0.50m
- Minimum clearance required from combustible materials to prevent fire hazards.
Images and diagrams
- Step 1: Remove bracket from fixture.
- Step 2: Drill holes and mount bracket using anchors.
- Step 3: Connect Line and Neutral wires.
- Step 4: Secure fixture to the bracket.
Model compatibility
- Suitable for indoor use.
- Not suitable for constant work with voltages outside the specified range.

Manual page author
Emily Carter
User documentation editor
Prepares concise manual descriptions and highlights the most useful setup, operation, and maintenance information for readers.