Electronics / RFID Barcode Scanners
User Manual for Datalogic Magellan 1500i Scanner
Comprehensive user guide for the Datalogic Magellan 1500i omni-directional imaging scanner. Includes setup, connection, programming, cleaning, and configuration instructions.
Table of contents
Manual images
Click an image to enlargeQuick Guide
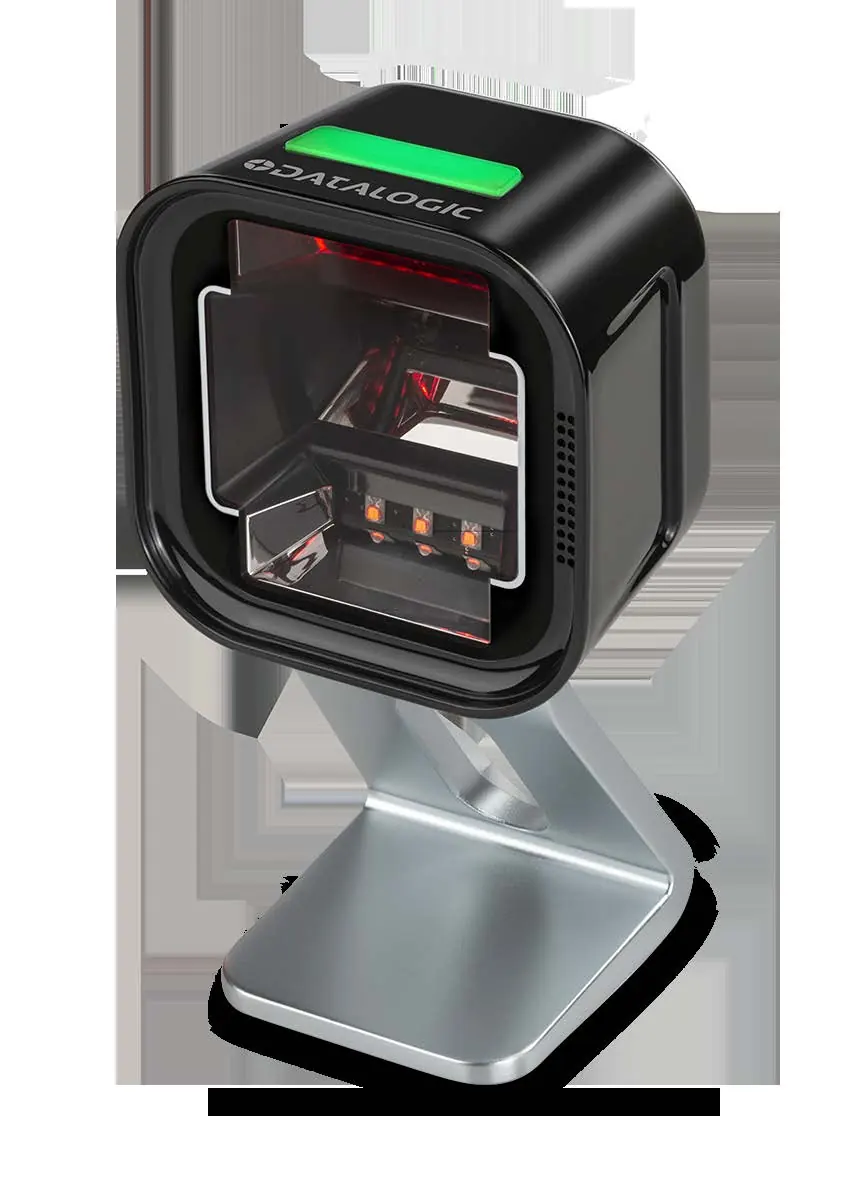
The Datalogic Magellan 1500i is an omni-directional imaging scanner designed for retail checkout environments. It supports automatic reading of barcodes from printed surfaces and mobile devices. The scanner is factory-configured for common terminal settings, but can be customized using programming barcodes or the Datalogic Scanalyzer software utility.
Installation and Mounting
The scanner can be used as a handheld device or mounted on a counter. Optional accessories include a Tilting Stand, Riser, and L-Bracket/Wall Mount.


Installing the Stand/Riser
- Ensure the EAS cable is secured if needed.
- Insert the tabs of the bottom cover into the front edge of the scanner.
- Push up on the back of the bottom cover to snap it into place.
- If using a Riser, open the Riser door to facilitate cable connection.
L-Bracket/Wall Mount
- Affix the L-Bracket to the desired surface using appropriate screws (do not use flathead screws).
- Install the bottom cover on the scanner.
- Insert the interface cable into the scanner until it clicks.
- Place the scanner into the L-Bracket, facing the front or either side.
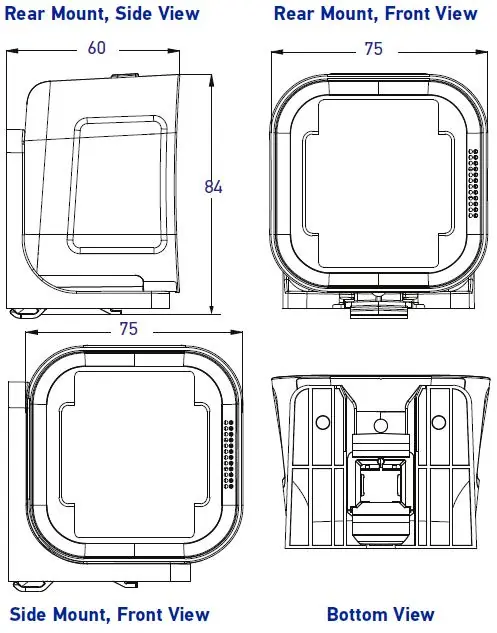
Connecting the Scanner
The scanner kit includes a cable compatible with your interface. Always ensure the host cable is disconnected when selecting a new interface type.
- RS-232 Serial Connection: Turn off power to the terminal/PC. Connect the scanner via the RS-232 cable. If the terminal does not support Power Off the Terminal (POT), use an approved AC adapter.
- USB Connection: Connect the scanner to a USB port on the terminal/PC using the appropriate USB cable.
Operation
The scanner supports two primary modes:
- Presentation Mode: Barcodes are presented to the scanner while it rests on the counter.
- Handheld Scanning Mode: Pick up the scanner to target specific barcodes. The aimer LED illuminates automatically. Press the button to scan. A successful read is indicated by a bright green flash and the GreenSpot feature.
Cleaning and Maintenance
Keep the scan window clean for optimal performance. Use a clean, lint-free cloth dampened with a mild, non-abrasive, water-based cleaner.
Approved Cleaning Materials
- Hydrogen Peroxide (max 3% solution)
- Chlorine bleach (max 0.25% solution)
- Mild detergent and water
- Isopropyl Alcohol (max 70% solution)
CAUTION: Do not spray cleaners directly on the scanner. Do not use abrasive cleansers, pads, or harsh chemicals like acetone, benzene, or ammonia solutions, as these will damage the scanner and void the warranty.
Programming
You can customize the scanner using programming barcodes found in this guide or the Datalogic Scanalyzer software.
- Programming Mode: Scan the "Enter/Exit Programming Mode" barcode to enter. Scan the desired parameter barcodes. Scan the "Enter/Exit Programming Mode" barcode again to save changes and exit.
- Service Port Mode: Required for using the Scanalyzer tool. Unplug the unit, hold the Scan Button, plug the scanner in, and release the button when the light illuminates.
- Return to Factory Settings: Scan the "Standard Product Default Settings" barcode to reset all features.
Configuration Features
The scanner offers extensive configuration options, including:
- General Scanner Features: Double read timeouts, accelerometer settings, and LED/beeper indicators.
- Imaging Features: Image capture, format (JPG/BMP), size, brightness, contrast, and Region of Interest (ROI).
- Interface Related Features: USB and RS-232 interface selection and communication settings.
- Data Editing: Global prefix/suffix, AIM ID, and Label ID settings.
- Symbology Programming: Enable/disable and configure various 1D and 2D symbologies.
Specifications
The Magellan 1500i operates on 5 VDC +/- 10%. It is rated IP52 for particulate and water sealing and can withstand repeated drops from 1.2 meters (4.0 ft) onto concrete.
Practical help
Common problems
Scanner not reading barcodes
Ensure the correct interface type is selected and the cable is securely connected. Verify the scanner is not in a disabled state.
Multiple reads of the same label
Increase the Double Read Timeout setting to a higher value.
Scanner not entering Service Port Mode
Ensure you are holding the Scan Button while plugging in the unit and releasing it immediately when the light illuminates.
Before use
- Verify the correct interface cable is used for your host system
- Power off the terminal/PC before connecting RS-232 cables
- Ensure the scan window is clean and free of debris
- Determine if you need Presentation or Handheld scanning mode
- Check that the scanner is properly mounted if using a stand or wall mount
Specs in practice
- Input Voltage
- 5 VDC +/- 10%
- Operating Current
- < 500 mA
- Drop Resistance
- Withstands repeated drops from 1.2 m / 4.0 ft onto concrete
Images and diagrams
- Figure 1: Connecting the scanner to the host/terminal
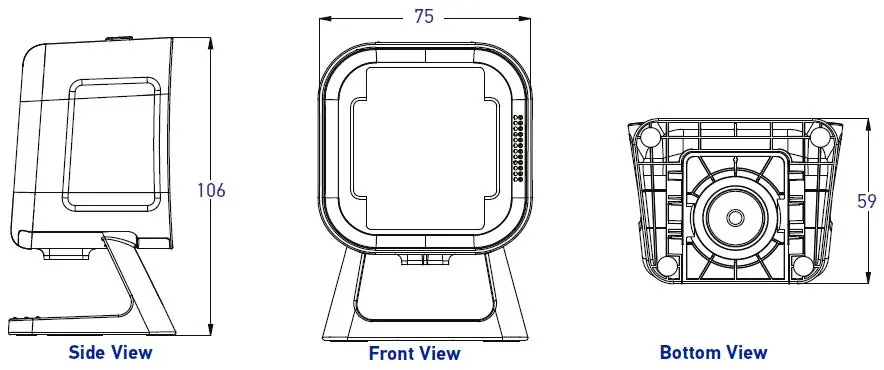
- Figure 2: Scanner features (front view)
- Figure 4: Stand, Riser, and Wall mount options
- Figure 9: Scanning methods (Presentation vs Handheld)
Model compatibility
- Supports RS-232, USB Keyboard, USB COM, and USB OEM interfaces
- EAS hardware works with Counterpoint IX and Evolve D11 models

Manual page author
Emily Carter
User documentation editor
Prepares concise manual descriptions and highlights the most useful setup, operation, and maintenance information for readers.