Automotive / Bicycle Carriers
Thule EasyFold XT 903202 Hitch Bike Rack User Manual
Comprehensive user guide for the Thule EasyFold XT 903202 hitch bike rack. Includes installation steps, loading instructions, safety guidelines, and maintenance tips.
Quick answers from the manual
Quick answer
- The Thule EasyFold XT 903202 is a hitch-mounted bike rack. Installation involves inserting it into the hitch receiver, tightening the bolt, and locking it. Bikes are secured via frame clamps and wheel straps. The rack can be tilted for trunk access and folded for storage. p. 1, 4, 5, 11
Key actions
- Mounting to hitch p. 4
- Securing bikes p. 7, 8, 9
- Tilting for trunk access p. 11
First start
- Check hitch compatibility and ensure all parts are present before assembly. p. 3, 4
Problems and fixes
Noise or movement
Check tightness of all fasteners and hitch connection.
p. 13Maintenance and reset
- Clean regularly with warm water/car shampoo, lubricate moving parts, and check bolts/straps. p. 13, 15
Technical specifications
| Parameter | Value | Meaning | Pages |
|---|---|---|---|
| Max weight per bike | 65 lbs / 29.5 kg | Maximum load capacity per bike position. | p. 3 |
| Max speed | 130 km/h (80 mph) | Maximum recommended driving speed. | p. 13 |
Where to find it in the PDF
- Installation p. 4, 5
- Safety and Maintenance p. 12, 13
Table of contents
Manual images
Click an image to enlargeQuick Guide
The Thule EasyFold XT 903202 is a hitch-mounted bike rack designed for easy transport. Before use, ensure your vehicle's hitch receiver is compatible (1.25" or 2"). Always verify the maximum weight capacity of 65 lbs (29.5 kg) per bike and do not exceed the vehicle's hitch load limit. Regularly check all fasteners and locks during transport.
Installation
Mounting to the Hitch:
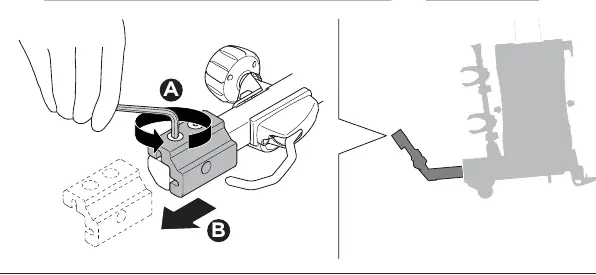
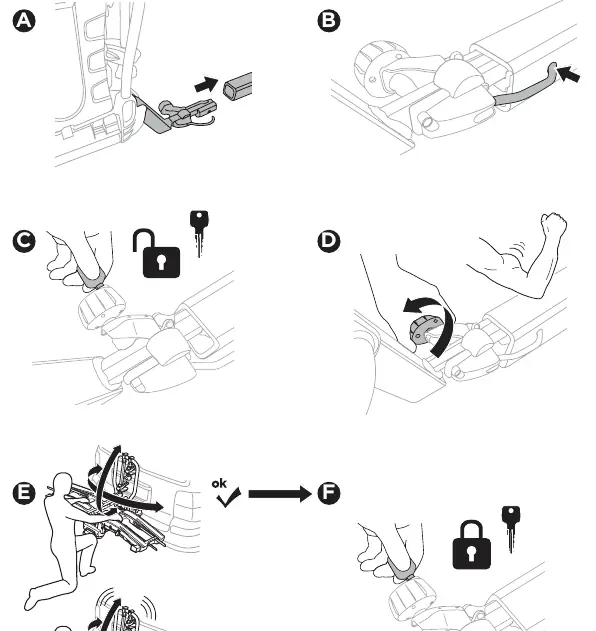
- Insert the rack into the hitch receiver.
- Ensure the hitch pin is properly engaged.
- Use the provided tool to tighten the hitch bolt securely (Step 1).
- Lock the mechanism using the key to prevent theft (Step 3).
Loading Bikes
Loading Procedure:
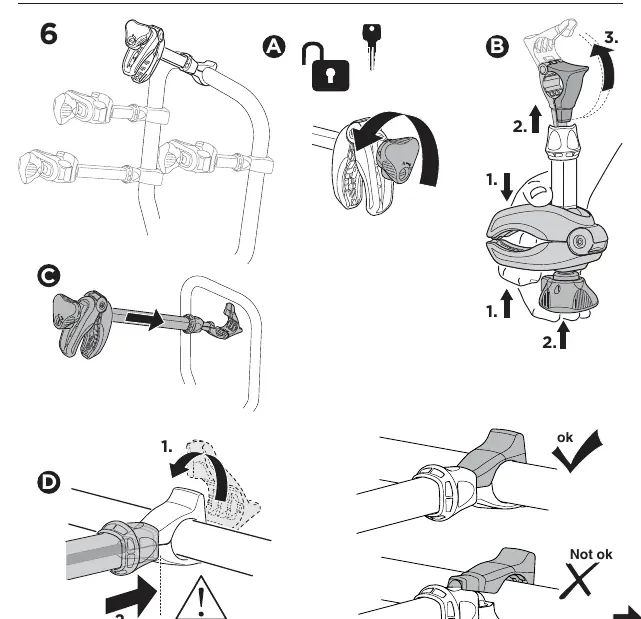
- Place the heaviest bikes closest to the vehicle.
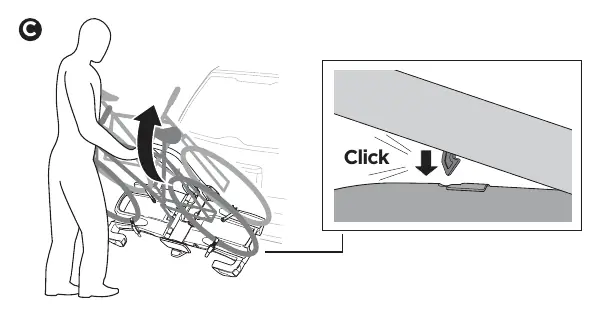
- Secure the bike frame using the clamping arm (Step 6).
- Tighten the clamp until you hear a 'click' to ensure proper tension.
- Secure the wheels using the provided straps.
- Carbon Frames: If using carbon frames, consult the bike manufacturer for compatibility or use the Thule Carbon Frame Protector (984).
Usage and Features
Tilting for Trunk Access:
- The rack can be tilted to allow access to the vehicle's trunk.
- Use the foot pedal mechanism to release the tilt lock (Page 11).
- Ensure the rack clicks back into the locked position after returning it to the upright state.
Folding:
- The rack can be folded for compact storage when not in use (Step 4/5).
Driving Regulations
- Speed Limits: Do not exceed 130 km/h (80 mph). Drive slowly (max 10 km/h) over speed bumps.
- Visibility: Ensure the rack does not obstruct the vehicle's third brake light. If obstructed, an additional light board may be required.
- Safety: Remove the rack from the vehicle when not in use to improve fuel economy and safety.
Maintenance
- Clean the rack regularly with warm water or car shampoo, especially after use in coastal areas or winter conditions where salt is present.
- Lubricate the coupling mechanism and moving parts as needed.
- Check all bolts, knobs, and rubber straps periodically for wear and tightness.
- If parts are lost or worn, use only genuine Thule spare parts.
Manufacturer information
Thule
Practical help
Common problems
Unusual noise or movement during transport
Stop the vehicle and check that the rack is securely fitted to the hitch and that all load fasteners are tightened.
Carbon frame damage
Consult the bike manufacturer before use. Use the Thule Carbon Frame Protector (984) if allowed.
Trunk access blocked
Use the tilt mechanism (foot pedal) to lower the rack away from the vehicle.
Before use
- Verify hitch receiver size (1.25" or 2").
- Check that all necessary parts are present.
- Ensure bike weight does not exceed 65 lbs (29.5 kg) per bike.
- Remove easily detachable parts from bikes (child seats, baskets, pumps).
- Check tire pressure and wheel straps for wear.
Specs in practice
- Max weight per bike
- 65 lbs (29.5 kg). Do not exceed this limit.
Images and diagrams
- Step 1: Hitch mounting and bolt tightening.
- Step 3: Locking the hitch mechanism.
- Step 6: Bike frame clamping procedure.
- Page 11: Tilting mechanism for trunk access.
Model compatibility
- Not intended for tandems or recumbents.
- Not for off-road driving.
- Check third brake light visibility; add light board if obstructed.

Manual page author
Emily Carter
User documentation editor
Prepares concise manual descriptions and highlights the most useful setup, operation, and maintenance information for readers.