Music / Guitar Effects
User Manual for Walrus Audio Melee Effects Pedal
Quick guide for the Walrus Audio Melee Wall of Noise effects pedal. Learn how to use the joystick for reverb and distortion mixing, configure bypass modes, and switch between reverb programs.
Table of contents
Manual images
Click an image to enlargeQuick Guide
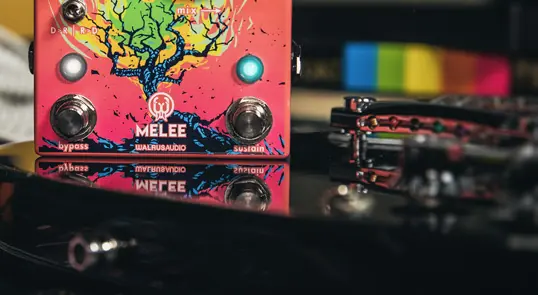
The Walrus Audio Melee is a combined reverb and distortion pedal designed for shoegaze and ambient textures. It requires a 9V DC, Center Negative power supply with at least 200mA. It is highly recommended to use an isolated power supply; daisy chain power supplies are not recommended.
Controls and Operation
The pedal features several knobs and switches to shape your sound:
- Volume: Sets the overall output volume of the pedal.
- Tone: Controls the tone of both distortion and reverb simultaneously. Left is normal, middle is dark, and right is the brightest setting.
- Decay: Controls the decay time of the reverb. Left is minimum, middle is medium, and right is max decay.
- Secondary Control: Hold down the bypass stomp switch and adjust the decay toggle to set modulation. Left is no modulation, middle is 33RPM, and right is 45RPM.
Joystick and Signal Order
The joystick allows for real-time mixing of effects:
- X-Axis (Left/Right): Sets the amount of reverb mix (Left = fully dry, Right = fully wet).
- Y-Axis (Up/Down): Sets the amount of distortion (Down = fully clean, Up = fully distorted).
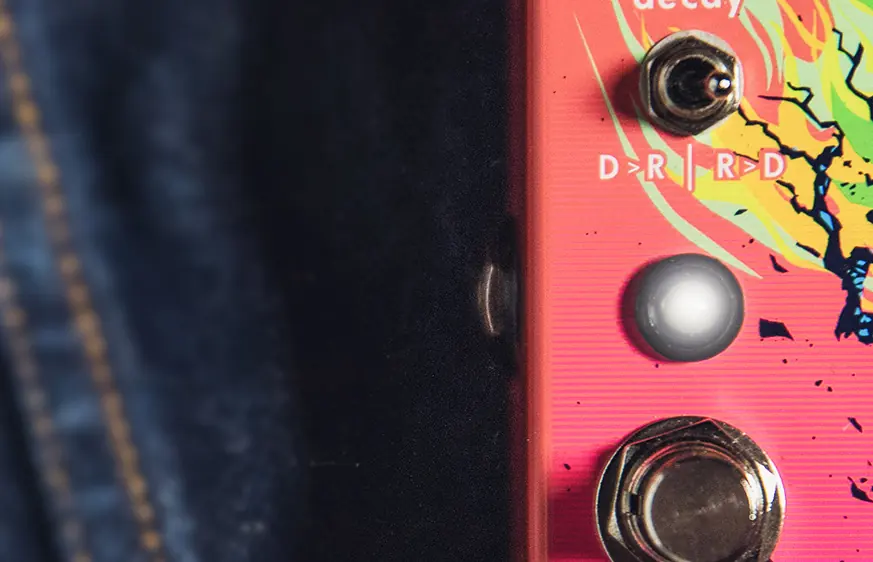
The D>R | R>D switch determines the signal path:
- D>R (Left): Distortion runs into Reverb. This maintains note clarity similar to traditional setups.
- R>D (Right): Reverb runs into Distortion. This creates a muddied, powerful wall of sound.
Reverb Programs
The Melee includes three reverb programs. Change them by simultaneously pressing the bypass and sustain stomp switches:
- Ambient Reverb (Pink LED): Massive trails for soaring melodic lines.
- Octave Down Reverb (Yellow LED): Adds an eerie lower octave to the reverb trail.
- Reverse Reverb with Feedback (Blue LED): Reversed trails. In this mode, the Decay knob controls feedback instead of decay time.
Momentary Features
- Bypass Switch: When the pedal is off, press and hold to temporarily activate the pedal for a moment of texture.
- Sustain Switch: Hold to ramp up the reverb trail to maximum. Press and release to latch the current reverb decay. Press again to release the latch.
Bypass Modes
The Melee offers three bypass modes. To change the mode, hold the Bypass switch while applying power until the preset LED lights up. Press the Bypass switch to scroll through colors, then press Bypass and Sustain simultaneously to confirm:
- Green (DSP Bypass): Default mode. Reverb has trails after bypassing.
- Blue (DSP+True Bypass): Reverb trails fade out before the relay bypasses the pedal.
- Red (True Bypass): Reverb does not have trails after bypassing.
Practical help
Common problems
Pedal not powering on or noisy operation
Ensure you are using a 9V DC, Center Negative power supply with at least 200mA. Use an isolated power supply; daisy chain supplies are not recommended.
Reverb trails cut off immediately when bypassing
You are likely in True Bypass mode. Change the bypass mode to DSP Bypass (Green) or DSP+True Bypass (Blue) to allow trails.
Before use
- Use a 9V DC, Center Negative power supply.
- Ensure power supply provides at least 200mA.
- Connect instrument to input and amplifier to output.
- Set the D>R | R>D switch to your preferred signal order.
Specs in practice
- 9V DC, Center Negative
- Standard power requirement for guitar pedals.
Images and diagrams
- Joystick X-axis controls reverb mix; Y-axis controls distortion amount.
- Order switch toggles between Distortion-first and Reverb-first signal paths.
Model compatibility
- Isolated power supply recommended for all Walrus Audio pedals.

Manual page author
Emily Carter
User documentation editor
Prepares concise manual descriptions and highlights the most useful setup, operation, and maintenance information for readers.