Electronics / Security Cameras
User Manual for xmartO 4K Dual Lens 10X Zoom Light Bulb Security Camera System
A comprehensive setup and user guide for the xmartO 4K Dual Lens 10X Zoom Light Bulb Security Camera System. This manual covers hardware installation, NVR configuration, camera pairing, mobile app setup, and troubleshooting.
Table of contents
Manual images
Click an image to enlargeQuick Guide from the Manual
This document provides the essential steps to set up your xmartO 4K Dual Lens 10X Zoom Light Bulb Security Camera System. The system includes an NVR and wireless cameras. Initial setup must be performed locally by connecting the NVR to a monitor or TV. Once configured, the system can be accessed remotely via the WallPixel mobile app or PC/Mac CMS software.
What's in the Box
Ensure you have all the necessary components before starting the installation:
- NVR or Monitor Built-in NVR
- Cameras
- NVR Power Adapter
- Plug-in E27 Socket (1 per camera)
- RJ-45 Ethernet Cable
- HDMI Cable
- USB Mouse
- Quick Start Guide
Note: For best results, use the included accessories. Third-party accessories may not work properly.
Product Overview
The NVR
The NVR serves as the central hub for your security system. Key ports and features include:
- Power Input: Connects the 12V DC power supply.
- USB Port: For connecting the included mouse or a USB flash drive for video storage.
- HDMI Output: Connects to a TV or monitor for initial setup and viewing.
- RJ-45 (Ethernet) Port: Connects to your router for internet access.
- Reset: Hard reset to manufacturer settings.
- Micro SD Card Slot: For video storage.
- NVR Antennas: For Wi-Fi connection with cameras.
- Built-in Speaker: For audio playback and setup tones.
The Cameras
The cameras feature an E27 base for easy installation. They include a microphone, lens, infrared LEDs, spot lights, and a reset/SD card slot.
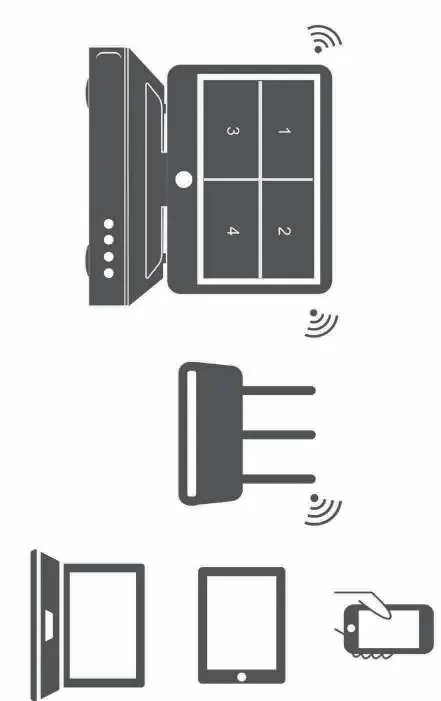
Connecting Your System
- Connect the NVR to a PC monitor or TV using the included HDMI cable.
- Connect the NVR LAN port to your router using the Ethernet cable (optional if using Wi-Fi).
- Plug the USB mouse into the NVR USB port.
- Connect the NVR to power using the larger 12V 2A power adapter.
- Verify cameras are working on the monitor before mounting them.
- Fix the cameras to lamp sockets or plug into wall outlets using the included plug-in sockets.
Positioning Your NVR and Cameras
Proper placement is critical for signal strength:
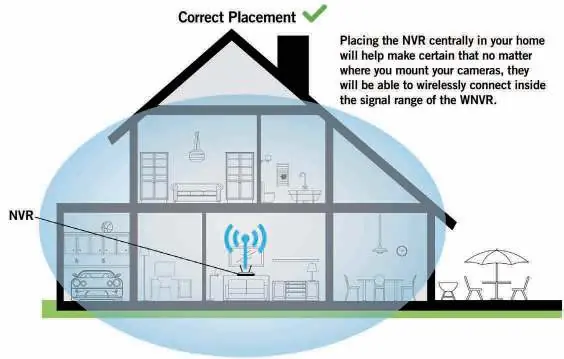
- Wireless Range: Up to 1300 ft in open space, or 300 ft with walls.
- Interference: Do not place the NVR near high-voltage wires or other sources of electrical interference.
- Mounting Height: Install cameras 2-3 meters (7-10 ft) above the ground for optimal motion sensor range.
- Dome Cameras: Must be installed upside down for better waterproof performance.
- Angle: Install cameras angularly for better motion detection.
Booting Up for the First Time
Upon powering on the NVR, the Startup Wizard will launch. Follow the on-screen steps to configure network settings and create an admin password. The default username is admin. It is strongly recommended to write down your password.

Using the WallPixel Mobile App
- Download the WallPixel app from the App Store or Google Play Store.
- Create an account using an email address or phone number.
- Sign in and tap the "+" symbol to add a device.
- Use "Scan Local Network" or "QR Code Setup" to add your NVR.
- Enter the NVR admin password when prompted.
Using WallPixel CMS on PC and Mac
Download the CMS software from the xmartO website. Log in with your mobile app account to automatically sync your system.
Pairing an Add-on Wireless Camera
Cameras come pre-paired by default. To add a new camera:
- Power on the add-on camera.
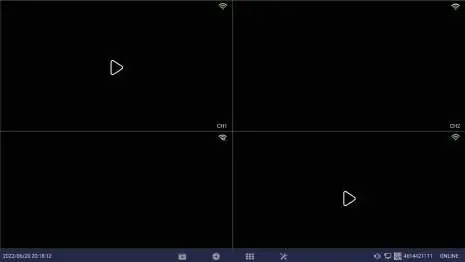
- With the NVR connected to a monitor, click the "+" icon at the bottom of the screen.
- Follow the on-screen guide to pair the camera.
- The new camera will appear in a vacant video field once successfully paired.
Frequently Asked Questions
- Internet Connection: The NVR does not need to be connected to the internet to work locally, but it is required for remote viewing.
- Remote Viewing: Requires the NVR to be connected to a router via Ethernet or Wi-Fi.
- PTZ Issues: If PTZ control is slow, check the Wi-Fi signal strength or use an Ethernet cable.
- Password Issues: The app requires two passwords: one for the app account and the NVR admin password for device access.
Practical help
Common problems
Camera PTZ control is not responding in real-time
The camera likely has a weak Wi-Fi signal. Mount the camera closer to the NVR/router or use an Ethernet cable.
WallPixel App is not accepting my password
You are likely entering the app account password. You must enter the NVR admin password to add the device.
Cannot connect using the App or CMS software
Ensure the system is connected to a router, the latest firmware is installed, and the password is correct.
Before use
- Connect NVR to a monitor/TV via HDMI.
- Connect NVR to power using the 12V 2A adapter.
- Plug in the USB mouse.
- Verify cameras appear on screen before mounting.
- Ensure NVR is in the intended location before testing cameras.
Images and diagrams
- NVR ports: DC12V, USB, HDMI, WAN, Reset, Micro SD slot.
- Camera components: E27 base, microphone, lens, infrared LEDs, reset/SD slot.
Model compatibility
- Cameras come pre-paired by default.
- NVR supports both wired and Wi-Fi internet connection.
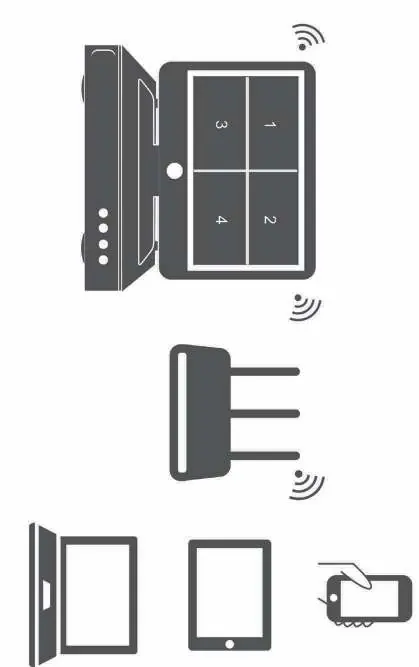
- Setup is the same for Smartphone and Tablet.

Manual page author
David Miller
Documentation analyst
Organizes user manual content into clear summaries, with attention to model details, product context, and everyday usability.