Electronics / Security Systems
ZOSI 1NR-84U2 Wireless CCTV Camera System User Guide
A comprehensive user guide for the ZOSI 1NR-84U2 wireless CCTV system. This manual covers installation, connection diagrams, remote access via smartphone and PC, system configuration, video playback, and troubleshooting.
Quick answers from the manual
Quick answer
- To set up the ZOSI 1NR-84U2, connect the NVR to your router, monitor, and power supply. Use the included mouse to navigate the menu, and download the Zosi Smart app for remote viewing. p. 1, 2, 3
Key actions
- Connect NVR to router via Ethernet cable. p. 2
- Change default password. p. 4, 5
First start
- Power on the NVR and connect the mouse to begin setup. p. 2, 4
Problems and fixes
No video output
Check HDMI/VGA cable, ensure monitor is at least 720p, and NVR is powered.
p. 7Maintenance and reset
- Periodic cleaning with a damp cloth is required. p. 7
Technical specifications
| Parameter | Value | Meaning | Pages |
|---|---|---|---|
| Power Supply | 12V 2A | Required power adapter specification. | p. 1, 2 |
Where to find it in the PDF
- Package Content & Structure p. 1
- Connection Diagram p. 2
- Remote Access p. 3
- System Settings p. 4, 5
- Playback & Backup p. 6
Table of contents
Manual images
Click an image to enlargeQuick Guide
To set up your ZOSI 1NR-84U2 system, follow these essential steps:
- Connect the NVR to your router using an Ethernet cable.
- Connect a monitor to the NVR via HDMI or VGA.
- Connect the USB mouse to the NVR.
- Connect the NVR to a power source using the provided 12V 2A adapter.
- Power on the IP cameras and wait for them to pair automatically with the NVR.
- Download the Zosi Smart app on your smartphone or the AVSS Client on your PC for remote access.
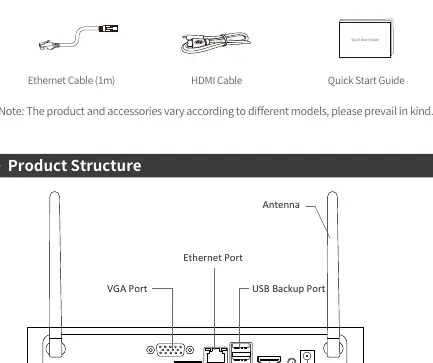
Package Content
The package includes the following items:
- NVR unit
- 12V 2A Power Supply
- USB Mouse
- Ethernet Cable (1m)
- HDMI Cable
- Quick Start Guide
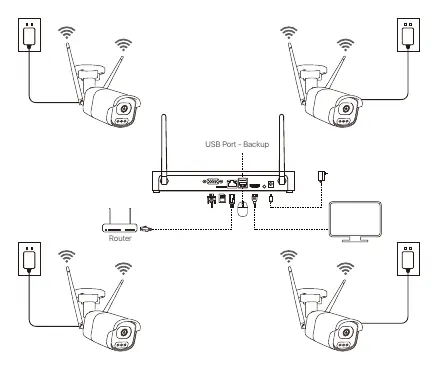
Product Structure
The rear panel of the NVR features the following ports:
- VGA Port
- Ethernet Port
- USB Backup Port
- HDMI Port
- Audio Port
- Power Supply Port
- SD Card Slot
- Mouse Port
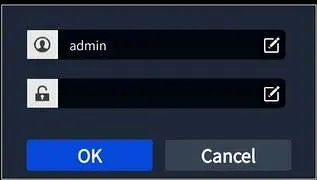
Connection Diagram
The system requires a wired connection between the NVR and the router. Cameras connect wirelessly to the NVR. Ensure the monitor is connected via HDMI or VGA. Power on the NVR first, then the cameras. The system supports up to 8 channels.
Remote Access
You can access the NVR remotely using the Zosi Smart app or PC client:
- Smartphone: Search for 'Zosi Smart' in the App Store or Google Play, or scan the QR code in the manual. Register and log in. Ensure you grant all required permissions during installation.
- PC: Download the AVSS Client from the official ZOSI website.
System Settings
Use the USB mouse to navigate the interface:
- Left Button: Click to open options or double-click split screens to view in full screen.
- Right Button: Click on the live preview screen to open the main menu or exit menus.
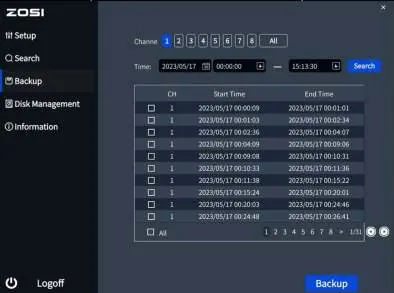
- Password: The default username is 'admin' and the password is blank. It is recommended to change this immediately via Main Menu > Config Management > User Management > Change Password.
- Time Setting: Configure via Main Menu > Config Management > Basic Config > Date and Time.
Video Playback and Backup
To view recorded footage:
- Right-click the mouse and select 'Video Playback'.
- Choose between 'Video Playback' (search by time/event) or 'Quick Playback' (last 30 minutes).
- To back up footage, insert a USB flash drive into the NVR's USB port.
- Go to Main Menu > Data Backup, select the channel and time period, search, select the clips, and click 'Backup'.
Usage Specifications
Follow these guidelines for safe operation:
- Use only compatible ZOSI NVRs with the cameras.
- Use a regulated power supply; non-conforming supplies may damage the product.
- Do not disassemble the product.
- Keep the device in a well-ventilated area; avoid sealed, humid environments.
- Clean periodically using only a damp cloth; avoid harsh chemicals.
Practical help
Common problems
No video output on the monitor
Ensure the monitor resolution is at least 720p, the NVR is powered on, and the HDMI/VGA cable is securely connected.
Failed to remotely access the camera
Verify the NVR is connected to the network (check via Menu-Network-Test), ensure your phone/PC has internet access, and try rebooting the NVR or router.
Before use
- Power on the NVR to test the product before installation.
- Ensure you have a monitor with at least 720p resolution.
- Connect the NVR to your router via Ethernet.
- Connect the mouse to the USB port.
- Allow all app permissions during Zosi Smart installation.
Specs in practice
- Power Supply
- Requires 12V 2A regulated power adapter.
- Monitor Resolution
- Must be 720p or higher for video output.
Images and diagrams
- The NVR acts as the central hub, connecting to the router via Ethernet and to cameras wirelessly.
- The rear panel layout includes dedicated ports for VGA, HDMI, USB, and Power.
Model compatibility
- Cameras must be used only with compatible ZOSI NVRs.
- Supports up to 8 channels.

Manual page author
Emily Carter
User documentation editor
Prepares concise manual descriptions and highlights the most useful setup, operation, and maintenance information for readers.