Home Appliances / Small Kitchen Appliances
User Manual for AcuRite 01185 Meat Thermometer with Wireless Display
Quick start guide and user manual for the AcuRite 01185 Meat Thermometer with Wireless Display. Learn how to set up probes, configure meat types, monitor cooking temperatures, and troubleshoot common errors.
Table of contents
Manual images
Click an image to enlargeQuick Start Guide
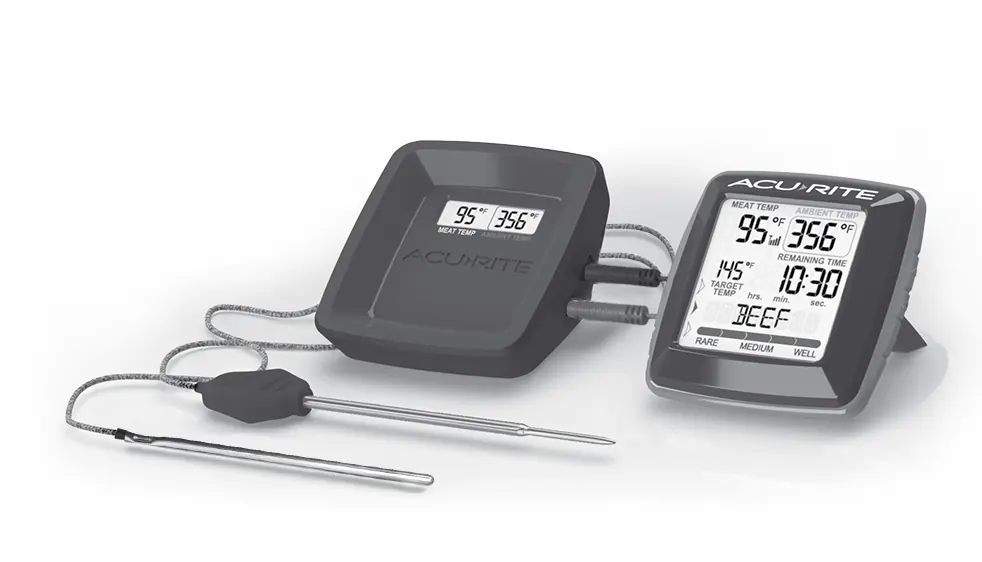
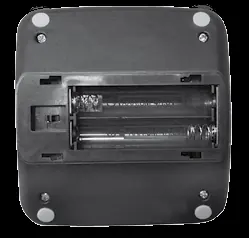
The AcuRite Meat Thermometer with Wireless Display allows you to monitor meat and ambient temperatures remotely. To begin, remove the protective film from the screen. Install 2 AAA batteries in the thermometer base and 3 AAA batteries in the wireless display. Plug the temperature probes into the base. Use the F/C switch in the battery compartment of the base to select your preferred temperature units.
Device Overview
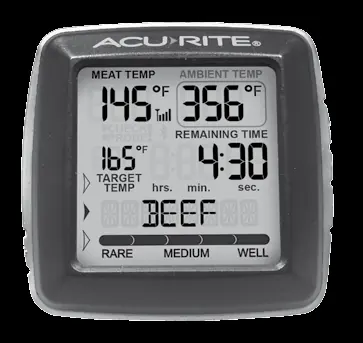
The system consists of a wireless display and a thermometer base. The base features color-coded probe plug-ins for the meat and ambient temperature probes. The wireless display shows target temperature, meat type, doneness level, and estimated time left to cook.

Setup and Operation
Meat Type and Doneness
When the wireless display is powered on, the meat type will flash. Use the arrow buttons to cycle through presets (Beef, Veal, Chicken, Pork, Poultry, Lamb, Fish, Custom, or Boil). Press SET to save. Once the meat type is selected, the doneness level will flash. Cycle through available options (Rare, Medium Rare, Medium, Medium Well, Well Done) and press SET to save. Note that not all meat types offer all doneness options.
Target Temperature
The target temperature is automatically set based on the meat type and doneness selection. You can manually adjust the target temperature by pressing the arrow buttons after selecting the meat type and doneness, then pressing SET.
Ambient Temperature
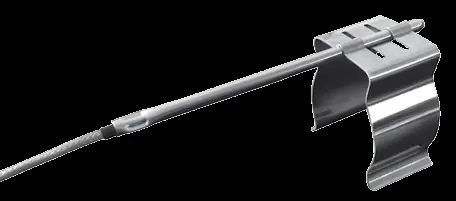
Use the ambient temperature probe to monitor oven, grill, or smoker temperatures. Attach the probe clip to the cooking grate and thread the probe through the top of the clip. Keep the probe cord away from food at all times.
Time Left to Cook
The device estimates remaining cook time based on the cooking process. For best results, insert the probe into the thickest part of the meat at the start of the cooking process. The calculation will appear once the internal temperature reaches 105°F (41°C).
Troubleshooting
If you encounter errors, check the following diagnostic codes:
- E1: Probe cord is not connected to the wireless display. Verify the connection is secure.
- E2: Probe cord is not functioning properly. Check the wire and connection for damage or exposure to extreme heat. Replace the cord if necessary.
If the display screen is not working, check that batteries are installed correctly and replace them if needed.
Care and Maintenance
Store the device in a dry location at room temperature. Clean the wireless display with a soft, damp cloth. Wipe the temperature probe clean with warm water immediately after use. Do not place the base or display on hot surfaces, do not use them in the oven, and do not wash them in a dishwasher. Do not immerse in water or use caustic cleaners.
Specifications
- Temperature Range: -57°F to 572°F (-49°C to 300°C)
- Probe Cord Heat Resistance: Up to 700°F (371°C)
- Remaining Cook Time Range: 9 hours, 59 minutes
- Wireless Range: 200 ft / 60 m (depending on home construction)
- Power: Thermometer Base: 2 x AAA alkaline batteries; Wireless Display: 3 x AAA alkaline batteries
Manufacturer information
AcuRite
Practical help
Common problems
E1 Diagnostic Code
Probe cord is not connected to the wireless display. Verify the cord connection is secure or reconnect the cord.
E2 Diagnostic Code
Probe cord is not functioning properly. Check the wire and connection for damage or excessive heat. Replace the cord.
Display screen not working
Check that the batteries are installed correctly. Batteries may need to be replaced.
Before use
- Remove protective film from the screen.
- Install 2 x AAA batteries in the thermometer base.
- Install 3 x AAA batteries in the wireless display.
- Plug the temperature probes into the thermometer base.
- Select Fahrenheit or Celsius using the F/C switch in the battery compartment.
Specs in practice
- Temperature Range
- -57°F to 572°F (-49°C to 300°C)
- Wireless Range
- 200 ft / 60 m depending on home construction
- Remaining Cook Time Range
- 9 hours, 59 minutes
Images and diagrams
- Thermometer Base: Includes power button, backlight button, probe plug-ins, and battery compartment.
- Wireless Display: Includes target temperature, meat type indicator, doneness selection, and time left to cook.
Model compatibility
- Ambient probe should not have any contact with food.
- Not all meat types offer all five doneness options.
- Do not use rechargeable batteries.

Manual page author
Michael Turner
Technical manual editor
Reviews PDF manuals for structure, safety notes, and practical product details so readers can find the right information quickly.