Electronics / Monitors
AcuRite 00608BPDI Weather Center
Quick setup and troubleshooting guide for the AcuRite 00608BPDI Weather Center. Learn how to install the 3-in-1 sensor, calibrate readings, and resolve common connectivity issues.
Table of contents
Manual images
Jump to the sectionQuick guide from the manual
To ensure your AcuRite Weather Center functions correctly, the most critical step is synchronizing the display unit and the 3-in-1 sensor. Both units must be set to the same A-B-C switch ID code located inside their respective battery compartments. After installing batteries, allow the units to sit within a few feet of each other for approximately 20 minutes to establish a strong connection.
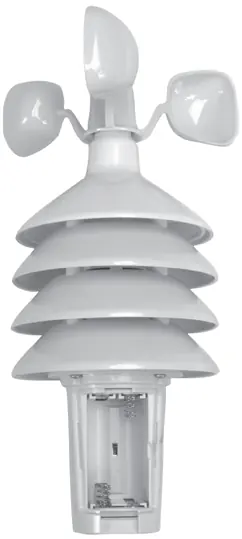
3-in-1 Sensor Setup
The sensor is designed for year-round outdoor use. To set it up:

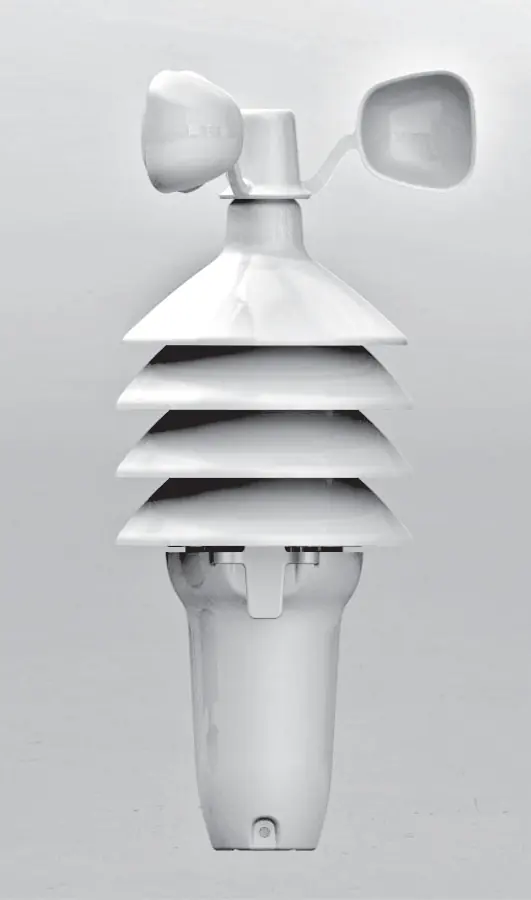

- Press the release lever to remove the lower housing.
- Locate the A-B-C switch inside the battery compartment and set it to A, B, or C.
- Insert 4 AA batteries, following the polarity diagram.
- Replace the battery cover and housing.
- Use high-quality alkaline or lithium batteries. Lithium batteries are required for temperatures below -4°F (-20°C).
Display Unit Setup
To prepare the display unit:
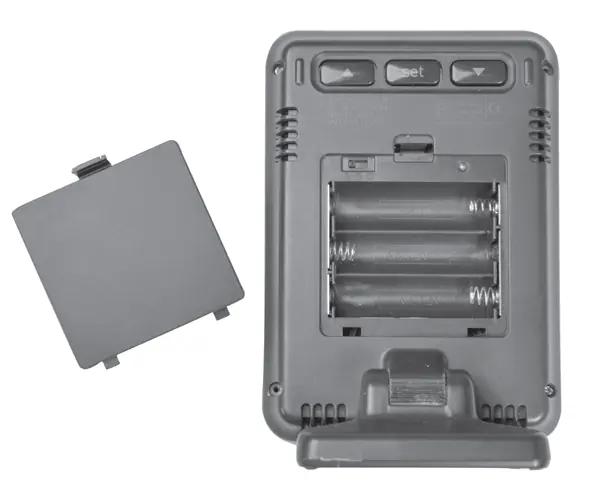
- Remove the protective film from the LCD screen.
- Open the battery compartment on the back of the unit.
- Set the A-B-C switch to match the letter chosen for the sensor.
- Insert 3 AA alkaline batteries according to the polarity diagram.
- Replace the battery cover.
Placement Guidelines
Proper placement is critical for accuracy:
- Wireless Range: Keep the display and sensor within 330ft (100m) of each other. Avoid large metallic items, thick walls, or metal surfaces.
- Interference: Place both units at least 3ft (0.9m) away from electronics like TVs, computers, and microwaves.
- Sensor Location: Mount the sensor at least 5ft (1.5m) off the ground in an open area. Avoid heat sources (vents, chimneys, asphalt), humidity sources (pools, spas), and sprinkler heads.
Calibration
You can manually calibrate readings if environmental factors impact accuracy:
- Temperature & Humidity: Hold the arrow buttons and the SET button for 5 seconds. Use the arrow buttons to adjust the value, then press SET to confirm.
- Barometric Pressure: The unit defaults to "AUTO" mode, which self-calibrates over a 14-day Learning Mode. To manually calibrate, hold the arrow buttons and SET for 5 seconds, cycle to the pressure value, select "MANUAL" mode, adjust the value, and press SET to confirm.
Troubleshooting
If you encounter issues, try these steps:
- No outdoor sensor reception: Ensure units are within range, away from electronics, and have fresh batteries. Try the synchronization process again by removing batteries from both units and reinstalling them.
- Inaccurate readings: Check that the sensor is mounted at least 5ft high and away from obstructions. Ensure wind cups spin freely; use graphite powder or silicone spray if they hesitate.
- Flashing outdoor temperature: This may indicate wireless interference. Try changing the A-B-C switch channel on both units.
Manufacturer information
AcuRite
Practical help
Common problems
No outdoor sensor reception (no bars)
Ensure units are within 330ft (100m). Move away from electronics. Remove batteries from both units, reinstall, and let them sit together for 20 minutes to sync.
Inaccurate wind readings
Ensure the sensor is mounted at least 5ft high with no obstructions. Check if wind cups spin freely; lubricate with graphite powder or silicone spray if necessary.
Outdoor temperature flashing or showing dashes
This indicates wireless interference. Ensure the A-B-C switch is set to the same letter on both the sensor and display unit. Try changing to a different channel.
Inaccurate forecast
The unit requires a 14-day Learning Mode to calibrate. Do not reset or remove batteries during this time. Full calibration takes 33 days.
Before use
- Remove protective film from the LCD screen.
- Set the A-B-C switch to the same letter on both the sensor and display unit.
- Install fresh AA batteries in both units.
- Place units within a few feet of each other for 20 minutes to sync.
- Mount the sensor at least 5ft off the ground in an open area.
Specs in practice
- Wireless Range
- 330ft (100m) depending on home construction materials.
- Operating Frequency
- 433MHz.
- Power (Sensor)
- 4 x AA alkaline or lithium batteries (lithium required below -4°F).
- Power (Display)
- 3 x AA alkaline batteries.
Images and diagrams
- The A-B-C switch is located inside the battery compartment of both the sensor and the display unit.
- The sensor mounting bracket is used to secure the sensor to a post or railing.
- The display unit has a tabletop stand and is also wall-mountable.
Model compatibility
- Sensor requires lithium batteries for temperatures below -4°F (-20°C).
- The unit uses a 433MHz frequency for wireless communication.

Manual page author
David Miller
Documentation analyst
Organizes user manual content into clear summaries, with attention to model details, product context, and everyday usability.