Computers / Cooling Systems
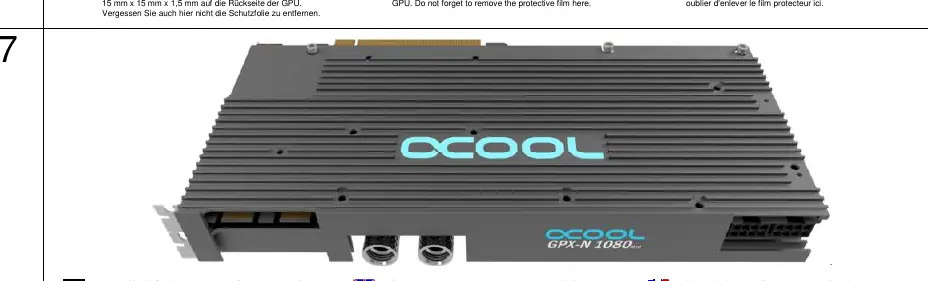
Installation Manual for Alphacool GPX-N 1080-M18 GPU Water Cooling Block
A comprehensive installation guide for the Alphacool GPX-N 1080-M18 GPU water cooling block. This manual covers dismantling the original cooler, applying thermal paste and pads, mounting the block, and essential safety precautions.
Table of contents
Manual images
Click an image to enlargeImportant Information
This document provides installation instructions for the Alphacool GPX-N 1080-M18 GPU water cooling block. Before beginning, ensure you have an antistatic mat and appropriate cleaning solvents (e.g., alcohol). The installation process requires careful handling of thermal pads and precise screw tightening to ensure optimal contact and prevent damage to the graphics card.
Preparation and Dismantling
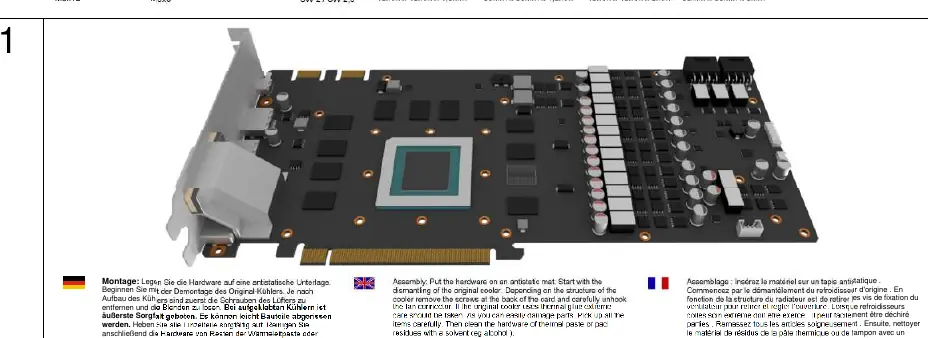
- Place your hardware on an antistatic mat.
- Carefully dismantle the original cooler. Depending on the design, remove screws from the back of the card and unhook the fan connector.
- If the original cooler uses thermal glue, exercise extreme caution to avoid damaging components.
- Clean all hardware surfaces of old thermal paste or pad residues using a solvent like alcohol.
Installation Steps

1. Applying Thermal Paste
Using a plastic strip or thermal paste spreader, apply a thin, even layer of thermal paste to the GPU. The layer should be less than one millimeter thick to prevent contamination of surrounding components.
2. Thermal Pad Placement
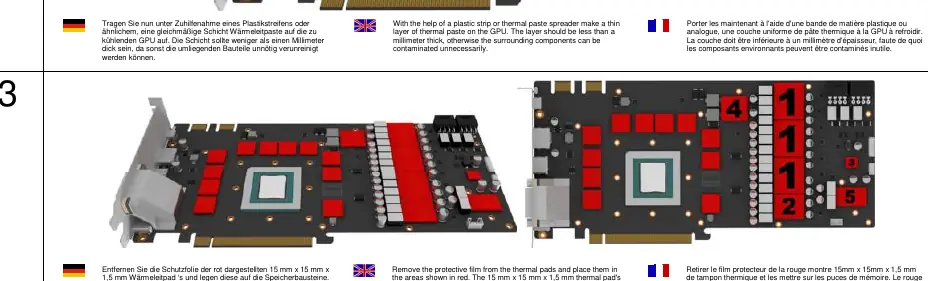
Remove the protective film from the thermal pads before application:
- 15mm x 15mm x 1.5mm pads: Place these on the memory chips.
- 30mm x 30mm x 1.5mm pads: These are for voltage converters and must be trimmed to size.
3. Mounting the Cooler
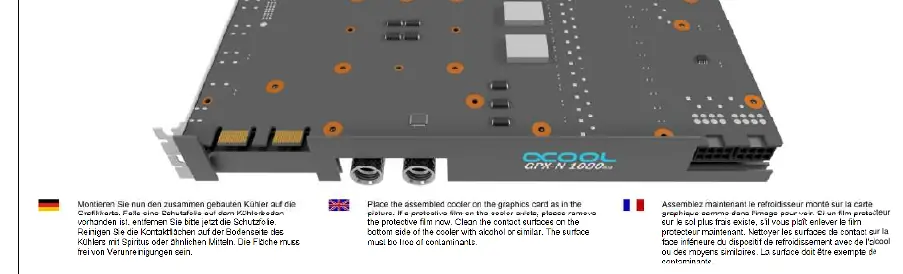
Place the assembled cooler onto the graphics card. Ensure the contact surfaces are clean. Mount the screws with washers as shown in the diagrams, but tighten them only slightly at first.
4. Backside Components
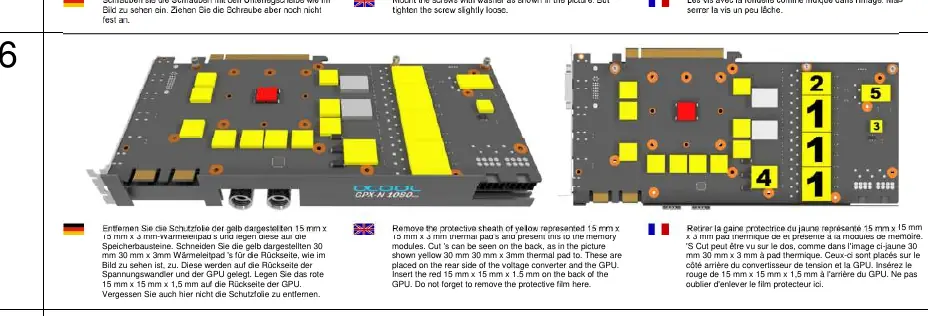
Apply the yellow 15mm x 15mm x 3mm thermal pads to the memory modules on the back of the card. Trim the yellow 30mm x 30mm x 3mm pads for the voltage converter and GPU back area. Apply the red 15mm x 15mm x 1.5mm pad to the back of the GPU.
5. Final Assembly
Place the backplate onto the graphics card. Apply slight pressure to ensure optimal contact between the backplate, cooler, and graphics card. Screw the cooler together, tightening the screws crosswise with one turn each. After approximately 12 hours of use, re-tighten all screws.
Safety and Maintenance
- Tools: Do not use tools like wrenches or pliers to tighten connectors. Hand-tightening is sufficient.
- Leak Testing: Perform a tightness test before final installation. The maximum water pressure in the loop should not exceed 0.8 bar.
- Operation: Never operate the cooling system without ensuring coolant is flowing. Coolers without liquid can become very hot and cause burns or damage hardware.
- Compatibility: Ensure the pump is functioning immediately upon switching on the hardware.
Contact Information
Alphacool International GmbH, Marienberger Str. 1, D-38122 Braunschweig. Support Phone: +49 (0)5 31/ 288 74-0. Email: [email protected].
Practical help
Common problems
Cooler not making contact
Ensure thermal paste is applied evenly and thermal pads are of the correct thickness and placed in the exact locations shown.
Leaking connections
Do not use tools to tighten connectors; hand-tightening is sufficient. Ensure connectors with 8mm threads are not blocking flow.
Overheating
Verify that the pump is running and coolant is flowing through the system immediately upon startup.
Before use
- Prepare an antistatic mat.
- Clean hardware of old thermal paste/pads using solvent (e.g., alcohol).
- Verify pump function before powering on.
- Perform a leak test before final installation.
- Ensure all protective films are removed from thermal pads.
Specs in practice
- Max Water Pressure
- 0.8 bar. Do not exceed this pressure in the cooling loop.
- Thermal Pad Thickness
- 1.5mm and 3mm pads are included; ensure the correct thickness is used for the specific component (memory vs. voltage converter).
- Tightening Procedure
- Finger-tighten screws initially, then tighten crosswise. Re-tighten after 12 hours of use.
Images and diagrams
- Thermal pad placement diagram shows specific locations for memory chips and voltage converters.
- Crosswise screw tightening pattern ensures even pressure distribution.
Model compatibility
- Designed for specific GPU models; verify compatibility before installation.
- Not suitable for children under 6 years due to small parts.

Manual page author
Emily Carter
User documentation editor
Prepares concise manual descriptions and highlights the most useful setup, operation, and maintenance information for readers.