Electronics / Security Systems
Installation Guide for Avigilon 10GbE Upgrade Kit
Step-by-step installation guide for the Avigilon 10GbE Upgrade Kit. Learn how to safely install the 10GbE PCIe card into NVR6 and AI NVR 2 systems, including slot identification, hardware installation, and software verification.
Table of contents
Manual images
Click an image to enlargeQuick guide from the manual
This document provides instructions for installing the 10GbE Upgrade Kit into Avigilon NVR6 and AI NVR 2 systems. The kit includes a 2-port 10GbE PCIe card designed to provide high-speed Ethernet connectivity for your security network.
Safety and preparation
Before beginning the installation, ensure you have the following tools:
- Phillips #2 screwdriver
- Torx #T30 screwdriver
- Wrist-grounding strap connected to the ground
- ESD Mat
Important: Always use an antistatic mat and antistatic strap while working on components inside the system. Shut down the NVR, disconnect all peripherals and power cables, and remove the unit from the rack if applicable before opening the cover.
Installation procedure
The installation process involves opening the NVR, locating the correct PCIe slot, and installing the card. The slot location depends on your specific model:

- NVR6 Standard / AI NVR 2 Standard: PCIe Slot 2
- NVR6 Premium / AI NVR 2 Premium: PCIe Slot 5
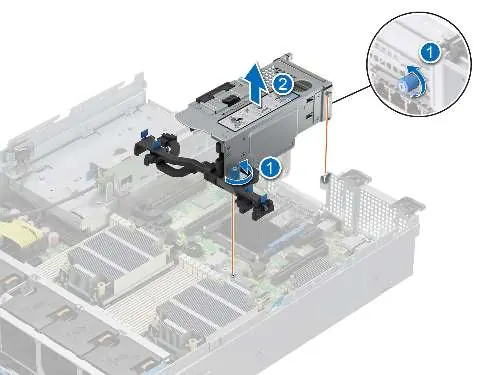
To open the system, unlock the latch release at the top of the NVR, lift and rotate the latch towards the back, and slide the cover off. Remove the air shroud by holding it at both ends and lifting it away.
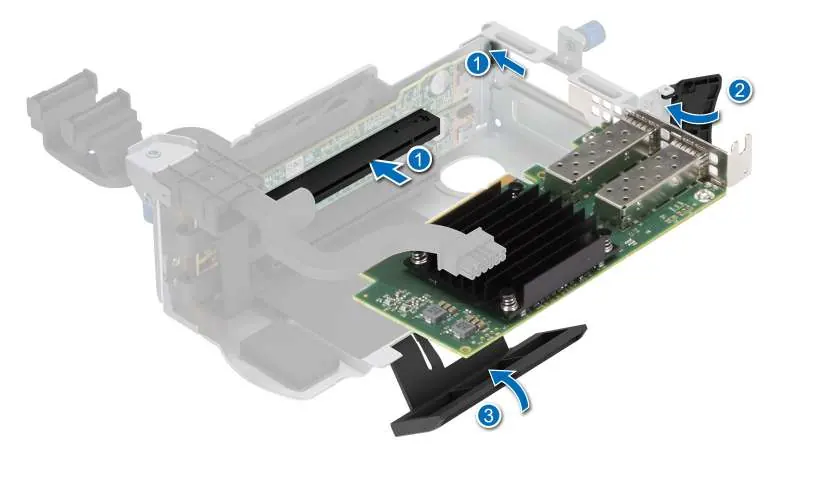
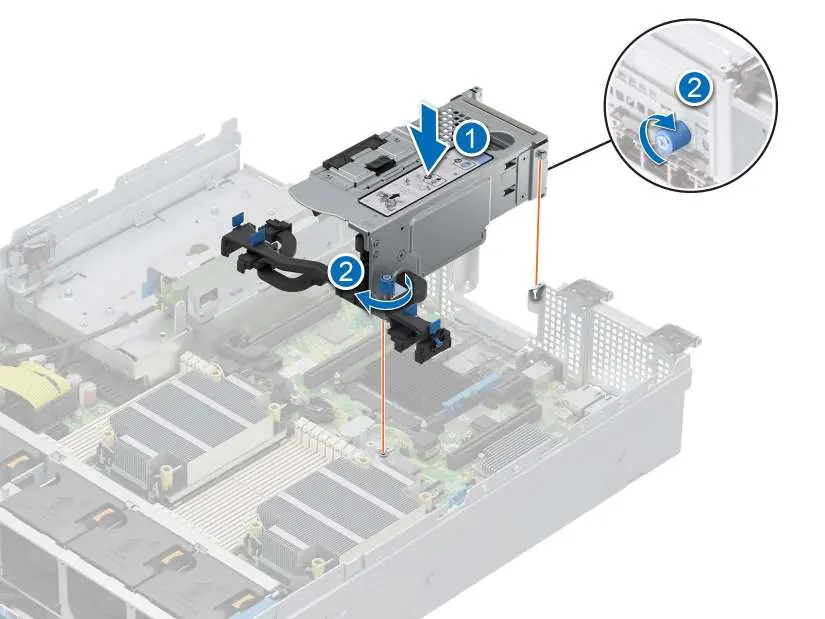
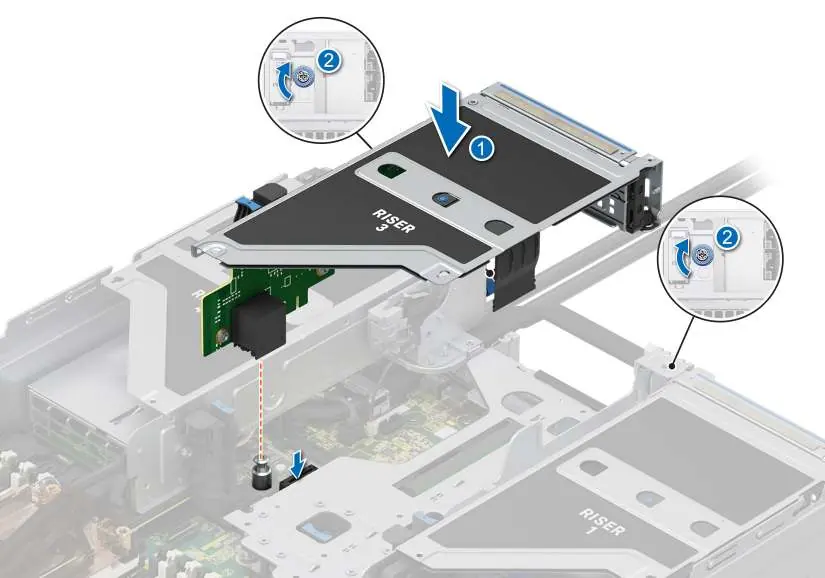
If installing in Slot 5 (Premium models), you must remove the expansion card riser by disconnecting the riser cables and loosening the two thumb screws. Insert the NIC into the riser slot, close the card holder, and reattach the riser to the system board. For Slot 2 (Standard models), insert the NIC directly into the PCIe slot on the system board.
Once installed, reattach the air shroud, close and lock the access panel, remount the NVR if necessary, and reconnect all cables.
Confirming the installation
After powering on the NVR, verify the installation using the ACC Client:
- Log in to the ACC site.
- Navigate to Site Setup.
- Select the upgraded NVR server in the System Explorer.
- Open the New Task menu and click Site Health.
- Under the Network Adapters heading, confirm that two new ports are listed with a Link Speed of 10Gbps.
Practical help
Common problems
System does not recognize the new network ports
Verify the card is firmly seated in the PCIe slot and that all riser cables are correctly reconnected to the system board.
Difficulty opening the NVR cover
If this is the first time opening the NVR, use a Phillips #2 screwdriver to remove the shipping screws before unlatching the cover.
Before use
- Shut down the NVR and all attached peripherals
- Disconnect the NVR from the electrical outlet
- Remove all network, power, and peripheral cables
- Prepare a Phillips #2 and Torx #T30 screwdriver
- Use an ESD mat and wrist-grounding strap
Images and diagrams
- The manual includes diagrams for opening the NVR cover, removing the air shroud, and installing the expansion card riser.
- Specific diagrams illustrate the latch release mechanism and the correct orientation for inserting the NIC into the riser.
Model compatibility
- Compatible with NVR6 Standard Form D, NVR6 Premium Form D, AI NVR 2 Standard Form D, and AI NVR 2 Premium Form D.

Manual page author
Michael Turner
Technical manual editor
Reviews PDF manuals for structure, safety notes, and practical product details so readers can find the right information quickly.