Electronics / Security Cameras
Installation Guide for Avigilon NVR5 16 GB RAM Kit
Step-by-step installation guide for the Avigilon NVR5 16 GB RAM Kit. Includes safety precautions, hardware installation steps, and system verification procedures.
Quick answers from the manual
Quick answer
- This guide provides instructions for installing the 16 GB RAM upgrade kit (NVR5-RAM-16GB-A) into Avigilon NVR5 Premium 192TB-224TB models. p. 4
Key actions
- Shut down and disconnect power p. 5
- Replace RAM modules p. 8
- Verify memory in ACC Client p. 10
First start
- Power on the NVR5 and check Site Health in ACC Client to verify memory capacity. p. 10
Technical specifications
| Parameter | Value | Meaning | Pages |
|---|---|---|---|
| Kit Contents | 2 x 8 GB DIMMs | Upgrade components | p. 4 |
Where to find it in the PDF
- Introduction p. 4
- Installation p. 5, 6, 7, 8
- Verification p. 10
Table of contents
Manual images
Click an image to enlargeQuick guide from the manual
This document provides instructions for installing the 16 GB RAM upgrade kit (NVR5-RAM-16GB-A) into Avigilon NVR5 Premium 192TB-224TB models. Before beginning, ensure the system is shut down and disconnected from all power sources. Always use an antistatic mat and wrist-grounding strap to prevent damage to sensitive components.
Required tools
- Phillips #2 screwdriver
- Torx #T30 screwdriver
- Wrist-grounding strap
- ESD Mat
Installation procedure
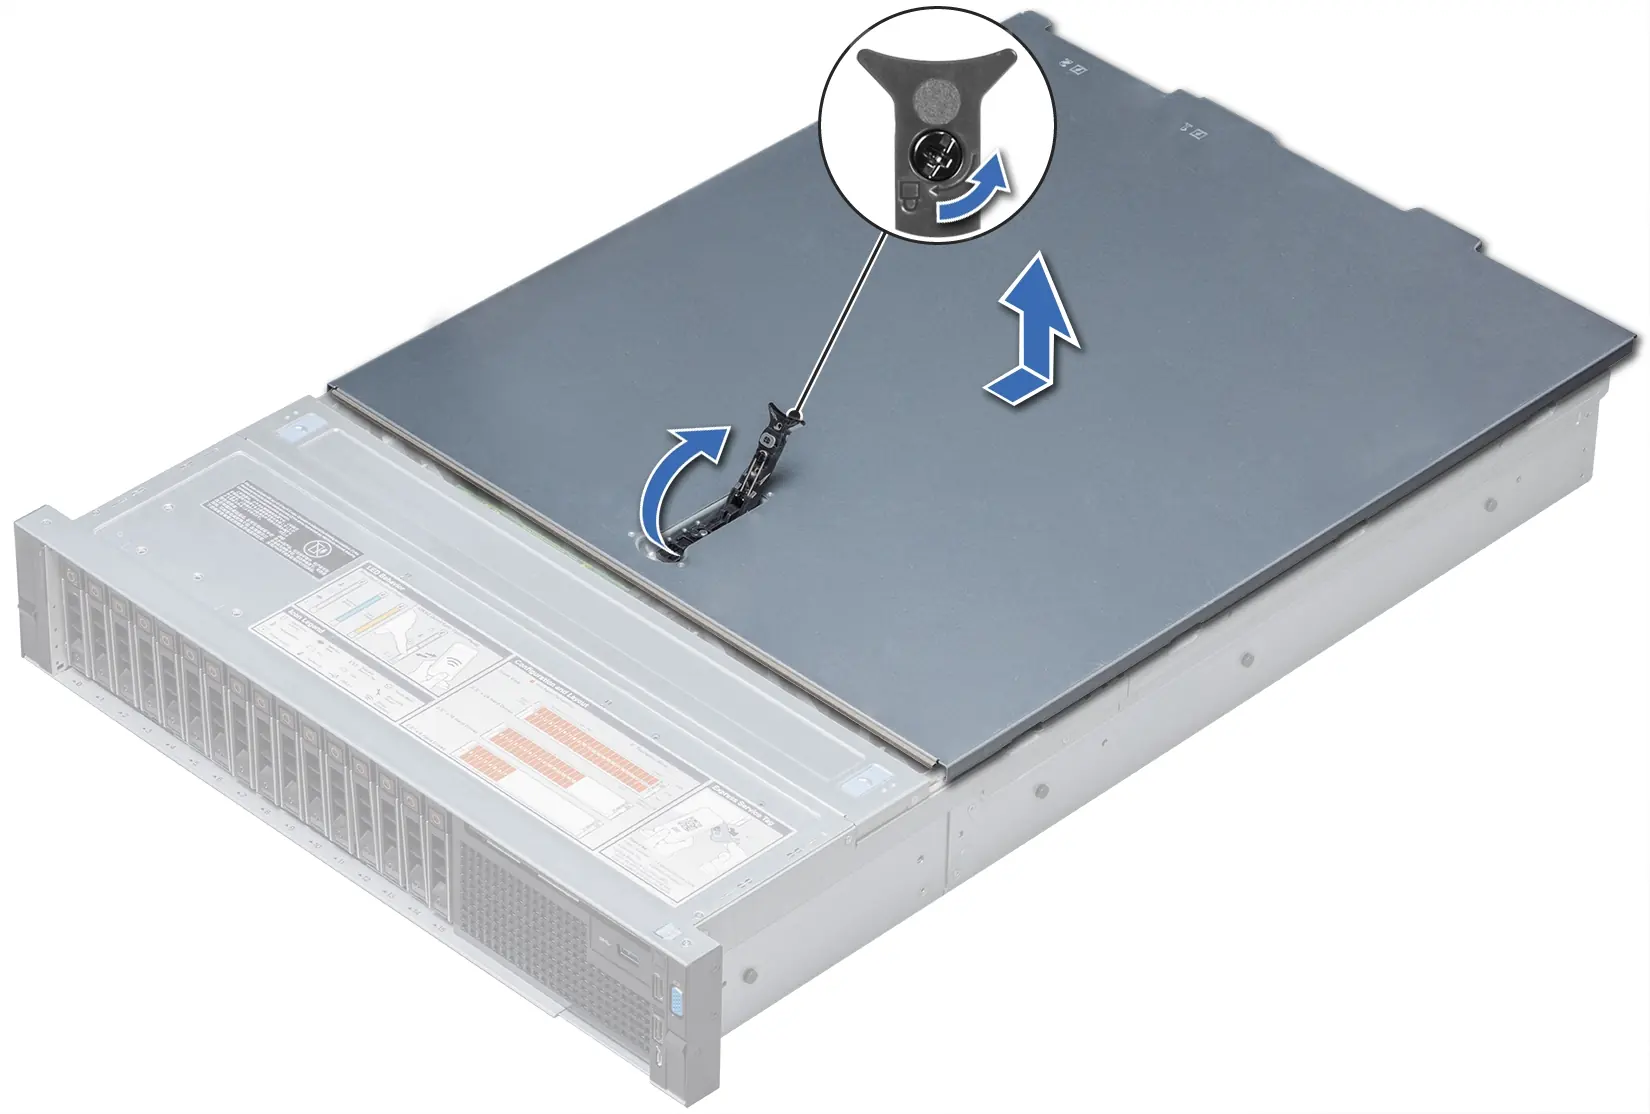
Opening the cover
Before starting, turn off the NVR5, disconnect all peripherals and power cables, and remove the unit from the rack if necessary. Unlock the latch release at the top of the unit, lift and rotate the latch towards the back to slide the cover off. Remove the air shroud by holding it at both ends and lifting it away.
Replacing RAM
Remove the mid drive tray by lifting the handles 90 degrees upward and lifting the tray out. Locate the memory module sockets. Push the white ejector clips outward on both ends of the socket to release the existing DIMM. Align the edge connector of the new DIMM with the alignment key of the socket and press firmly until the levers click into place.
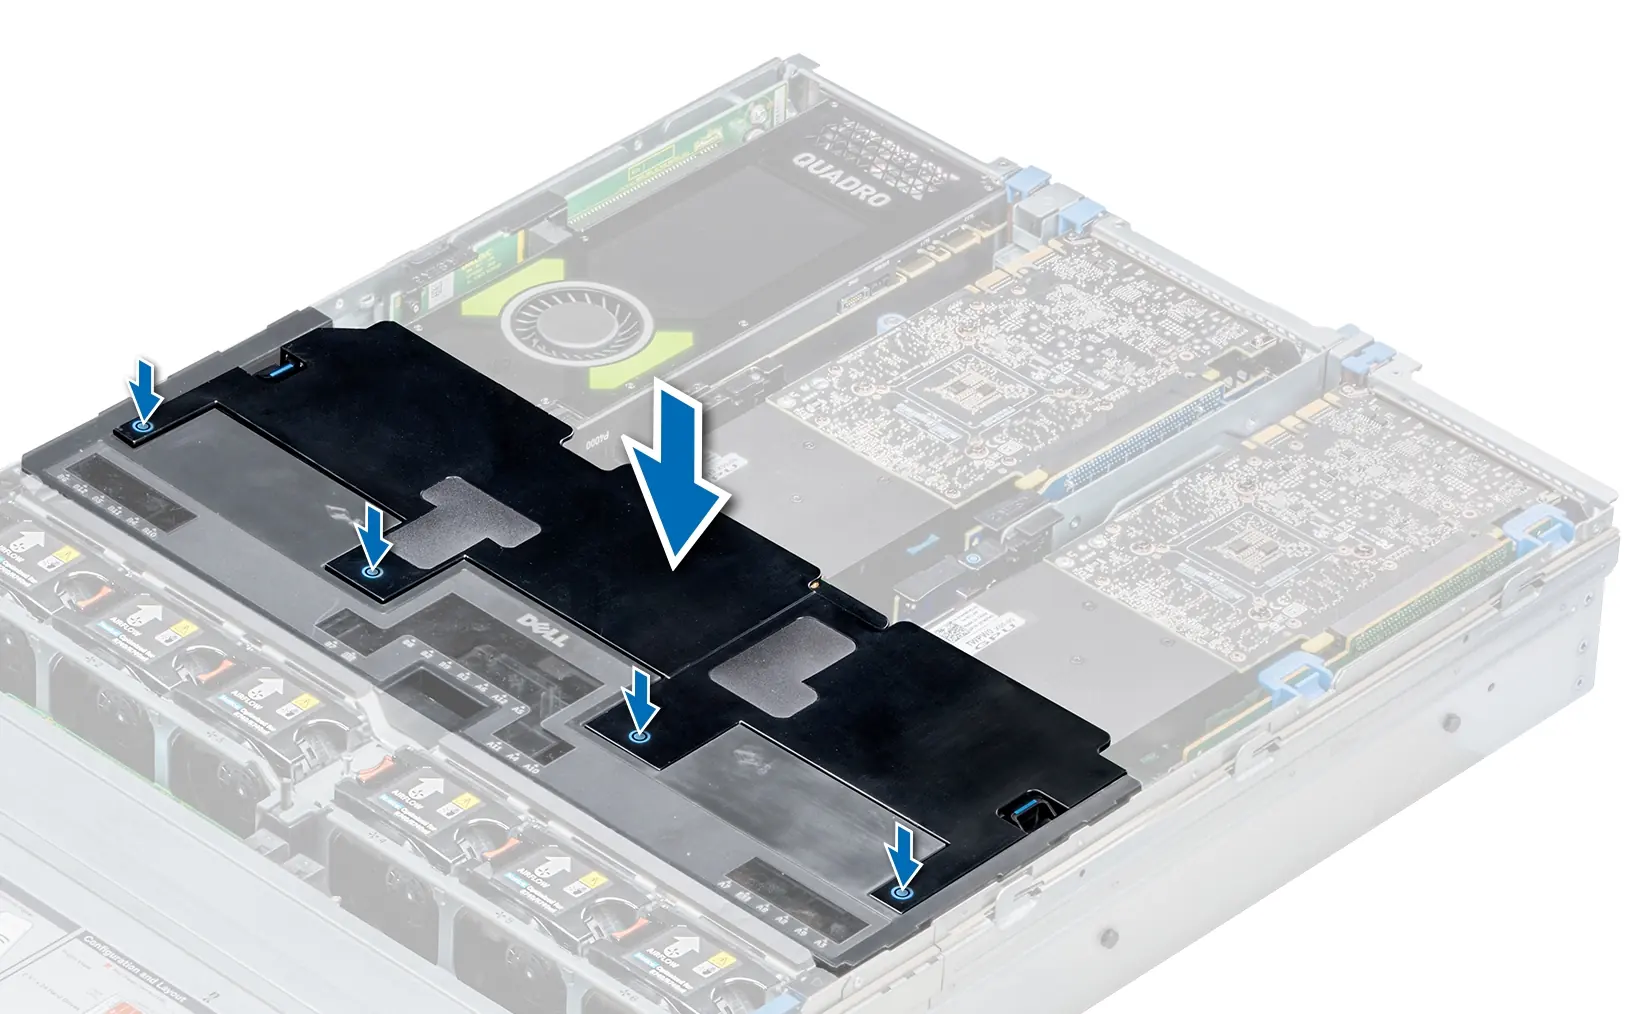
Reassembly and verification
Reinstall the mid drive tray, the cooling shroud, and close the NVR5 cover. Reconnect all cables and power on the system. To verify the installation, log in to the ACC Client, navigate to Site Setup, and check the Site Health. The total memory should reflect 48 GB for a single-CPU configuration or 96 GB for a dual-CPU configuration.
Practical help
Common problems
System not booting or memory performance issues
Ensure you are not exceeding six DIMMs per CPU. The kit is for replacement only; configurations with more than six DIMMs per CPU are not supported.
Risk of electric shock
Always shut down the system and disconnect all power cables before opening the cover.
Before use
- Phillips #2 screwdriver
- Torx #T30 screwdriver
- Wrist-grounding strap connected to ground
- System shut down and disconnected from power
Specs in practice
- Memory Configuration
- 48 GB total for single-CPU, 96 GB total for dual-CPU systems.
Images and diagrams
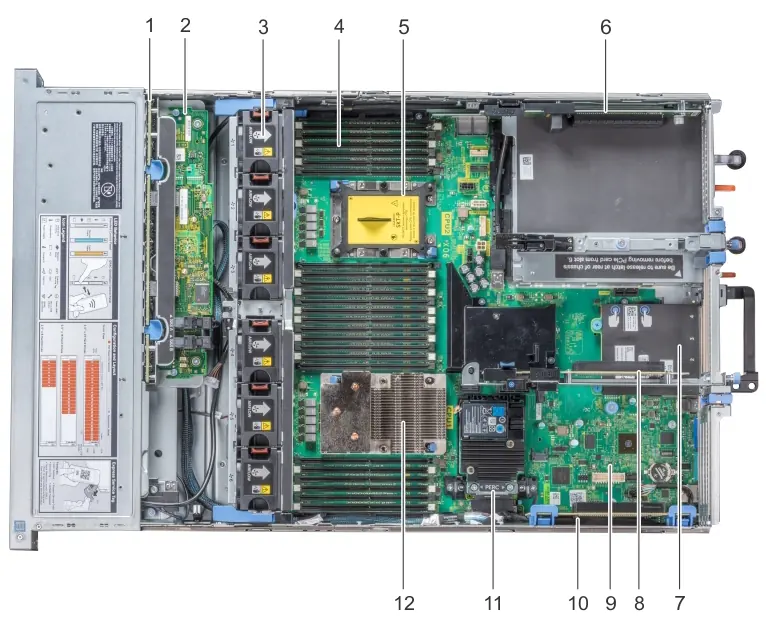
- The interior view shows the location of memory modules and drive trays.
- The RAM replacement diagram illustrates using ejector clips to release and secure DIMMs.
Model compatibility
- Compatible with NVR5 Premium 192TB-224TB models only.
- Kit contains 2 x 8 GB DIMMs.

Manual page author
Emily Carter
User documentation editor
Prepares concise manual descriptions and highlights the most useful setup, operation, and maintenance information for readers.