Lighting / Stage Lighting
Quick Start Guide for Beamz StrobeMoon 2-in-1 Party Effect
Quick start guide for the Beamz StrobeMoon 2-in-1 party effect. Learn how to safely rig the unit, connect power, and operate the device using the remote controller and control menu.
Quick answers from the manual
Quick answer
- The Beamz StrobeMoon is a 2-in-1 party effect. It can be operated via the included remote controller or the onboard control menu. It requires a stable mounting surface or truss installation with a safety cable. p. 1, 2, 3
Key actions
- Rigging the unit to a truss p. 2
- Operating via Remote p. 3
First start
- Allow the unit to reach room temperature before switching on if it has been exposed to temperature fluctuations. p. 2
Where to find it in the PDF
- Quick Start Guide p. 1
- Unpacking, Power, Rigging p. 2
- Remote Controller and Menu p. 3
Table of contents
Manual images
Click an image to enlargeQuick guide from the manual
The Beamz StrobeMoon is a 2-in-1 party effect device. Before operation, ensure the unit has reached room temperature if it was exposed to temperature fluctuations during transport. Always connect the unit to a protected circuit (circuit breaker or fuse) and ensure proper grounding. Do not use with a dimmer or adjustable power supply.
Unpacking and Safety
Upon receiving the product, carefully unpack the carton and check that all parts are present and undamaged. If the package shows signs of mishandling, notify the shipper immediately. Retain all packing materials for potential future returns. Do not switch the unit on immediately if it has been exposed to drastic temperature changes to avoid damage from condensation.
Rigging and Installation
The unit can be set up on a stable, even surface or mounted upside down to a truss. When mounting to a truss:
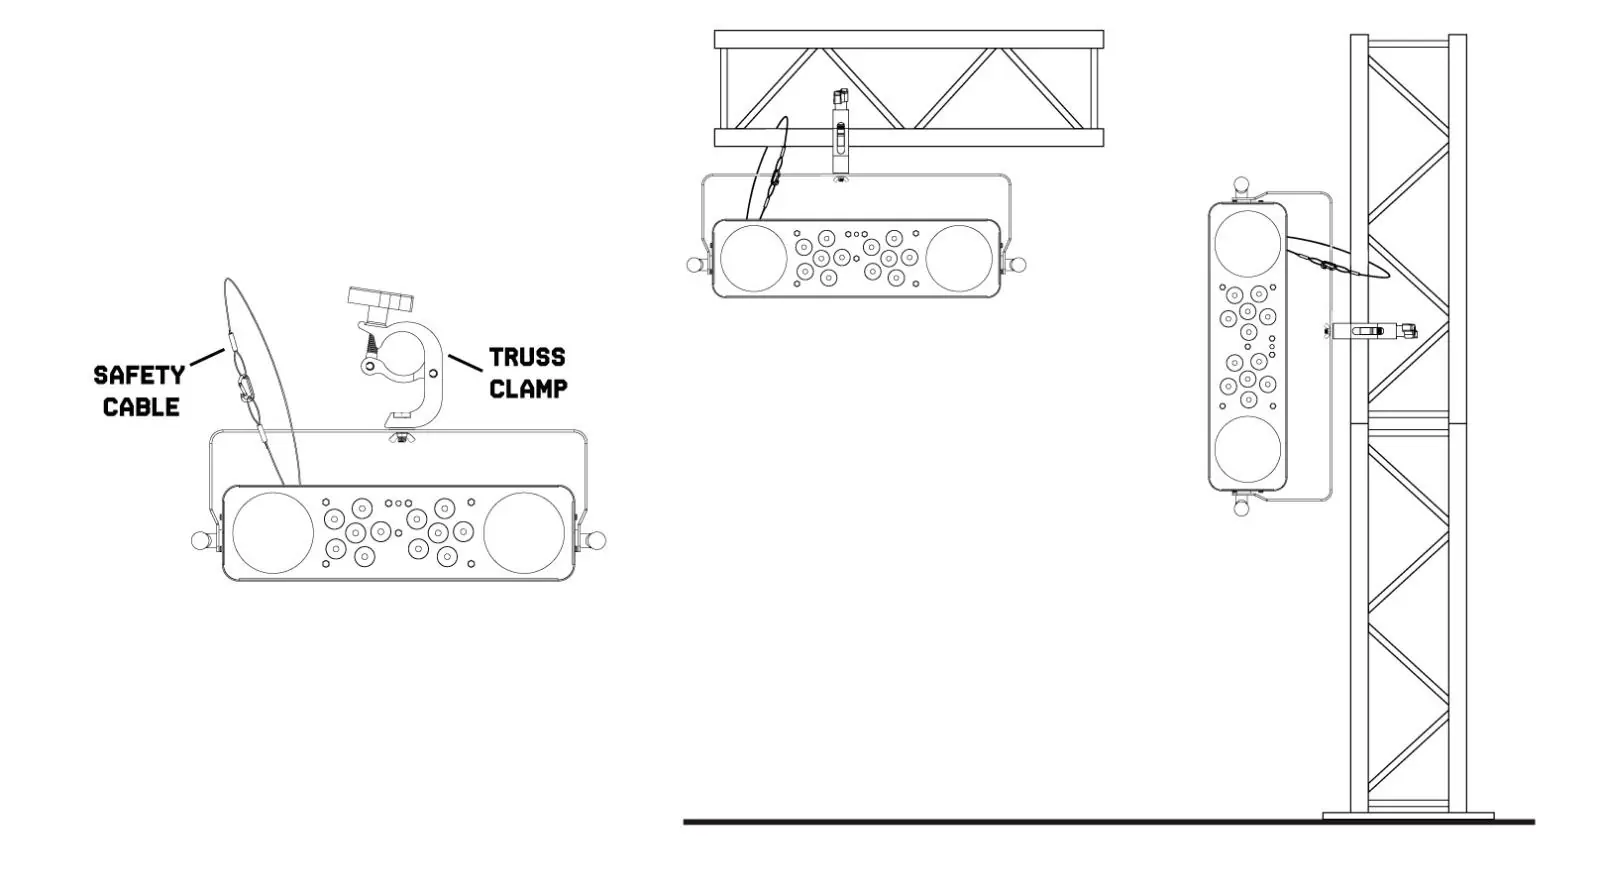
- Use certified clamps with the correct safe working load.
- Ensure the mounting location is stable and can support 10 times the weight of the unit.
- Always secure the unit with a safety cable to prevent it from falling.
- Comply with all European and national guidelines concerning rigging and safety.
Remote Controller Operation
The remote controller allows for the following modes:
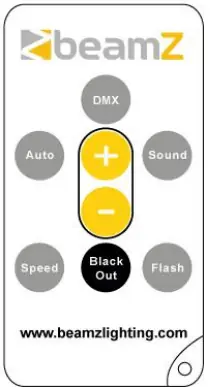
- Black Out: Turns off existing modes.
- Auto Mode: Runs automatic programs. Press AUTO, then use the arrow buttons to select programs.
- Sound-Active Mode: Responds to music. Press SOUND, then use the arrow buttons to select programs.
- Speed Mode: Adjusts the speed of automatic and sound-active programs. Press SPEED, then use the arrow buttons to adjust.
- Flash Mode: Press FLASH to enable, use arrow buttons to adjust rate, and press FLASH again to turn off.
Control Menu Settings
The onboard menu allows for the following adjustments:
- STAT: Select static colour (S01-20)
- AUTO: Auto program (Au1-4)
- SOUN: Sound program (So1-4)
- SPEE: Adjust speed (SP1-9)
- SENS: Adjust microphone sensitivity (SE1-9)
- DIMM: Master dimmer (DI1-9)
- STRO: Enable/disable strobe program
- SILE: Silent scene by sound program
- INFR: Enable/disable IR remote
Manufacturer information
beamZ
Practical help
Common problems
Unit does not turn on or light effect is damaged
Ensure the mains voltage matches the label on the back of the unit. Do not use dimmers or adjustable power supplies.
Condensation after transport
Do not switch the unit on immediately. Leave it switched off until it has reached room temperature.
Before use
- Check contents for damage upon unpacking
- Verify mains voltage matches the label on the back
- Ensure connection to a protected circuit (breaker or fuse)
- Verify mounting surface stability
- Attach safety cable when truss mounting
Images and diagrams
- Rigging diagram shows how to attach the unit to a truss using a clamp and safety cable.
- Remote controller diagram illustrates buttons for DMX, Auto, Sound, Speed, and Flash modes.
Model compatibility
- Requires protected circuit (breaker or fuse)
- Do not use with dimmer or adjustable power supply

Manual page author
Michael Turner
Technical manual editor
Reviews PDF manuals for structure, safety notes, and practical product details so readers can find the right information quickly.