Lighting / Stage Lighting
User Manual for beamZ Whirlwind 3-In-1 LED Effect
Quick guide for the beamZ Whirlwind 3-In-1 LED Effect. Includes installation, DMX control, remote operation, maintenance, and troubleshooting.
Table of contents
Manual images
Click an image to enlargeQuick guide from the manual
The beamZ Whirlwind is a 3-in-1 LED effect light. This manual provides essential instructions for safe installation, DMX configuration, and maintenance. Always ensure the unit is installed in a well-ventilated area and never operate it in the immediate vicinity of fluids unless specified for outdoor use.
Safety Instructions
- Always verify that the mains voltage and frequency match the values specified on the unit before connecting.
- Never connect the unit to a dimmer pack.
- Ensure a free air space of at least 50 cm around the unit for ventilation.
- For mounting heights over 100 cm, always use an appropriate safety rope.
- Never look directly at the light beam.
- The unit is not designed for permanent operation; allow for consistent breaks.
- Ambient temperature must be between -5°C and +45°C.
Unpacking and Installation
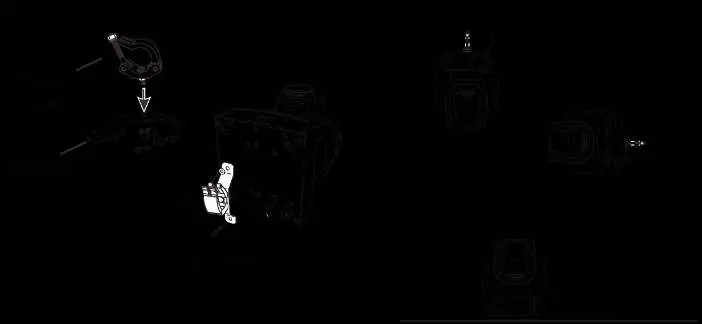
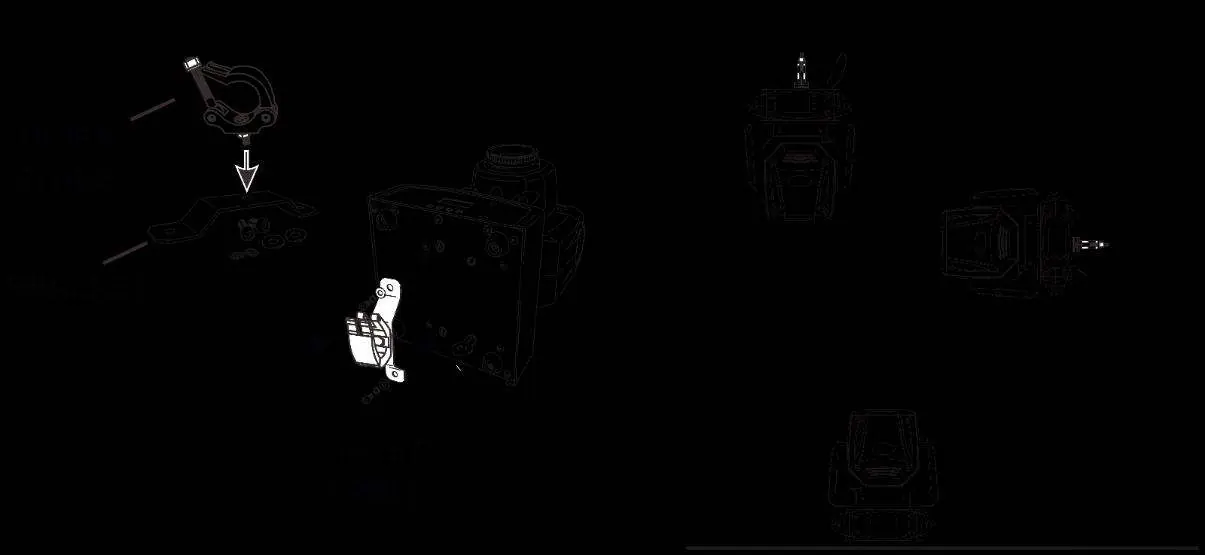
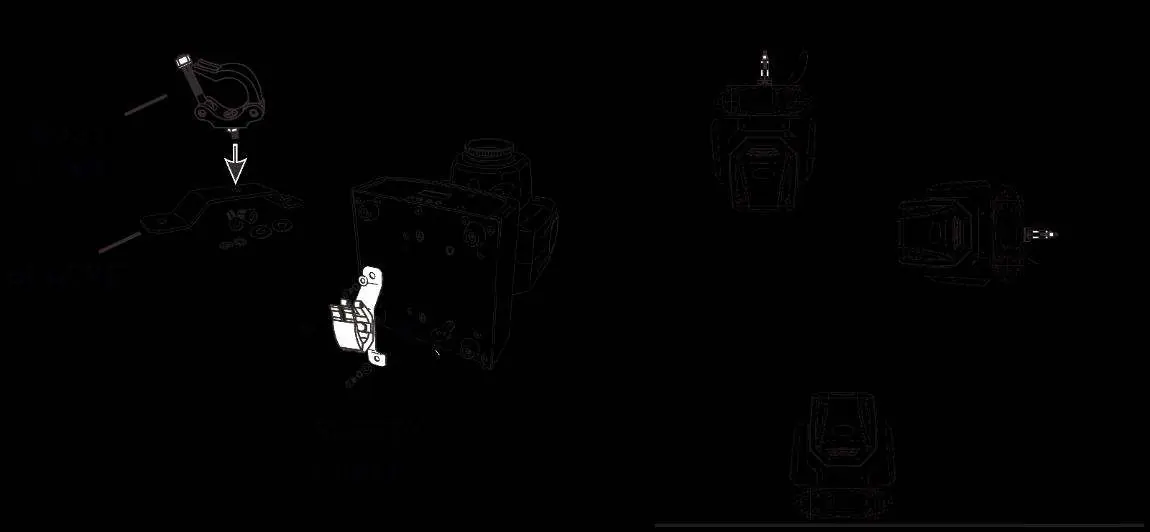
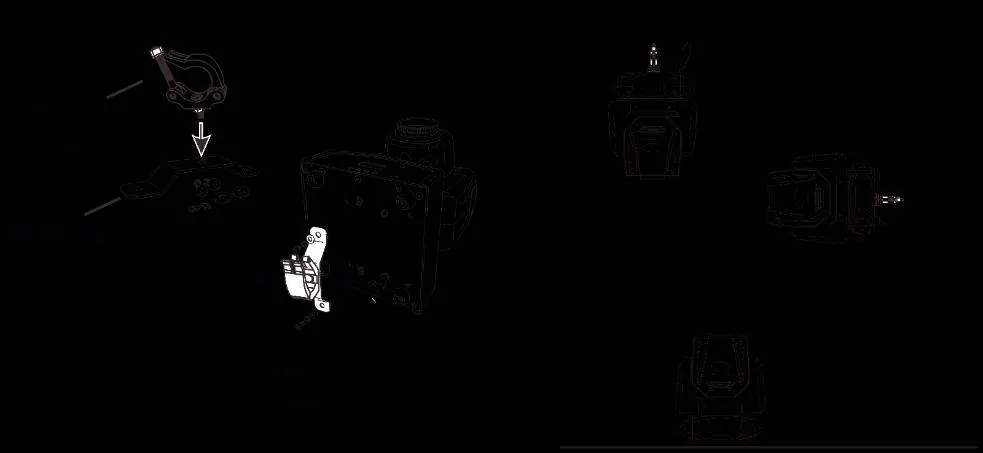
Immediately upon receiving the product, unpack and check for transportation damage. Retain all packing materials. The unit can be set up on a stable surface or mounted upside down to a truss using certified clamps. Ensure the mounting structure can support 10 times the unit's weight and always secure the unit with a safety cable.

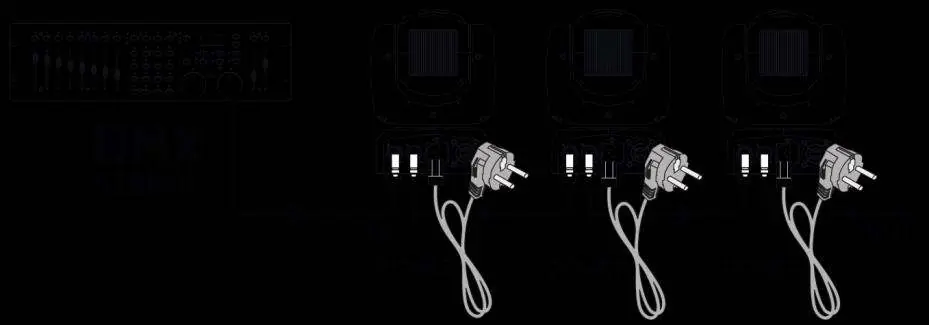
Power Supply
Check the label on the back of the unit for the required power supply. Connect the unit directly to the mains. Do not use a dimmer or adjustable power supply. Ensure the unit is connected to a protected circuit with appropriate electrical grounding.
DMX512 Control
Connect the DMX output of your controller to the DMX input of the first unit in the chain. Connect the output of one unit to the input of the next. At the last unit in the chain, you must close the DMX line with a terminating resistor (120 Ohm resistor between signal (-) and signal (+)).
Remote Controller
The remote control is supplied with a battery inserted. Remove the insulating foil from the battery support on the rear side before first use. If the range decreases, replace the battery with a 3V button cell type CR 2025, ensuring the positive pole faces upwards.
Cleaning and Maintenance
Dust and dirt buildup reduce light output and prevent proper cooling. Inspect the unit regularly. Disconnect from power and allow it to cool before cleaning. Use a dry cloth or low-pressure compressed air to remove dust. Clean glass components with a soft, lint-free cloth moistened with a weak detergent solution.
Replacing the Fuse
If the fuse is defective, replace it with a fuse of the same type and rating. Disconnect the mains lead before proceeding. Open the fuse holder on the rear panel with a screwdriver, remove the old fuse, install the new one, and replace the holder.
Troubleshooting
If the unit does not respond, check the power supply and fuse. If it does not respond to the controller, check DMX connections, ensure the line is terminated, and verify the DMX address settings. If the light output cuts out, allow the unit to cool and ensure proper ventilation.
Technical Specifications
- Rated voltage: 100-240VAC, 50-60Hz
- LED: Red, Green, Blue, White
- Fuse: F5A
- DMX Channels: 18
- Dimensions: 220 x 220 x 230 mm
- Weight: 1.8 kg
Manufacturer information
beamZ
Practical help
Common problems
No response from unit
Check power connection and ensure the unit is switched on. Check if the fuse is blown.
Unit does not respond to DMX controller
Check DMX cables and connections. Ensure the DMX line is terminated with a 120 Ohm resistor at the last unit. Verify DMX address settings.
Light output cuts out intermittently
The unit may be overheating. Allow it to cool, ensure free airflow around the unit, and clean if necessary.
Before use
- Check for transportation damage upon unpacking.
- Verify that mains voltage matches the unit specifications.
- Ensure no ventilation slots are blocked.
- For overhead mounting, attach a safety cable to the correct fixation points.
- Remove the battery insulating foil from the remote control.
Specs in practice
- DMX Channels
- 18 channels used for controlling various functions like rotation, dimmer, strobe, and colors.
- Ambient Temperature
- Must be between -5°C and +45°C for safe operation.
Images and diagrams
- Rigging: Shows how to attach the bracket and safety cable to the unit for truss mounting.
- DMX Connection: Illustrates daisy-chaining multiple units using XLR cables.
- DMX Terminator: Shows how to solder a 120 Ohm resistor to an XLR connector for the last unit in the chain.
- Remote Battery: Shows the procedure to remove the battery tray from the remote control.
Model compatibility
- Indoor use only.
- Not designed for permanent operation.
- Do not connect to a dimmer pack.

Manual page author
David Miller
Documentation analyst
Organizes user manual content into clear summaries, with attention to model details, product context, and everyday usability.