Tools / Drills
User Manual for 12V Cordless Drill Driver
Quick guide for the 12V Cordless Drill Driver. Learn how to change drill bits, adjust torque and speed settings, and use the included accessories safely.
Table of contents
Manual images
Click an image to enlargeQuick guide from the manual
This manual provides instructions for the 12V Cordless Drill Driver. Key operations include adjusting the torque ring for screw driving or drilling, selecting between two speed zones, and properly loading drill bits into the keyless chuck. Always ensure the battery is fully charged before use and wear appropriate eye protection.
Product overview
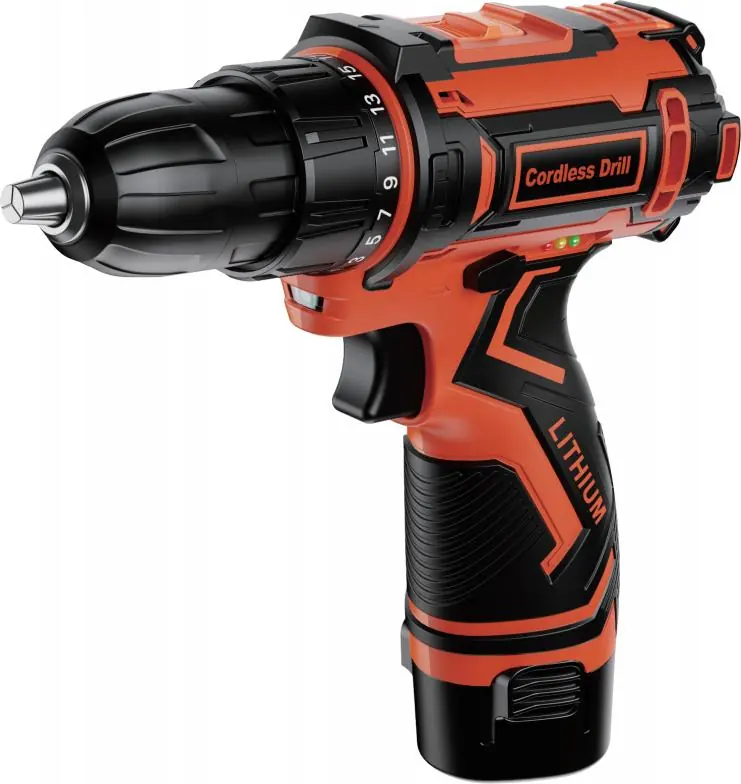
The drill features a 10mm keyless chuck, a variable speed trigger, and an ergonomic handle. The torque adjustment ring (18+1 or 25+1 settings) allows for precise control, while the two-speed switch on top of the tool toggles between low and high speed modes. An LED work light activates automatically when the trigger is pressed.
Safety warnings
- Protect your eyes when drilling.
- Do not use in explosive environments (dust or liquids) as the tool generates sparks.
- Keep the battery pack away from metal objects (paper clips, coins, screws) to prevent short circuits.
- Maintenance must be performed by qualified personnel using identical replacement parts.
- Do not touch the drill bit or workpiece immediately after operation as they may be hot.
Operation guide
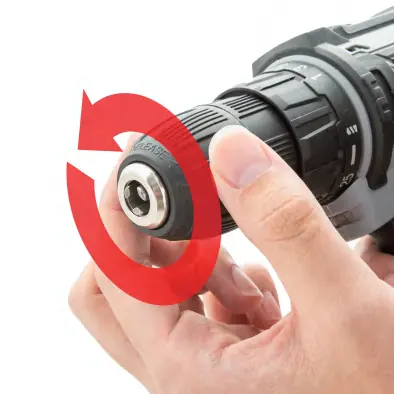
Step 1: Attaching/un-attaching the drill bit
Manual loading: Rotate the drill chuck counterclockwise to open, insert the bit, and rotate clockwise to tighten. Electric loading: Select clockwise mode, hold the chuck with one hand, and lightly press the trigger with the other to tighten or loosen.
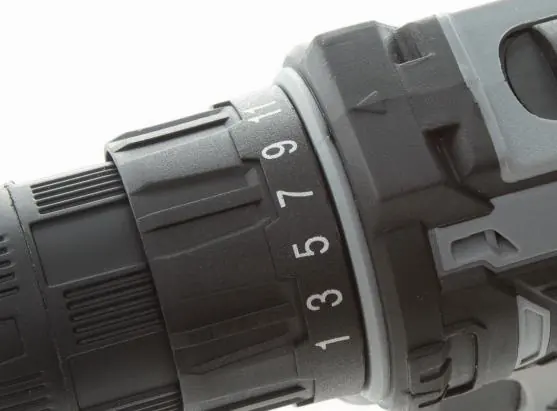
Step 2: Select functional modes
Rotate the torque adjustment ring until the desired symbol aligns with the triangle marker. Move the top button to reveal '1' for low speed or '2' for high speed.
Step 3: Start, control speed, stop
Hold the handle firmly and press the trigger to start. The LED light will illuminate. Control speed by varying pressure on the trigger. Release the trigger to stop and ensure the tool comes to a complete halt before setting it down.
Usage suggestions
For screw driving, use low speed with torque settings 1-18. For drilling, use low speed for hard materials (metal) and high speed for soft materials (wood). If the drill stops and clicks, the torque setting is too low for the task. Slight sparking during operation is normal for brush motors.
Accessories
The kit includes various accessories such as twist drill bits, screwdriver bits, a socket wrench set, a flexible shaft driver for tight spaces, and a cleaning brush head. Note that specific accessory combinations vary by drill style.

Manufacturer information
Bosch
Practical help
Common problems
Drill bit slips or dulls
Apply proper pressure. Too little pressure causes slipping; too much pressure slows the bit and reduces efficiency.
Drill stops turning and makes a clicking sound
The set torque is lower than the actual torque required. Increase the torque setting.
Sparks appear during operation
This is normal for brush motors and does not indicate a defect.
Drill bit is kinked or stuck
Reverse the rotation direction to disengage the bit from the workpiece.
Before use
- Ensure the battery pack is fully charged.
- Check that the drill bit is securely tightened in the chuck.
- Select the appropriate torque setting for the material.
- Set the speed zone (1 for low, 2 for high) based on the task.
- Wear eye protection.
- Test on a piece of scrap material first.
Specs in practice
- Torque Setting
- 18+1 or 25+1 levels to control driving force and prevent over-tightening.
- Speed Adjustment
- 0-450 RPM (Low) for high torque tasks; 0-1400 RPM (High) for fast drilling.
Images and diagrams
- 1: 10mm Keyless Chuck
- 2: LED Work Light
- 3: Torque Adjustment Ring
- 4: Variable Speed Trigger
- 5: Ergonomic Handle
Model compatibility
- Low speed mode is required for drilling hard materials or large holes.
- High speed mode is suitable for soft materials or small holes.
- Use coolant or water when drilling metal to maintain bit sharpness.

Manual page author
Michael Turner
Technical manual editor
Reviews PDF manuals for structure, safety notes, and practical product details so readers can find the right information quickly.