Garden / Outdoor Cooking
Owner's Manual for Char-Broil 463625217 2-Burner Gas Grill
Comprehensive owner's manual for the Char-Broil 463625217 2-Burner Gas Grill. Includes assembly instructions, safety guidelines, operating procedures, cleaning tips, and troubleshooting steps.
Quick answers from the manual
Quick answer
- This manual provides assembly, operation, maintenance, and troubleshooting instructions for the Char-Broil 463625217 2-Burner Gas Grill. p. 2, 20, 32, 39
Key actions
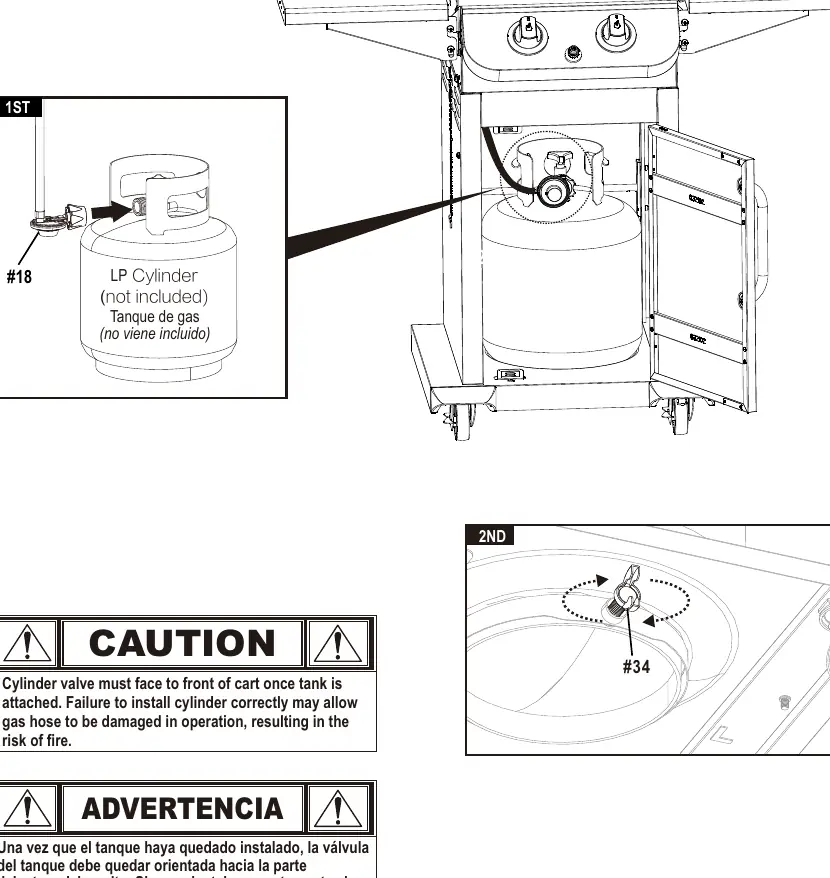
- Perform a leak test before first use and after every cylinder exchange. p. 6, 7
- Reset the regulator if the grill doesn't get hot enough (250-300°F). p. 32
First start
- Remove all point-of-purchase advertising, assemble the grill, and run on high for 15-20 minutes to burn off manufacturing oils. p. 32
Problems and fixes
Burner will not light
Check gas supply, ensure burner is engaged with valve, check ignitor battery, or use match-lighting.
p. 40Maintenance and reset
- Reset the gas regulator safety device by disconnecting and reconnecting the regulator to the LP tank. p. 32
Technical specifications
| Parameter | Value | Meaning | Pages |
|---|---|---|---|
| LP Cylinder Capacity | 20 lb. (9 kg) | Maximum capacity for the required LP cylinder. | p. 5 |
Where to find it in the PDF
- Assembly p. 20, 30
- Use and Care p. 4, 9
- Troubleshooting p. 39, 40
Table of contents
Manual images
Click an image to enlargeQuick Guide
This manual provides essential instructions for the safe assembly, operation, and maintenance of your Char-Broil 2-Burner Gas Grill. Always perform a leak test before the first use and after every LP cylinder exchange. Maintain at least 3 feet of clearance from walls and combustible materials.
Assembly
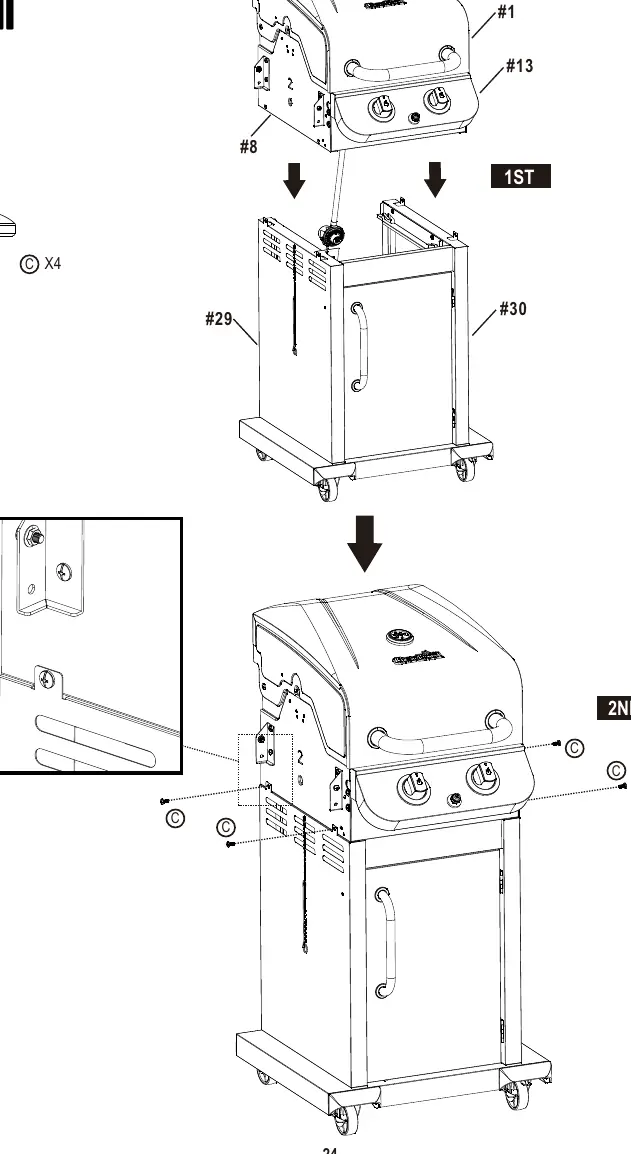
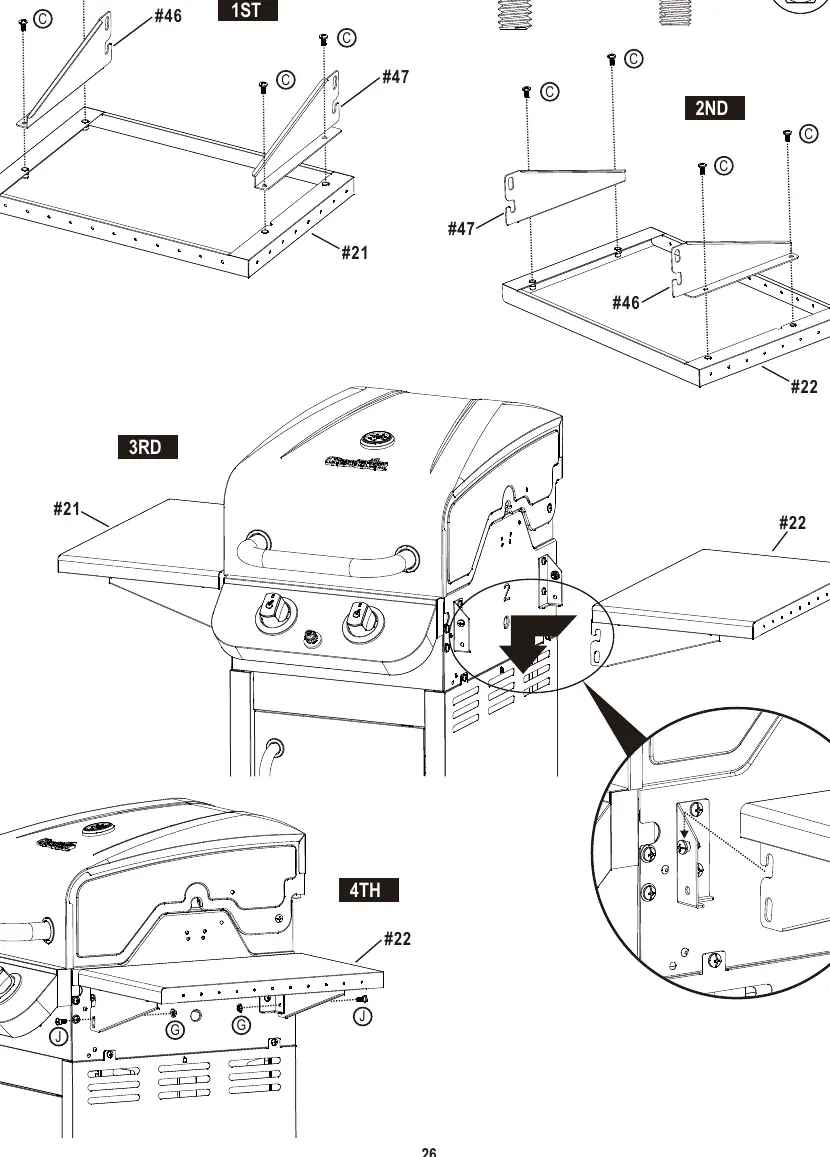
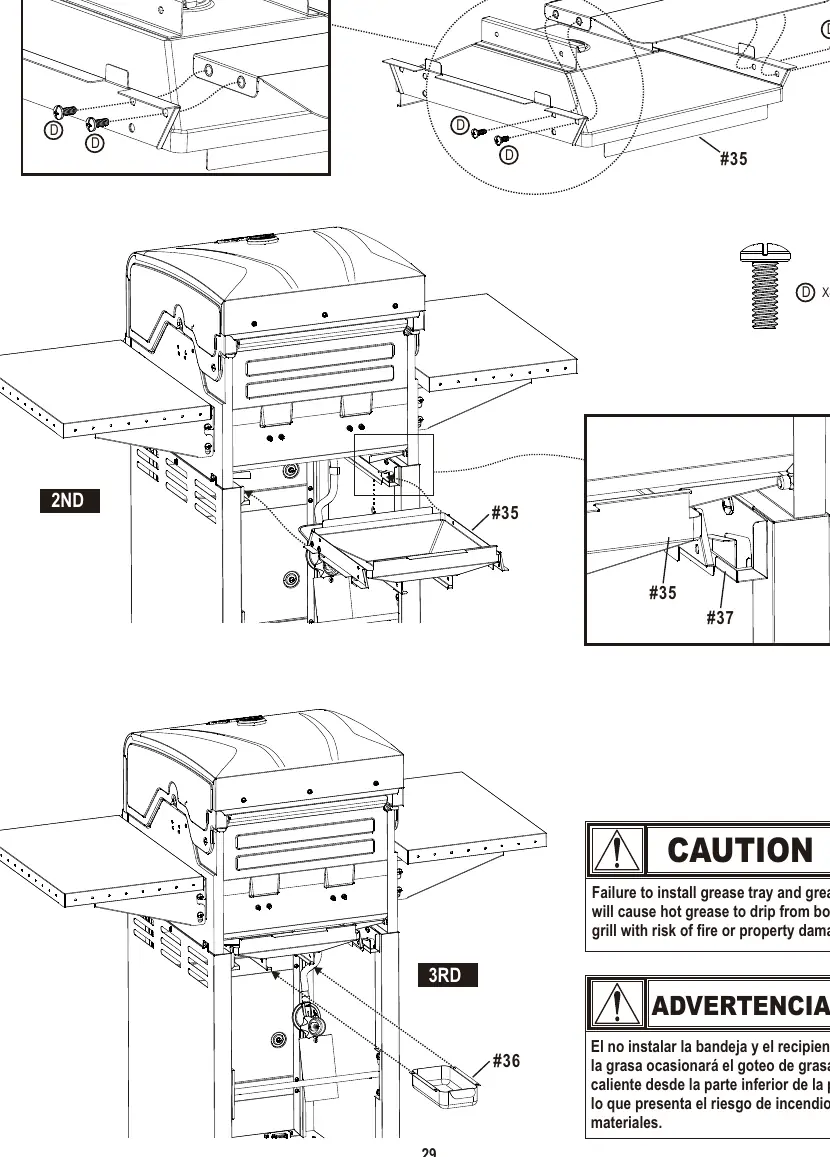
The assembly process involves 16 steps, including:
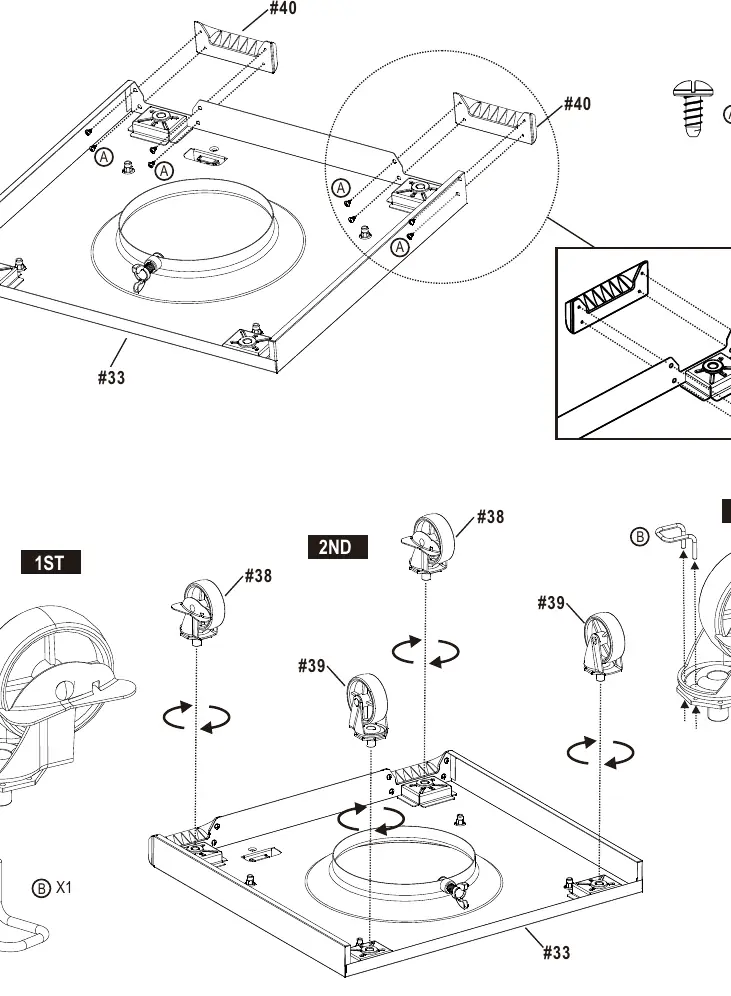
- Attaching casters to the bottom shelf.
- Assembling the cart frame (left and right panels).
- Mounting the grill head to the cart.
- Installing side shelves and control panels.
- Installing burners, heat tents, and cooking grates.
- Installing the grease tray and grease pan.
- Connecting the LP cylinder.
Note: Do not over-tighten screws on porcelain-coated surfaces to prevent cracking.
Operation
Lighting the Grill:
- Open the lid before lighting.
- Ensure all control knobs are in the OFF position.
- Turn on the LP cylinder gas.
- Push and turn the ignition burner knob to HIGH, then press and hold the electronic ignitor button until the burner lights.
- If ignition does not occur in 5 seconds, turn off the burner, wait 5 minutes, and repeat.
Cooking:
- Pre-heat the grill on high for 10-15 minutes before cooking.
- Use direct cooking for searing and indirect cooking for larger cuts of meat.
- Always use a meat thermometer to ensure safe internal temperatures.
Maintenance
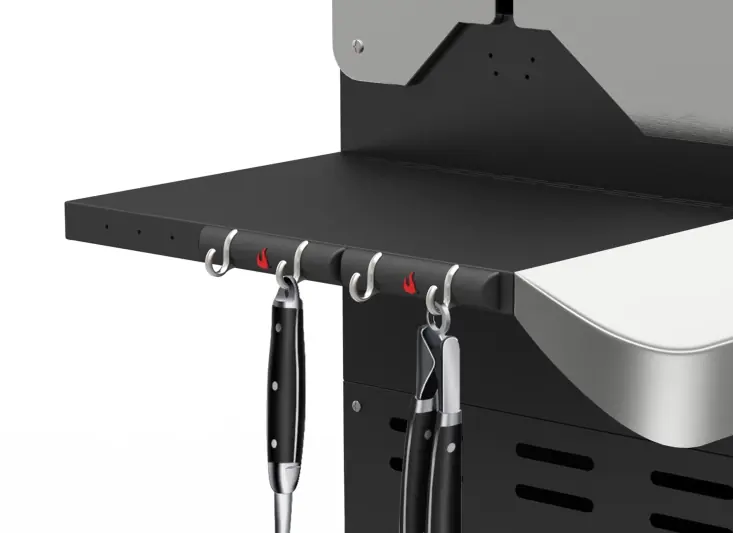
- Cleaning: Clean cooking grates after each use. Use a grill brush to remove food particles.
- Burners: Inspect and clean venturi tubes regularly to prevent spider nests, which can cause flashbacks.
- General: Wash plastic parts with warm soapy water. Use non-abrasive cleaners for porcelain and stainless steel surfaces.
Troubleshooting
- Grill won't light: Check gas supply, ensure burner is engaged with the valve, check ignitor battery, or use match-lighting.
- Low flame: Check for an empty tank, reset the regulator safety device (disconnect and reconnect), or check for obstructions.
- Grease fire: Turn off knobs and LP cylinder. Leave the lid open and let the fire burn out. Clean the grease tray and burner area after the grill cools.
Warranty
The manufacturer provides a limited warranty covering defects in workmanship and materials. Coverage includes 5 years for stainless burners, 2 years for the firebox and lid, and 1 year for all other parts. A dated sales receipt is required for service.
Practical help
Common problems
Grill won't light
Check gas supply, ensure burner is engaged with valve, check ignitor battery, or use match-lighting.
Low flame or sudden drop in gas flow
Check for empty tank, reset regulator safety device (disconnect/reconnect), or check for obstructions.
Grease fire
Turn off knobs and LP cylinder. Leave lid open and let fire burn out. Clean grease tray and burner area after cooling.
Before use
- Check for gas leaks using soapy water solution
- Ensure grill is on a level surface
- Verify burner tubes are free of spider webs/nests
- Check that grease tray is installed
- Ensure LP cylinder is properly secured
Images and diagrams
- Assembly steps 1-16 show the step-by-step construction of the grill cart and head.
- Parts diagram on page 43 identifies all components.
Model compatibility
- For use with LP (propane) gas only.
- Not for commercial use.
- Not for use on boats or RVs.

Manual page author
David Miller
Documentation analyst
Organizes user manual content into clear summaries, with attention to model details, product context, and everyday usability.