Electronics / Microphone Accessories
User Manual for Citronic Aqua-Bar 18x18W Waterproof LED Wall Bar
Quick guide for the Citronic Aqua-Bar 18x18W LED Wall Bar. Learn about DMX control, menu settings, installation, and troubleshooting.
Quick answers from the manual
Quick answer
- The Citronic Aqua-Bar is a waterproof LED wall wash fixture. It can be controlled via DMX (6, 8, 9, or 12 channels) or standalone using internal color sequences and performance modes. p. 1, 5, 6
Key actions
- Entering DMX mode p. 5
- Mounting the unit p. 1
First start
- Connect power and mount the unit securely using the provided brackets. p. 1
- Use the rear panel buttons to select the desired mode (DMX or standalone). p. 2
Problems and fixes
Unresponsive to DMX
Check that unit is in DMX mode and ensure the A on the DMX address flashes to confirm it’s receiving a DMX signal.
p. 7Maintenance and reset
- Cleaning p. 2
Technical specifications
| Parameter | Value | Meaning | Pages |
|---|---|---|---|
| Power consumption | 324W | Power usage | p. 7 |
| Beam angle | 25° | Light spread | p. 7 |
Where to find it in the PDF
- Introduction and Setup p. 1
- Controls and Menu p. 2, 3, 4
- DMX Channel Modes p. 5, 6
- Specifications and Troubleshooting p. 7
Table of contents
Manual images
Click an image to enlargeImportant information from the manual
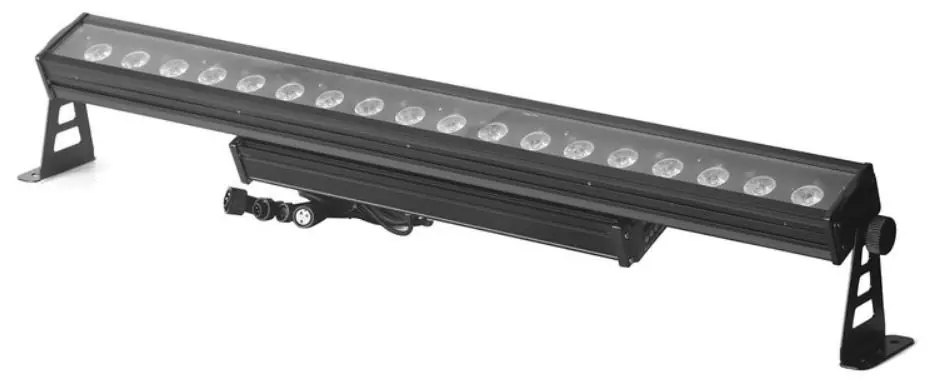
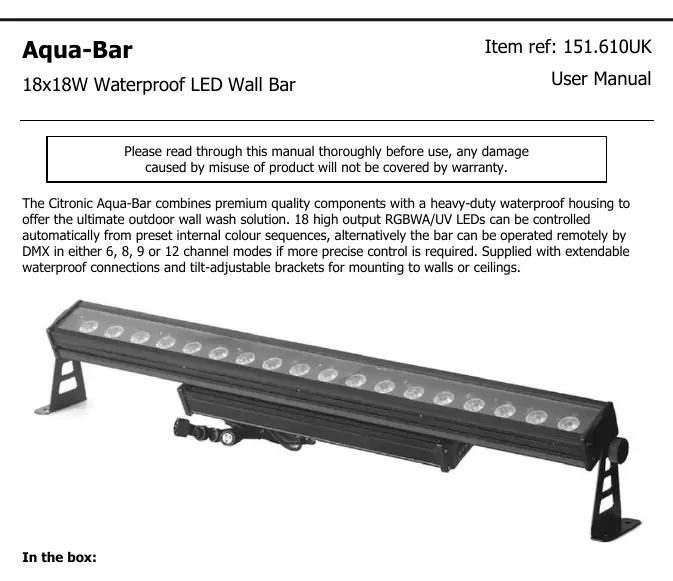
The Citronic Aqua-Bar is a waterproof LED wall wash fixture designed for outdoor use. It features 18 high-output RGBWA/UV LEDs. The unit can be operated in standalone mode using internal color sequences and performance modes, or remotely via DMX512 controllers using 6, 8, 9, or 12 channel modes. Always ensure adequate airflow around the fixture and do not aim the LED output directly into the line of sight to prevent eye injury.
Product overview
The package includes the main unit, two fixing stand/brackets with thumbscrews, a UK mains plug to waterproof socket extension lead, a DMX XLR plug to waterproof socket lead, and waterproof end caps for IEC and XLR connections.
Installation
Use the included mounting brackets to fix the unit to a stand or lighting truss. If mounting the unit overhead, you must use secondary safety fixings. Ensure the unit is placed in a location with adequate airflow and that the controls and connections remain accessible.
Rear panel controls
The rear panel features a digital display and four buttons for navigation:
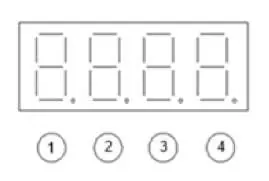
- MENU: Enter the menu.
- Up (Triangle): Previous menu.
- Down (Inverted Triangle): Next menu.
- ENTER: Select the function.
DMX operation
To control the unit via DMX, connect the DMX signal source to the DMX input using the provided waterproof XLR lead. You can daisy-chain extra fixtures by looping through the DMX out. To enter DMX mode, select A001 from the menu and confirm the start address and channel mode using the navigation buttons. The 'A' on the LED display will flash once it receives a valid DMX signal.
Menu settings
The menu allows for various configurations, including:
- DMX Address: Select from 001-512.
- DMX Mode: Choose between 6, 8, 9, or 12 channel modes.
- Master/Slave: Select Transmit/Receive signal.
- Colors: Access 15 predetermined colors (0-15).
- Strobe: Adjust strobe speed (0-99).
- Performance Modes: Choose from 24 dynamic performance modes (PAR01-PAR24).
- Dimmer Curves: Options include Linear, Exponential, Logarithmic, S-Curve, and Halogen.
- System Info: Check internal temperature, usage time, and software version.
Cleaning and maintenance
Use a soft cloth with a neutral detergent to clean the screen and casing as required. Do not use strong solvents. The unit is not serviceable by the end user; refer to qualified personnel for any repairs.
Troubleshooting
If the unit fails to power on, check that the mains voltage is correct and the IEC power extension lead is connected properly. If there is no light output, check the control panel mode settings and DMX controller settings (dimmer levels, blackout). If the unit is unresponsive to DMX, ensure it is in DMX mode, the 'A' is flashing, the controller is not set to blackout, and the master dimmer value is set correctly.
Practical help
Common problems
No power
Check mains voltage and ensure the IEC power extension lead is connected properly.
No light output
Check control panel mode settings and DMX controller settings (dimmer levels, blackout).
Unresponsive to DMX
Verify the unit is in DMX mode (A should flash), check DMX address, master dimmer value, and ensure the controller is not in blackout mode.
Before use
- Check contents: main unit, 2 brackets, mains lead, DMX lead, end caps.
- Ensure adequate airflow around the fixture.
- Ensure access to controls and connections.
- Do not aim LED output directly into eyes.
- Use secondary safety fixings if mounting overhead.
Specs in practice
- Power supply
- 100-240Vac, 50/60Hz
- DMX channels
- 6, 8, 9, or 12 channels
Images and diagrams
- Buttons 1-4 are used to navigate the menu: Menu, Up, Down, Enter.
- The digital display shows the current mode, address, or setting value.
Model compatibility
- IP65 rated (waterproof).
- Compatible with DMX512 controllers.
- Supports Master/Slave operation.

Manual page author
Michael Turner
Technical manual editor
Reviews PDF manuals for structure, safety notes, and practical product details so readers can find the right information quickly.