HVAC / Parts & Accessories
Installation Guide for Danfoss Twin Kit 086L1370
Comprehensive installation guide for the Danfoss Twin Kit 086L1370. Includes step-by-step instructions for electrical connections, system configuration, and commissioning for master/slave heat pump setups.
Table of contents
Manual images
Click an image to enlargeImportant information
The Twin Kit 086L1370 allows for the addition of an external unit (Slave) to an existing heat pump system (Master). The installation involves physical piping, electrical wiring, and software configuration in the control system. This guide is intended for authorized electricians and qualified personnel.
Safety precautions
- Danger: Hazardous electrical voltage. Isolate all power supplies before starting electrical installation.
- Warning: Electrical installation must be carried out by an authorized electrician following local regulations.
- Warning: Use permanently routed cables and a multi-pole circuit breaker with a minimum contact gap of 3 mm.
- Caution: Changes to the slave unit (dipswitch/jumper) must only be performed on that unit to avoid damage.
Installation overview
The system consists of a Master heat pump (internal and external unit) and an additional Slave outdoor unit. The control unit manages both units via communication cables. Ensure all components listed in the delivery check (Expansion card, sensors, cables) are present before starting.
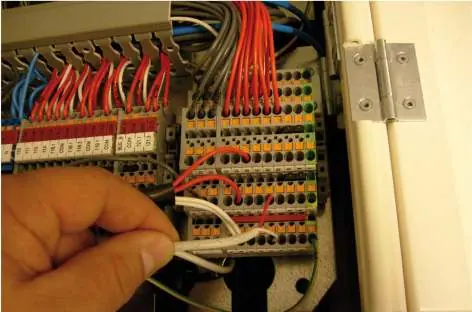
Electrical installation
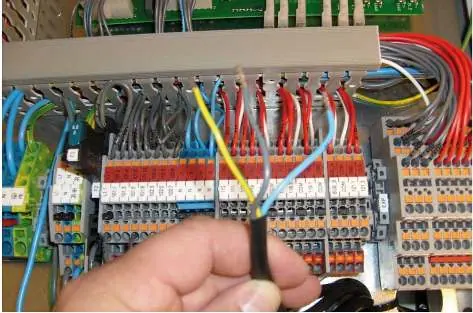
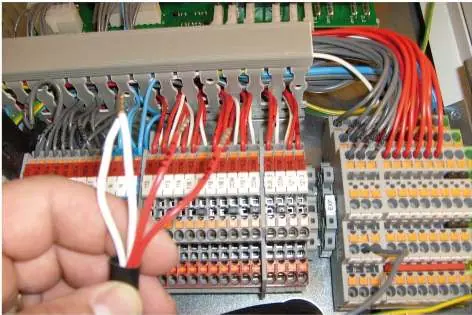
The electrical installation requires connecting the control unit, the slave unit's electrical cabinet, and the communication cables. Specific wiring procedures are required for the circulation pump, 0-10V/alarm signals, and temperature sensors. Ensure all connections are made to the correct terminals on the expansion board and terminal blocks as detailed in the wiring diagrams.

Settings in the control system
After physical installation, the control system must be configured for master/slave operation:
- Master/Slave: Access the SERVICE menu, navigate to INSTALLATION -> SYSTEM -> MASTER/SLAV, and set to ON.
- Optimum: Enable the OPTIMUM setting in the installation menu.
- Heat Source: Select AIR and configure the heat pump output size.
- Options: Configure settings for hot water, cooling, and auxiliary heaters as required by the specific system setup.
Commissioning and operation
Once settings are configured, perform a manual test to verify component operation. Navigate to the MANUAL TEST menu to activate and test individual components. Finally, set the system to AUTO in the OPERAT menu to begin normal operation.
Manufacturer information
Danfoss A/S
Practical help
Common problems
Risk of electric shock
Always isolate all power supplies before beginning any electrical installation work.
Damage to devices during slave unit setup
Ensure that dipswitch and jumper modifications are performed exclusively on the slave unit.
Communication failure between units
Verify that the RJ-45 communication cable and bus cables are securely connected to the correct terminals (BUS_A, BUS_B, COM).
Before use
- Verify all parts from the delivery check are present (Expansion card, sensors, cables).
- Ensure all power supplies are isolated and locked out.
- Confirm the installation is performed by an authorized electrician.
- Check if the control unit has a built-in circulation pump, as some wiring steps are specific to this configuration.
- Ensure the heat pump Installation guide is available for reference.
Images and diagrams
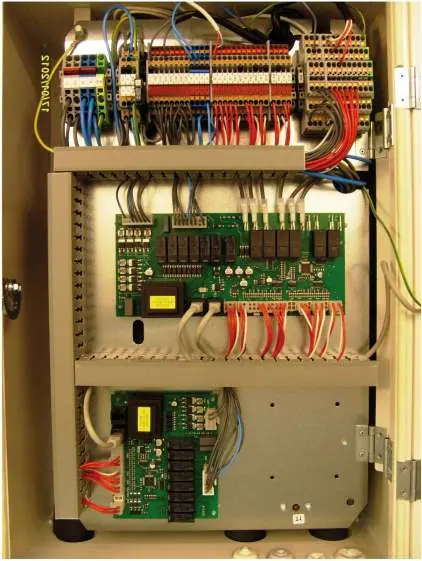
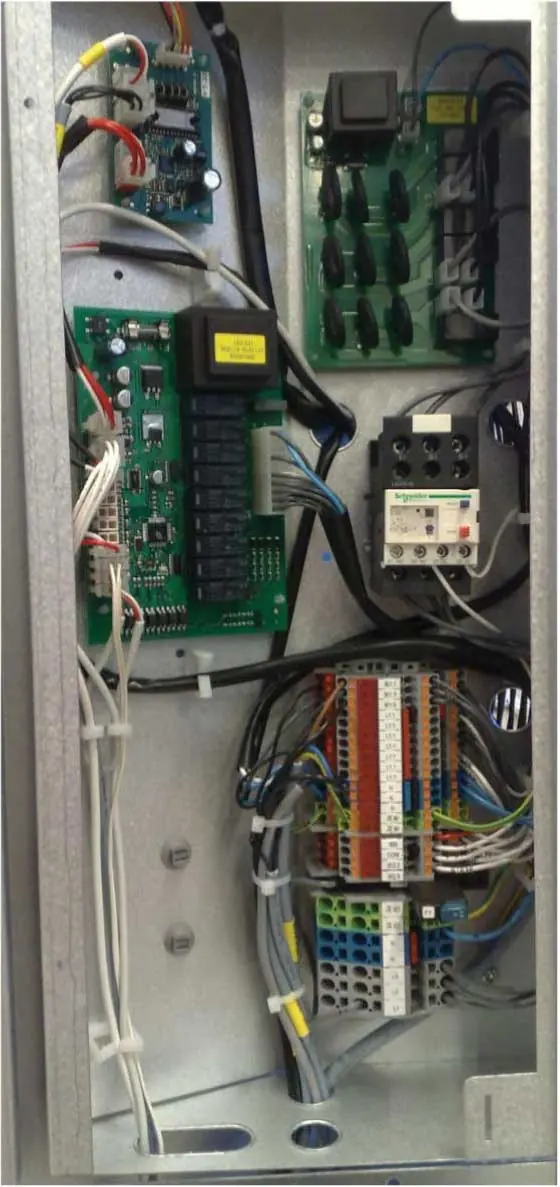
- Components in control unit: Identifies the location of the expansion card, HUB card, and terminal blocks.
- Electrical connections: Provides wiring diagrams for pumps, sensors, and communication cables.
- System solution: Shows the overall hydraulic and electrical layout of the master/slave system.
Model compatibility
- Some steps, such as Slave sensor and 0-10V wiring, are only applicable for control units with a built-in circulation pump.
- The communication cable between the control unit and outdoor units is not supplied with the kit.

Manual page author
Michael Turner
Technical manual editor
Reviews PDF manuals for structure, safety notes, and practical product details so readers can find the right information quickly.