Computers / Laptops
Service Manual for Dell Inspiron 11-3147 2-in-1
Comprehensive service and repair guide for the Dell Inspiron 11-3147 2-in-1. Includes step-by-step instructions for component removal, replacement, and BIOS maintenance.
Quick answers from the manual
Quick answer
- This document is a service manual for the Dell Inspiron 11-3147 2-in-1, providing detailed instructions for disassembling and replacing internal components. p. 1, 78
Key actions
- Removing the base cover p. 12
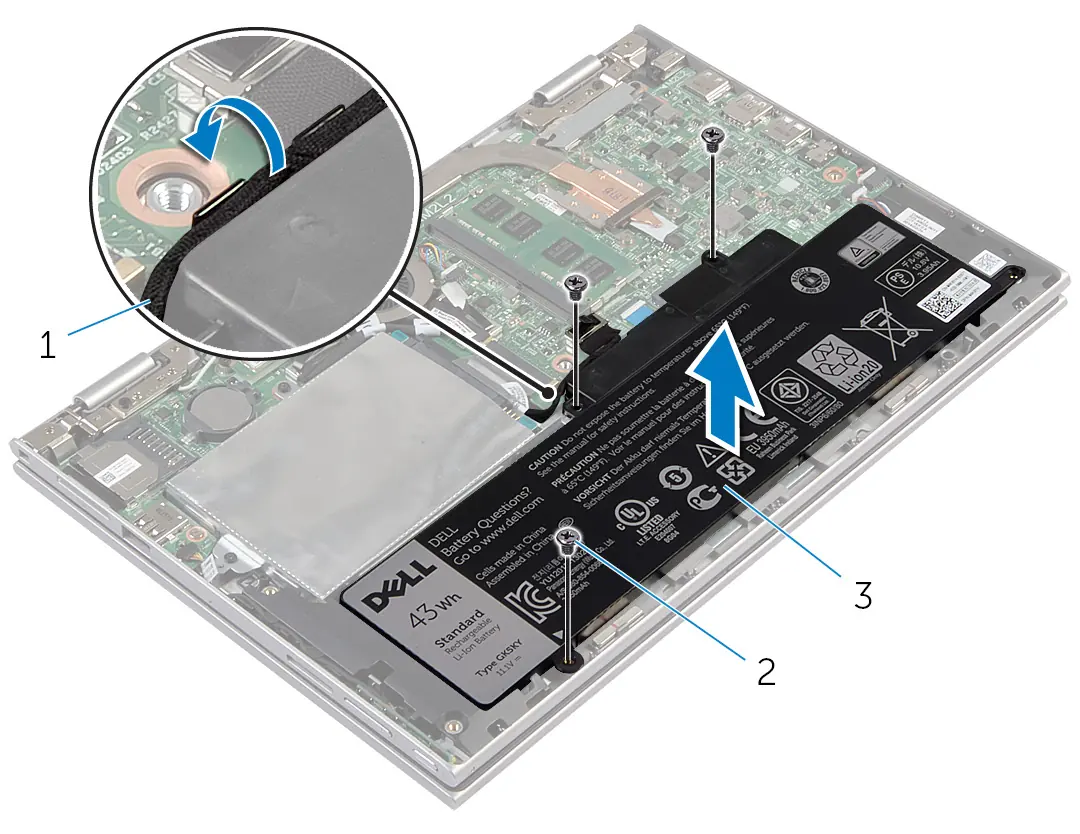
- Removing the battery p. 14
Maintenance and reset
- Entering the Service Tag in the BIOS p. 50
Where to find it in the PDF
- Safety Instructions p. 9, 10
- Component Removal p. 12, 76
Table of contents
Manual images
Click an image to enlargeQuick guide from the manual
This document provides detailed instructions for the safe disassembly and replacement of internal components for the Dell Inspiron 11-3147 2-in-1. Before performing any service, ensure the computer is shut down, disconnected from all power sources, and that you have grounded yourself to prevent electrostatic discharge.
Recommended Tools
- Philips screwdriver
- Flat-head screwdriver
- Plastic scribe
Safety Instructions
WARNING: Before working inside your computer, read the safety information that shipped with your computer. Disconnect all power sources before opening the computer cover or panels. Handle components by their edges and avoid touching pins and contacts.
Component Removal and Replacement
The manual provides step-by-step procedures for removing and replacing the following components:
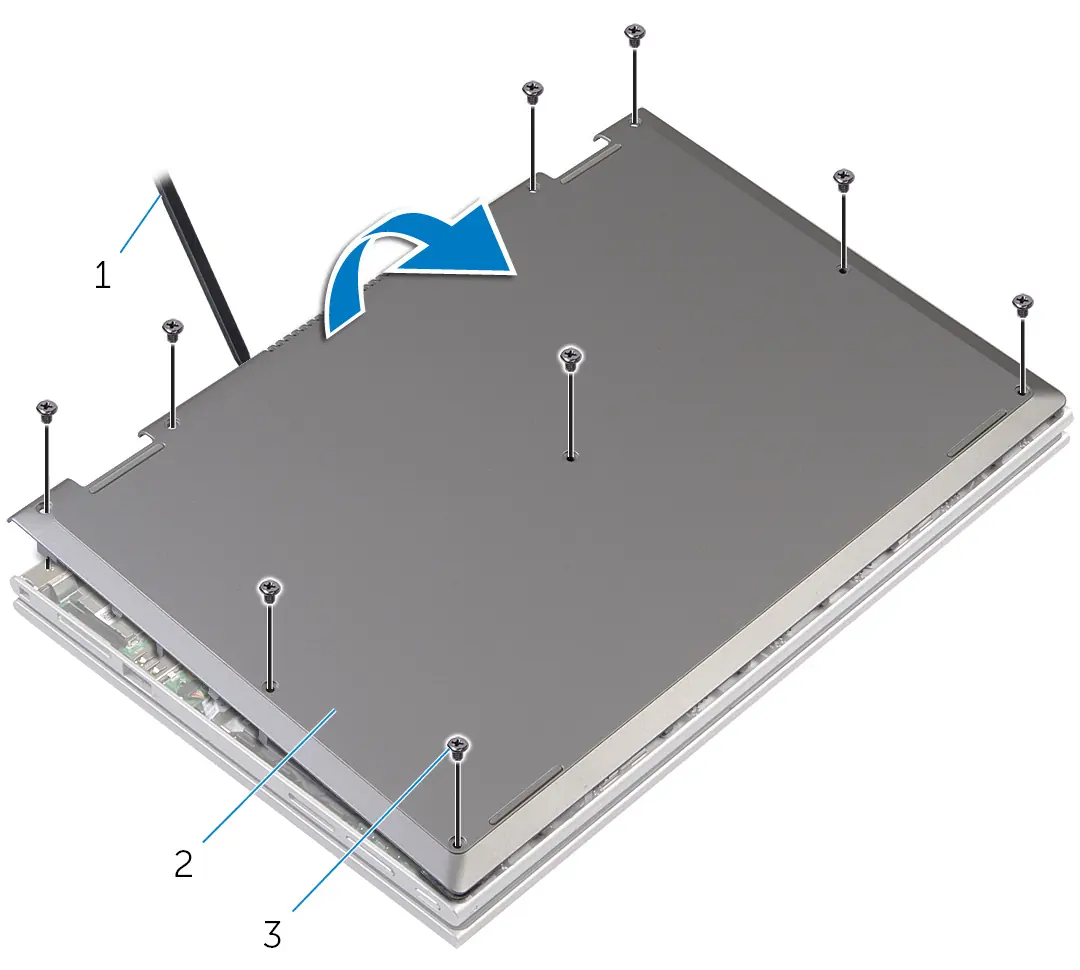
- Base Cover: The first step for most internal repairs.
- Battery: Must be removed before accessing most other internal components.
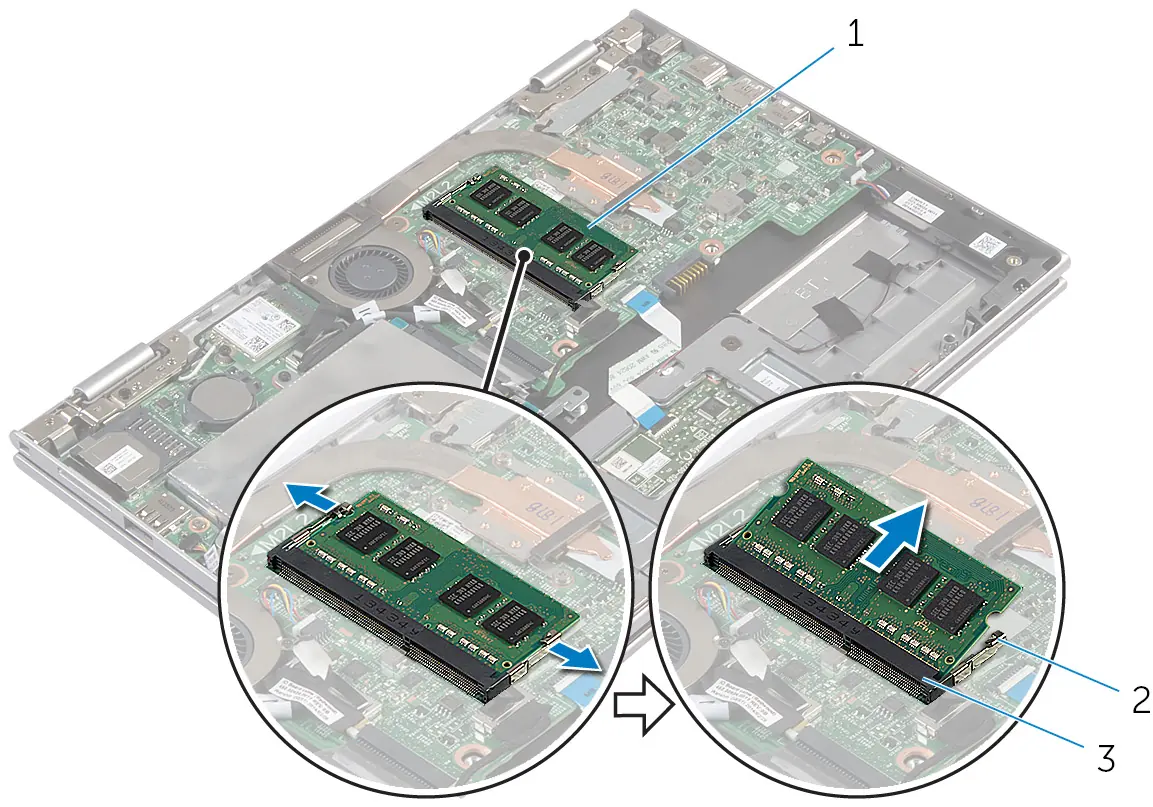
- Memory Module: Accessible after removing the base cover and battery.
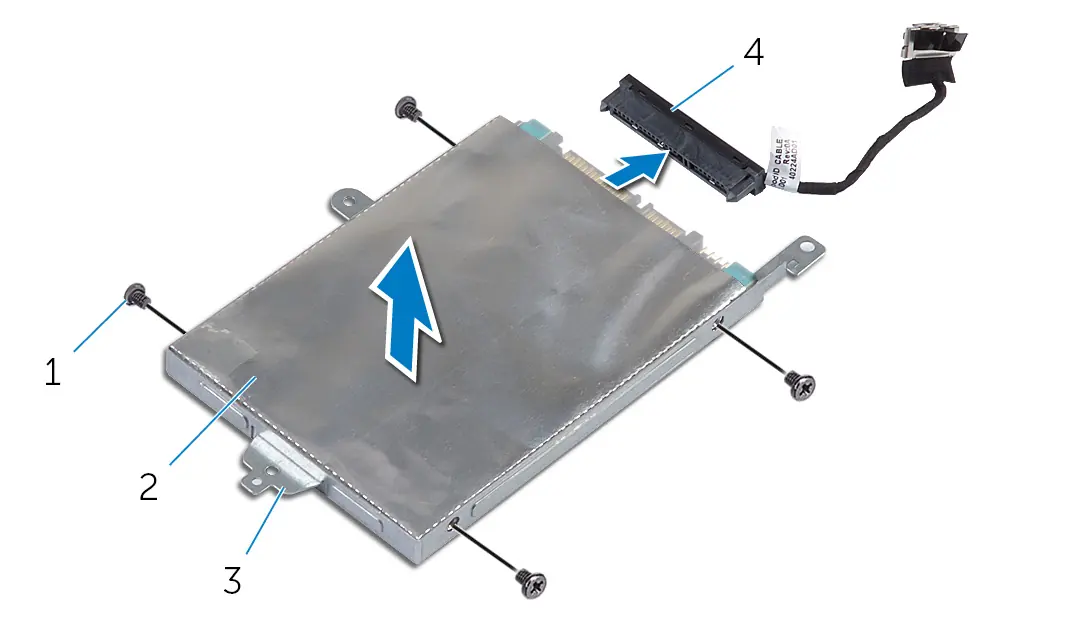
- Hard Drive: Requires removal of the base cover and battery.
- Coin-Cell Battery: Note that removing this resets BIOS settings to default.
- Wireless Card: Requires disconnecting antenna cables.
- Processor Fan and Heat-Sink Assembly: Note that appearance may vary based on graphics configuration.
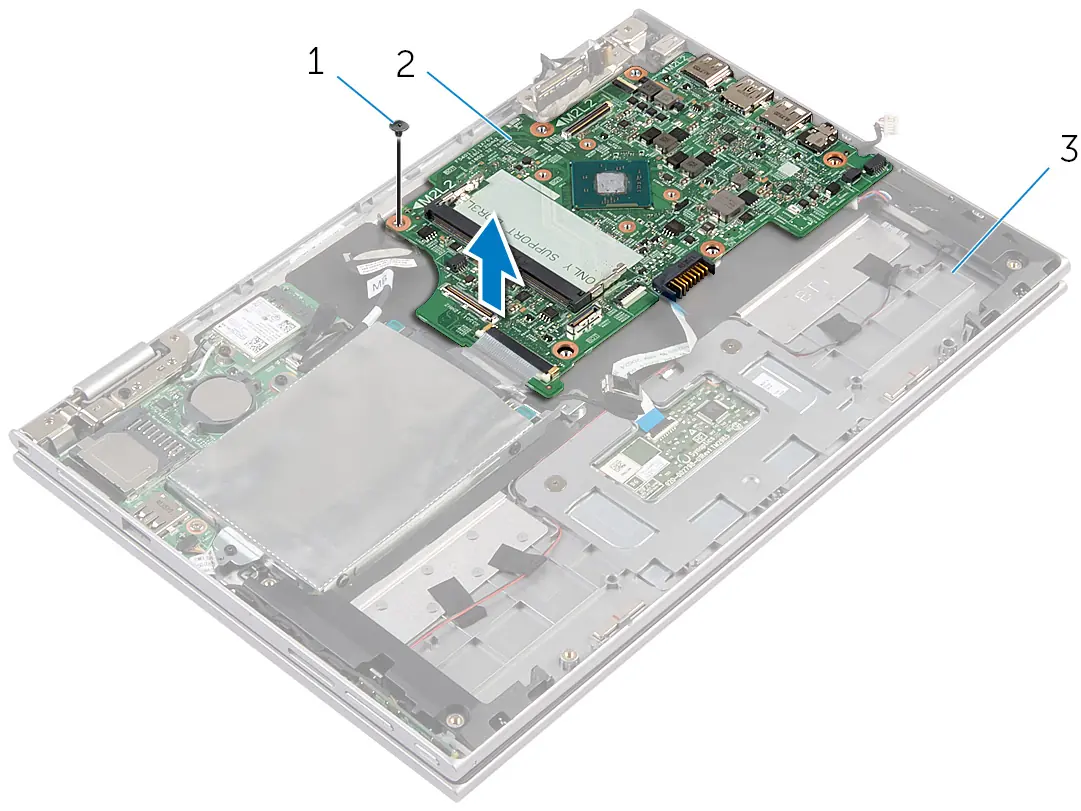
- System Board: Requires removing most other components first.
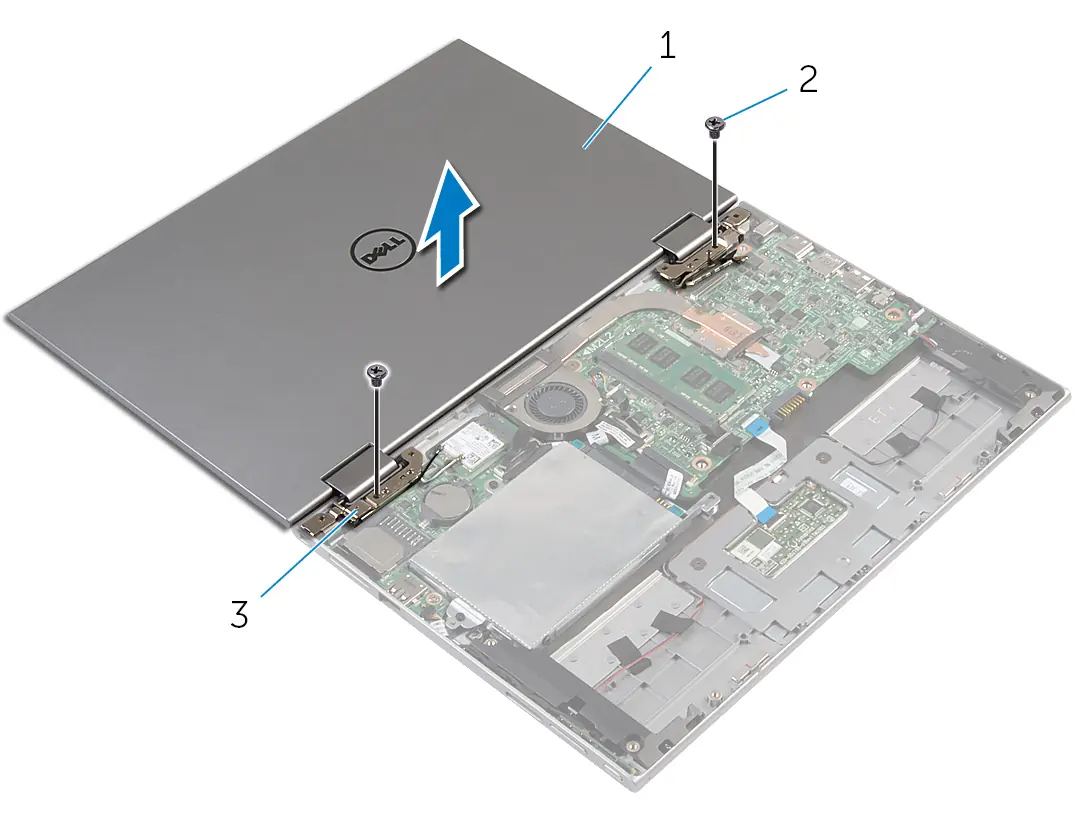
- Display Assembly: Involves disconnecting the display cable and antenna cables.
BIOS Maintenance
If you replace the system board, you must enter the Service Tag in the system setup. To flash the BIOS, visit dell.com/support, enter your Service Tag, and follow the instructions to download and run the latest BIOS update file.
Official resources from the manual
Manufacturer information
Dell Inc.
Practical help
Common problems
BIOS settings reset
Removing the coin-cell battery resets the BIOS settings to default. It is recommended to note your settings before removal.
System board replacement
The Service Tag is stored on the system board. You must enter the Service Tag in the system setup after replacement.
Before use
- Save and close all open files and applications.
- Shut down the computer.
- Disconnect the computer and all attached devices from electrical outlets.
- Disconnect all cables (telephone, network, etc.).
- Remove any media cards or optical discs.
- Ground yourself by touching an unpainted metal surface.
Images and diagrams
- The manual includes detailed exploded-view diagrams for every component, clearly labeling screws, cable routing, and connector locations.
Model compatibility
- The appearance of the heat sink and the number of screws may vary if your computer has an integrated graphics card.

Manual page author
David Miller
Documentation analyst
Organizes user manual content into clear summaries, with attention to model details, product context, and everyday usability.