Electronics / Networking
User Manual for Digitus 2-Port USB 2.0 Wireless Network Server DN-13024
Learn how to set up and configure your Digitus 2-Port USB 2.0 Wireless Network Server (DN-13024). This guide covers hardware installation, software setup, printer/scanner connection, and USB storage management.
Quick answers from the manual
Quick answer
- The Digitus DN-13024 is a network server that allows you to share USB devices (printers, scanners, storage) over a network. Install the software utility, connect the device via Ethernet, and use the Control Center to manage connections. p. 2, 5, 7
Key actions
- Connect hardware p. 5
- Install software p. 5
- Connect USB device p. 7
First start
- Connect the device to your router via Ethernet, power it on, install the software from the CD, and open the Control Center to manage connected devices. p. 5, 6
Problems and fixes
Device not appearing in Control Center
Check if the device is powered on and the Ethernet cable is connected to the router.
p. 3, 5
Cannot connect to USB device
Ensure no other user is currently connected to that device.
p. 8Maintenance and reset
- Reset to factory defaults p. 4
Technical specifications
| Parameter | Value | Meaning | Pages |
|---|---|---|---|
| Wireless Speed | 300 Mbps | Maximum wireless data transfer rate. | p. 1 |
Where to find it in the PDF
- Getting Started p. 2
- Hardware Installation p. 5
- Software Installation p. 5
- Configuration p. 6
Table of contents
Manual images
Click an image to enlargeQuick guide from the manual
The Digitus 2-Port USB 2.0 Wireless Network Server (DN-13024) allows you to share USB devices, such as printers, scanners, and storage drives, over a network. To get started, ensure you have a Windows 7 or 10 PC, an Ethernet cable, and the included software CD. The device requires a wired connection to your router and provides wireless access to connected USB peripherals.
Product Overview
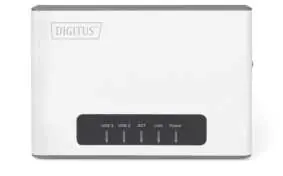
The device features several LED indicators to monitor status:
- Power: Solid green when powered on.
- Link: Green when data is transmitted/received via LAN; orange when wireless connection is successful.
- ACT: Blinking green when wireless is active; blinks rapidly during data transmission.
- USB1/USB2: Indicates activity on the respective USB ports.
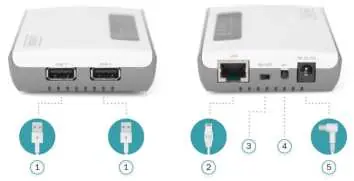
The rear panel includes two USB 2.0 ports, a LAN port, an On/Off power switch, a WPS/Init button (hold 5s for WPS, 15s for factory reset), and a power port.
Hardware Installation
- Connect one end of an Ethernet cable to the device's LAN port and the other to your network router.
- Connect your USB device (printer, scanner, or storage) to one of the USB ports using a USB cable.
- Plug in the power adapter and switch the device to the "ON" position.
- Verify the connection by checking the LED indicators.
Software Installation
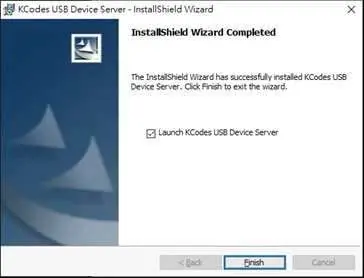
- Insert the provided Setup CD into your computer.
- Run the setup utility. If the auto-load page does not appear, navigate to your CD/DVD drive and run autorun.exe.
- Follow the on-screen instructions to complete the installation of the Device Server Control Center.
Configuration and Usage
The Control Center is the primary interface for managing your devices:
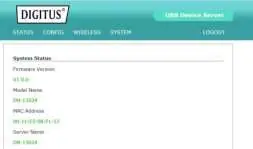
- Accessing the device: Open the Control Center from your desktop. It will automatically search for the server.
- Login: Double-click the device to open the web interface. The default username and password are admin.
- Connecting devices: Select the desired USB device in the Control Center and click Connect. This simulates a direct USB connection to your PC.
- Disconnecting: Always click Disconnect when finished so other users can access the device.
Printing and Scanning
To use a printer or scanner over the network:
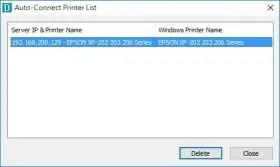
- Auto-Connect Printer: In the Control Center, select the printer and choose Set Auto-Connect Printer. This allows the system to automatically connect to the printer when a print job is issued.
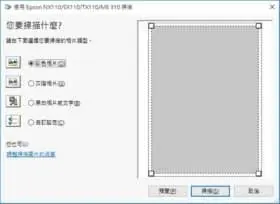
- Scanning: Select the scanner in the Control Center and click Network Scanner. The software will handle the connection automatically.
USB Storage
USB storage devices must be manually connected via the Control Center. Once connected, the drive will appear as a new disk on your PC. Always use the Safely remove USB Mass Storage Device option in your system tray before disconnecting the device in the Control Center to prevent data loss.
Official resources from the manual
Practical help
Common problems
Device not detected in Control Center
Ensure the device is powered on, the Ethernet cable is securely connected to the router, and the Control Center software is running.
Cannot connect to a USB device
Only one PC can connect to a specific USB device at a time. Ensure the previous user has clicked 'Disconnect' in the Control Center.
Before use
- Ethernet cable
- USB cable for the peripheral device
- PC with CD-ROM drive
- Windows 7 or 10 operating system
- Power adapter (included)
Specs in practice
- WPS/Init Button
- Hold for 5 seconds to activate Wi-Fi Protected Setup (PBC); hold for 15 seconds to reset the device to factory defaults.
- USB 2.0 Ports
- Used to connect printers, scanners, or storage devices to the network.
Images and diagrams
- The rear panel contains the LAN port, power switch, WPS/Init button, and power input.
- The Control Center interface allows you to manage connections, view device status, and configure auto-connect settings.
Model compatibility
- Requires Windows 7 or 10.
- Supports USB printers, scanners, and mass storage devices.
- Only one user can connect to a specific USB device at a time.

Manual page author
Emily Carter
User documentation editor
Prepares concise manual descriptions and highlights the most useful setup, operation, and maintenance information for readers.