Smart Home / Smart Doorbells
DiO 150m Wireless Pushbutton User Guide
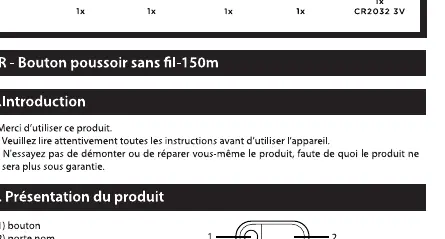
Quick guide for the DiO 150m Wireless Pushbutton. Learn how to install the battery, pair the button with your chime, mount it on the wall, and link it to DiO 1.0 modules.
Table of contents
Manual images
Click an image to enlargeQuick Guide
This guide helps you set up your DiO 150m Wireless Pushbutton. The device is designed to trigger a DiO chime or link with other DiO 1.0 modules. Key steps include inserting the CR2032 battery, pairing the button with your receiver, and mounting it securely. Avoid installing the button on metal or PVC surfaces, as these materials can significantly reduce the transmission range.
Battery Installation
To install or replace the battery:
- Use a flat-head screwdriver to open the back cover of the pushbutton.
- Insert the CR2032 battery, ensuring you respect the correct polarity (+/-).
- Close the cover securely.
Pairing with Chime
To pair the button with your chime:
- Insert the battery into the chime unit.
- The chime will emit a 'Ding Dong' sound, indicating it is in pairing mode.
- Press the button on the pushbutton.
- A second 'Ding Dong' sound confirms that the pairing was successful.
Note: You can link up to 8 pushbuttons to one chime. If you add a 9th button, the first one linked will be automatically disconnected.
Wall Mounting
There are two methods for mounting the pushbutton:
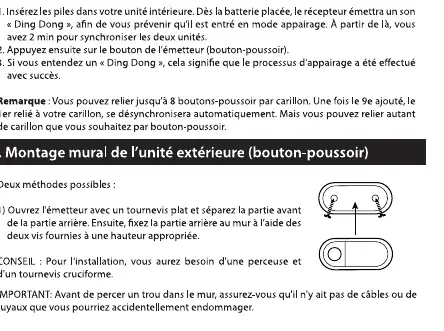
- Screws: Open the transmitter using a flat-head screwdriver, separate the front and back sections, and mount the rear section to the wall using two screws.
- Adhesive: You can also attach the transmitter to a flat surface using the provided double-sided adhesive tape.
Note: If you mount the button on a metal or PVC surface, the transmission range will be reduced.
Resetting the Unit
If you need to delete your pairing settings:
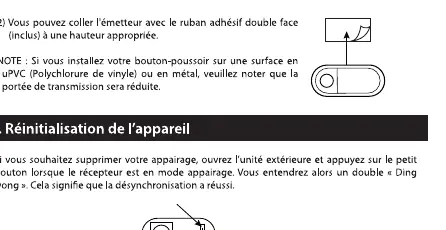
- Open the transmitter.
- Press the small button inside the unit.
- You will hear a 'Ding Dong' sound, which confirms that the synchronization has been reset.
Linking to DiO 1.0
This product is compatible with all DiO 1.0 modules. To link, ensure your DiO 1.0 module is in pairing mode (refer to the module's specific instructions), then press the pushbutton. The module will light up to confirm the connection.
Safety Information
- Keep new and used batteries out of the reach of children.
- If the battery compartment does not close properly, stop using the product and keep it out of the reach of children.
- If you think batteries may have been swallowed, consult a doctor immediately.
- Swallowing a battery can have serious consequences; internal burns within two hours, or even death.
- Recycle used batteries in line with environmental protection regulations.
Technical Specifications
- Frequency: 433.92 MHz
- Radio frequency power: <20mW (EIRP)
- Transmission range: 150m (in open field)
- Weatherproof: IP44
- Battery: 1x CR2032 3V (included)
Practical help
Common problems
Button does not pair with the chime
Ensure the chime is in pairing mode (listen for the 'Ding Dong' sound) before pressing the button. Check that the battery is inserted correctly.
Reduced transmission range
Avoid mounting the button on metal or PVC surfaces, as these materials interfere with the radio signal.
Before use
- Check that the CR2032 battery is inserted with the correct polarity (+/-).
- Ensure the chime is ready to receive the pairing signal.
- Choose a mounting location away from metal surfaces.
- Verify the battery is not expired.
Specs in practice
- Frequency: 433.92 MHz
- The standard radio frequency used for DiO 1.0 devices.
- Battery: CR2032
- Standard 3V lithium coin cell battery.
Images and diagrams
- Battery insertion: Open the back cover with a flat screwdriver to access the battery compartment.
- Mounting: Use the provided screws or double-sided adhesive tape.
Model compatibility
- Compatible with all DiO 1.0 modules.

Manual page author
Emily Carter
User documentation editor
Prepares concise manual descriptions and highlights the most useful setup, operation, and maintenance information for readers.