Lighting / Stage Lighting
User Manual for Elation Professional KL Fresnel 6 CW PO
Quick guide for the Elation Professional KL Fresnel 6 CW PO. Includes installation, rigging, DMX settings, maintenance, and troubleshooting instructions.
Table of contents
Manual images
Click an image to enlargeQuick guide from the manual
The Elation Professional KL Fresnel 6 CW PO is a high-performance lighting fixture intended for use by trained personnel only. It is not suitable for private use. Before operating, ensure the fixture is properly grounded and kept away from flammable materials. The unit is designed for dry, indoor environments only. Always allow the fixture to cool for approximately 15 minutes before servicing.
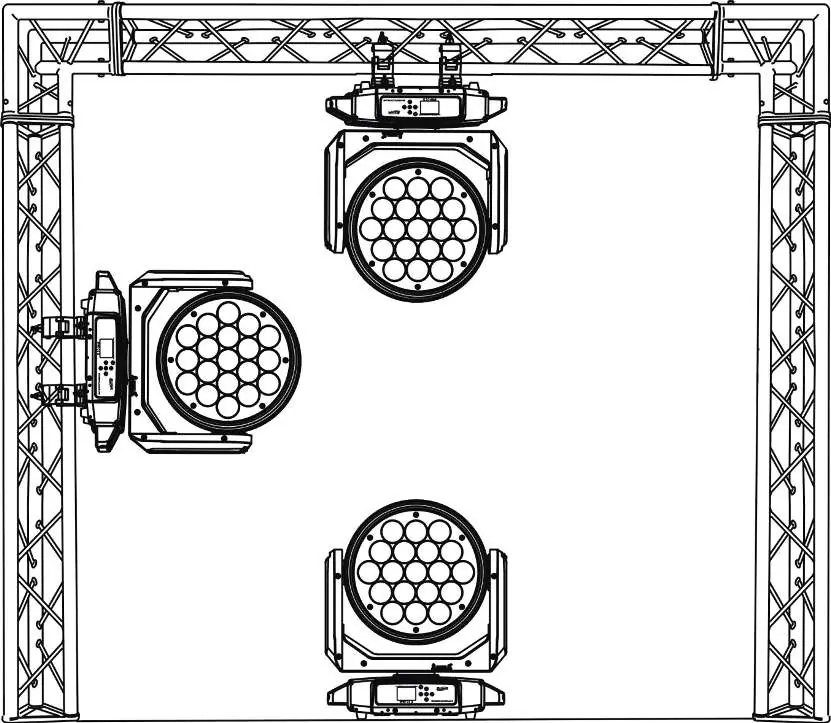
Installation and Rigging
Before rigging, consult a professional installer to ensure the mounting surface can support the combined weight of the fixture and accessories. The fixture can be installed hanging from a horizontal truss, suspended sideways from a vertical truss, or standing upright on a flat surface.
- Clamp Installation: Secure an appropriately rated clamp to the mounting yoke.
- Safety Cable: Always attach a safety cable to the designated rigging point on the fixture body when installing in a suspended environment.
- Clearance: Maintain at least 6 inches (15cm) of space between the fixture and other devices or walls for proper cooling.
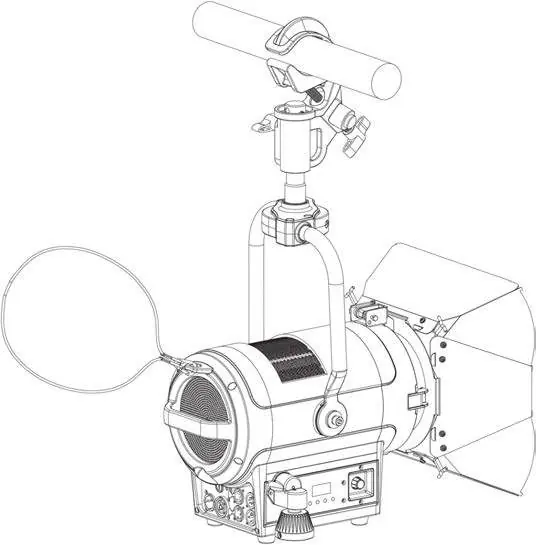
Accessory Installation
The fixture includes a removable gel frame and barndoors.
- Gel Frame: Release the lens frame latch, flip it upward, slide the gel frame into the slot, and secure the latch back down until it clicks.
- Barndoors: Follow the same latch procedure to install the barndoors in the slot in front of the lens and gel frame. Unfold the panels carefully.
Control Panel and System Menu
The control panel on the side of the fixture allows for system adjustments. Press the MODE button to access the main menu, use UP/DOWN to navigate, and ENTER to select and confirm settings. The display turns off after 30 seconds of inactivity.
- Manual Dimming: Press the encoder knob to enter Manual Dimmer Mode. Turn the knob to adjust intensity.
- Fan Control: Modes include Auto (default), High (for efficient cooling), and Low (for noise-critical environments).
- System Reset: Use the DFSE option in the Function menu to reset to default settings.
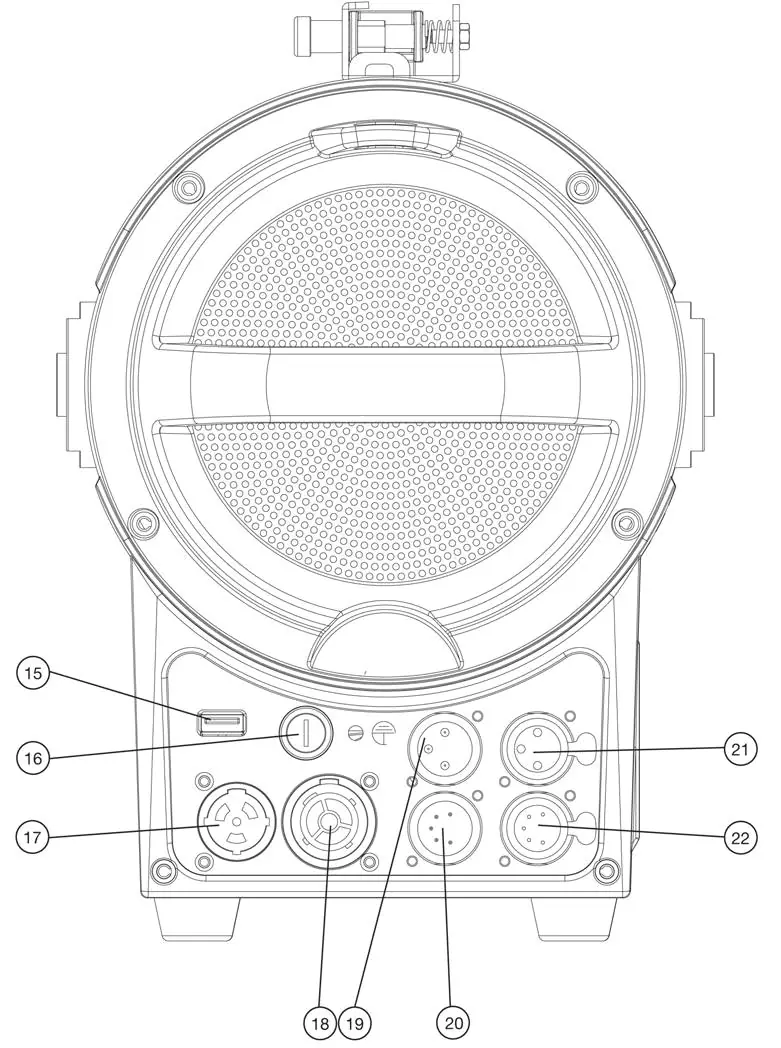
DMX and RDM
The fixture supports RDM (Remote Device Management) for bi-directional communication. It offers five DMX channel modes (1, 2, 3, 4, 5). Refer to the DMX Traits section in the manual for detailed channel values regarding dimmer intensity, strobe effects, and dimmer curves.
Maintenance and Cleaning
Disconnect power before performing any maintenance. Clean the external lens surface periodically with a soft cloth to prevent dirt accumulation. Never use alcohol, solvents, or ammonia-based cleaners. Perform a detailed electrical check every three months to ensure circuit contacts are in good condition.
Specifications
- Source: 150W Cool White LED Engine, 5,600K, 97CRI.
- Power: AC 100-240V, 50/60Hz, 180W Max.
- Operating Temperature: 14°F to 113°F (-10°C to 45°C).
- Zoom Range: 16° - 39°.
- Weight: 18.5 lbs. (8.4kg).
Troubleshooting
If the unit displays an error code, refer to the Error Codes section. The most common error is 'Temp error', which indicates an issue with the LED temperature. Ensure the fan inlets are clean and the fixture is not blocked.
Practical help
Common problems
Fixture does not power on
Check power connection and the fuse (T3A / 250V).
Temp error
Check LED temperature; ensure proper ventilation and that air inlets are not blocked.
Fixture overheating
Ensure 6 inches (15cm) clearance from walls/devices and check fan operation.
Before use
- Check shipping carton for damage
- Verify all accessories (Barn Doors, Junior Pin, Gel Frame, Power Cable) are present
- Ensure installation surface can support the weight
- Attach safety cable for suspended installations
- Verify ambient temperature is within 14°F to 113°F
Specs in practice
- Power Consumption
- 180W Max
- Operating Temperature
- 14°F to 113°F (-10°C to 45°C)
- DMX Channels
- 1, 2, 3, 4, or 5 channel modes
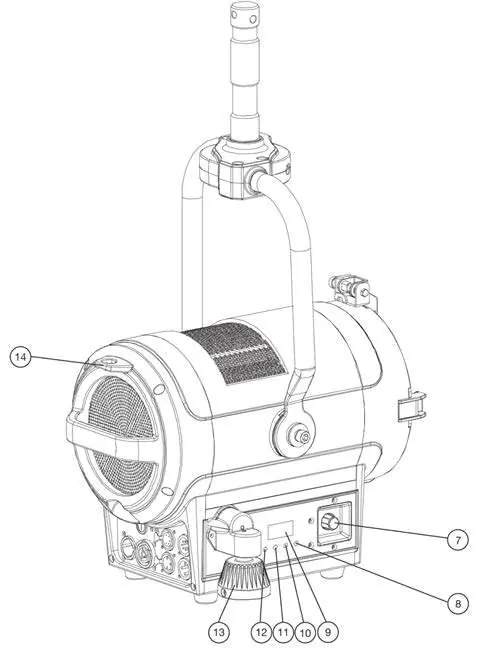
Images and diagrams
- Overview of parts (Barn doors, Yoke, Knobs)
- Clamp and safety cable installation points
- Control panel button layout
Model compatibility
- Intended for indoor use only
- Not suitable for private use; trained personnel only
- Do not plug into dimmer pack

Manual page author
David Miller
Documentation analyst
Organizes user manual content into clear summaries, with attention to model details, product context, and everyday usability.