Automotive / Brake Systems
Eurowise 12V VR6 Intake Installation Guide
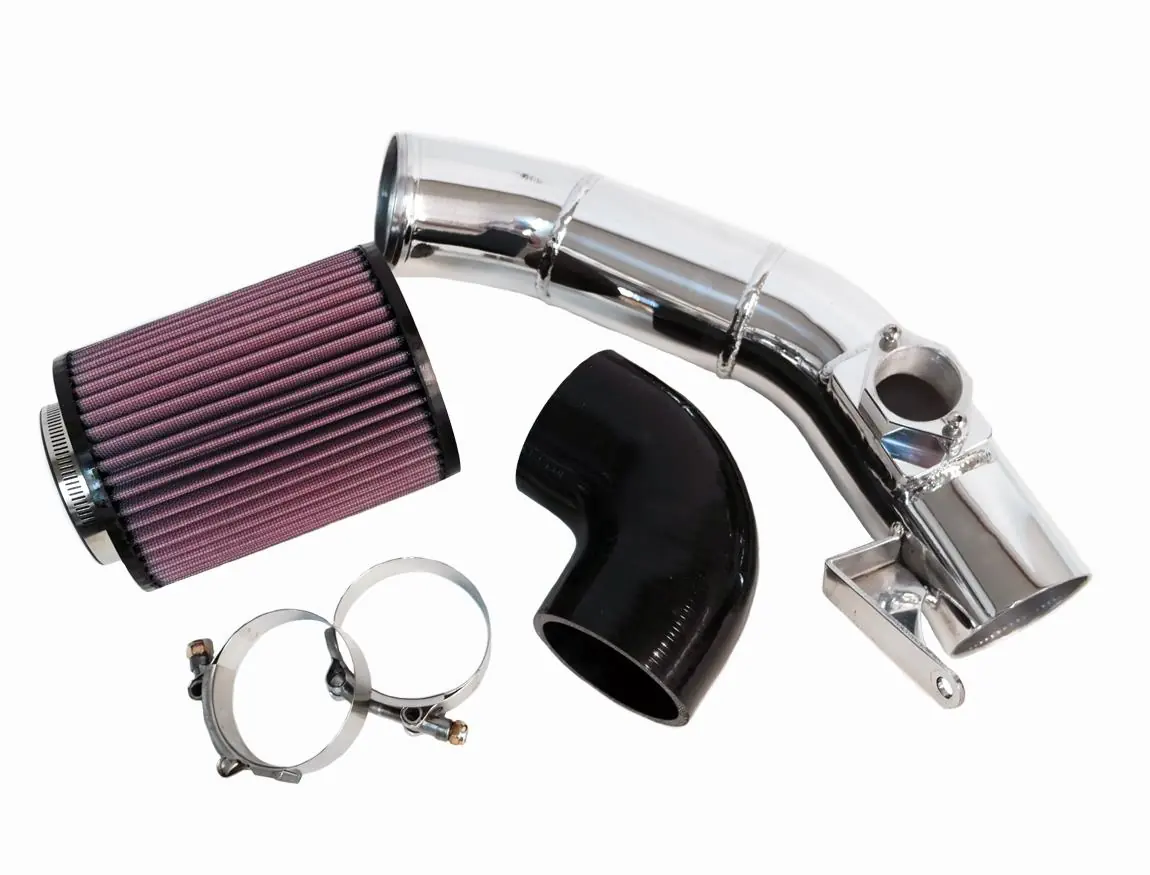
Installation guide for the Eurowise 12V VR6 intake system. Includes step-by-step instructions for removing the factory air box, installing the silicone elbow, MAF sensor, aluminum pipe, and air filter.
Table of contents
Manual images
Click an image to enlargeQuick guide from the manual
This guide provides instructions for installing the Eurowise 12V VR6 intake system. Ensure you have basic mechanical tools before starting. Do not fully tighten clamps until the entire system is in place to allow for necessary adjustments.
Installation steps
Step 1: Removal of factory components
Remove the factory air box completely, including the intake pipe connecting the box to the throttle body. Disconnect the Mass Air Flow (MAF) sensor connector before removing the assembly from the vehicle.
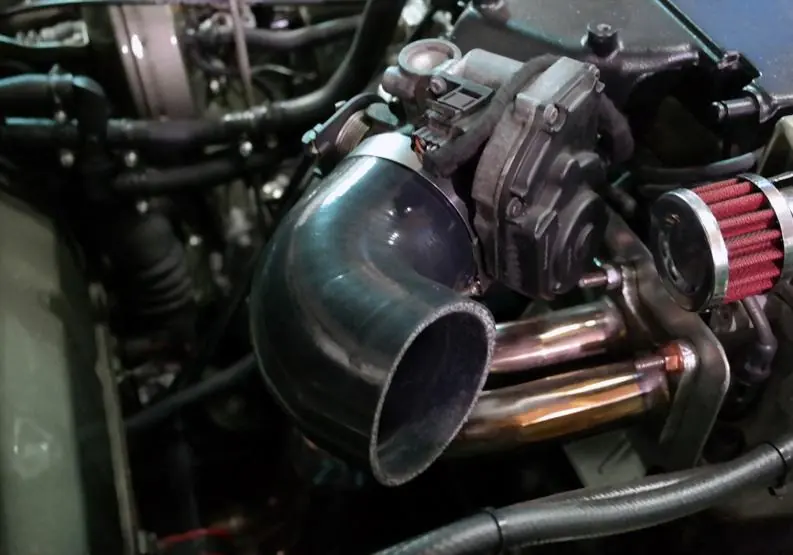
Step 2: Installing the silicone elbow
Install the 90-degree silicone elbow onto the throttle body. Secure it using the supplied t-bolt clamp. Do not tighten the clamp fully at this stage to allow for adjustments during the installation of the intake pipe.
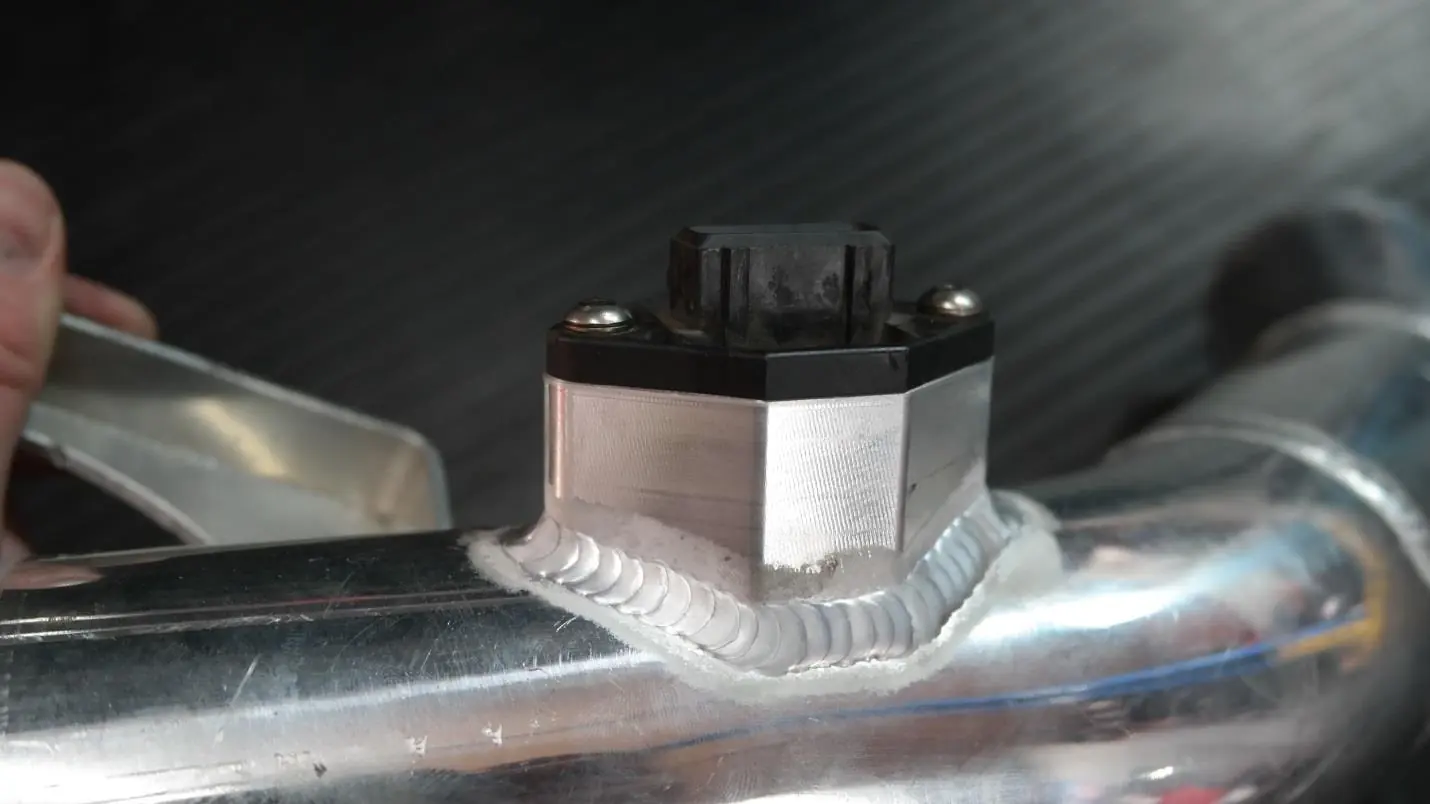
Step 3: Installing the MAF sensor
Install the Mass Air Flow sensor into the aluminum intake pipe and secure it with the supplied hardware. Ensure the sensor is pressed into the pipe with no gap for a flush, tight seal.
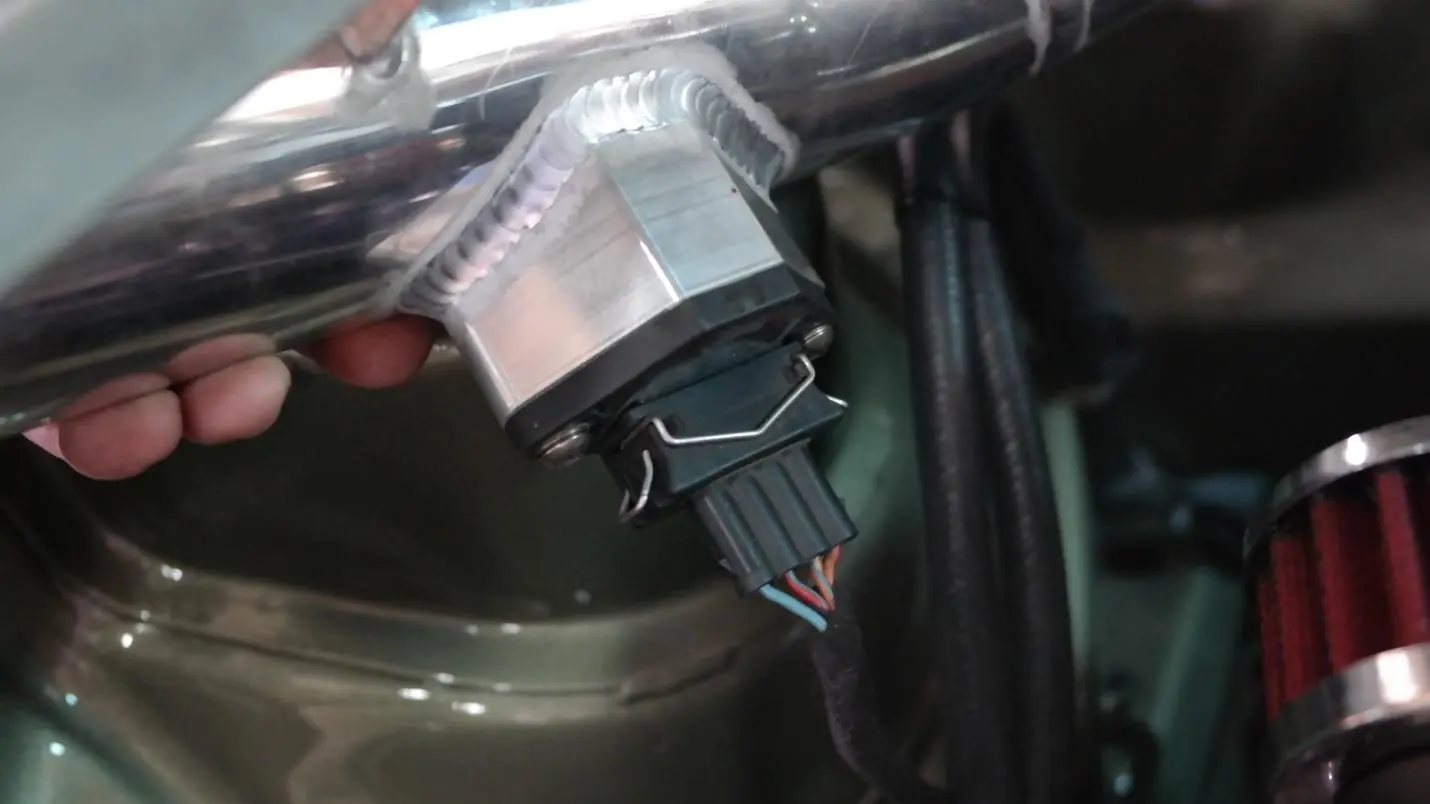
Step 4: Connecting the intake pipe
Connect the Mass Air Flow sensor plug. Insert the aluminum pipe into the silicone elbow and secure it using the t-bolt clamp. Again, do not tighten completely to allow for later adjustments.
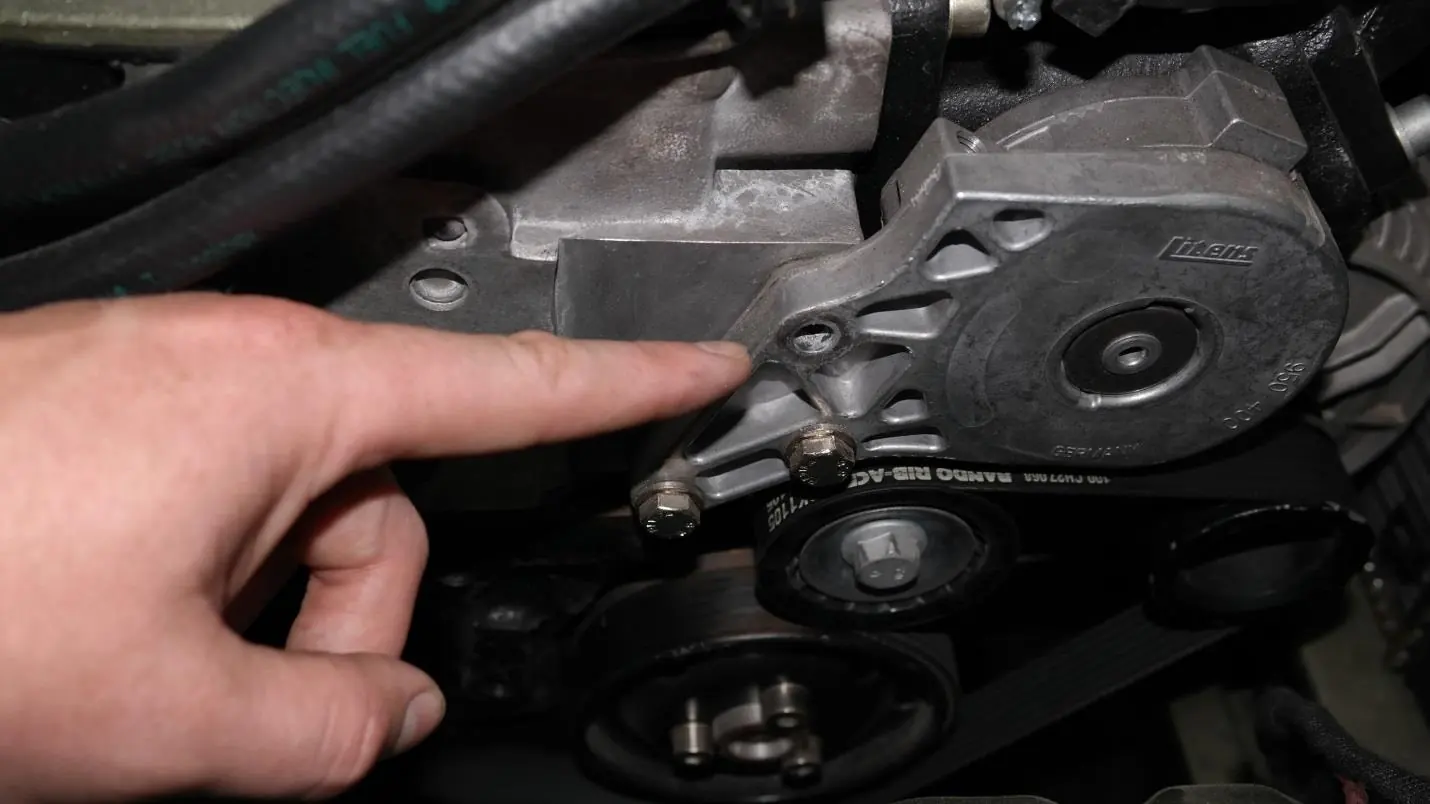
Step 5: Securing the intake pipe
Remove the upper belt tensioner bolt (13mm) and use it to secure the intake pipe.
Step 6: Installing the air filter
Install the supplied K&N air filter using the supplied t-bolt clamp.
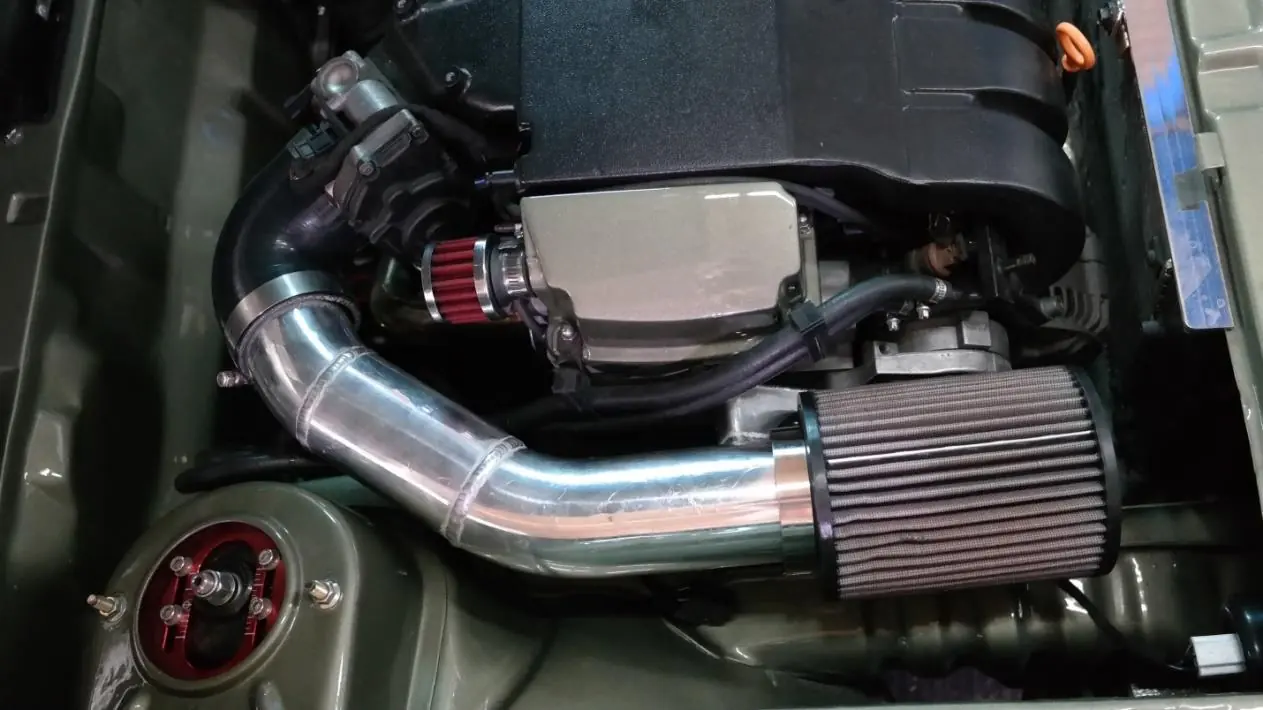
Step 7: Final adjustments
Once the entire kit is in place with the filter installed, tighten all t-bolt clamps securely.
Contact information
If you have any questions, comments, or concerns related to your product, please contact Eurowise. Address: 440 Springbrook Road, Charlotte, NC 28217. Phone: 704-559-8100. Email: [email protected]. Website: www.eurowise.com.
Official resources from the manual
Practical help
Common problems
Intake pipe alignment issues
Do not fully tighten t-bolt clamps until the entire intake system is in place to allow for necessary adjustments.
MAF sensor air leak
Ensure the sensor is pressed into the pipe with no gap for a flush, tight seal.
Before use
- 13mm wrench or socket for the tensioner bolt
- Basic hand tools for removing the factory air box
- Ensure the engine is cool before starting the installation
Images and diagrams
- The manual includes photos showing the removal of the factory air box, the installation of the silicone elbow, the mounting of the MAF sensor, and the final assembly of the intake pipe and filter.
Model compatibility
- Designed for 12V VR6 engines.

Manual page author
Emily Carter
User documentation editor
Prepares concise manual descriptions and highlights the most useful setup, operation, and maintenance information for readers.