General / Other Manuals
Installation Guide for Falcon Ridge Soft Door and Rear Window Combo for Kawasaki Teryx 2014-2017
Quick installation guide for the Falcon Ridge soft door and rear window enclosure for Kawasaki Teryx 2014-2017. Includes step-by-step mounting instructions, cleaning tips, and storage recommendations.
Table of contents
Manual images
Jump to the sectionQuick guide from the manual
This document provides instructions for installing the Falcon Ridge Soft Door and Rear Window Combo on Kawasaki Teryx 2014-2017 models. Installation is best performed in temperatures of 70 degrees F or warmer to ensure proper adhesion of the Velcro strips. If working in colder conditions, store the adhesive Velcro at room temperature before starting.
Installation preparation
Before beginning, ensure you are working on a clean, flat surface. Verify all parts are present:
- Doors: 20x 3" adhesive strips, 2x 4" strips, 2x 10" strips, 2x 30" strips.
- Rear Window: 12x 3" adhesive strips, 2x 4" strips, 2x 18" strips.
- Cab Enclosure: 3 panels.
Rear Window installation
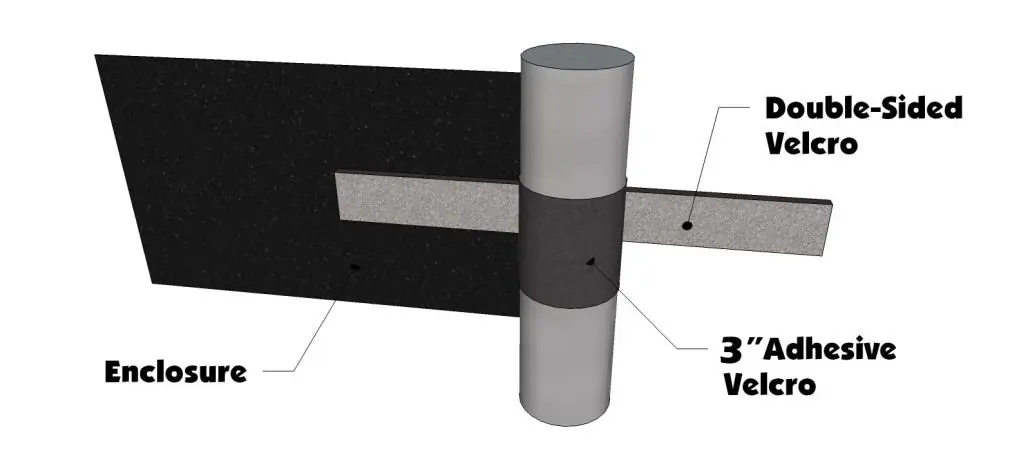
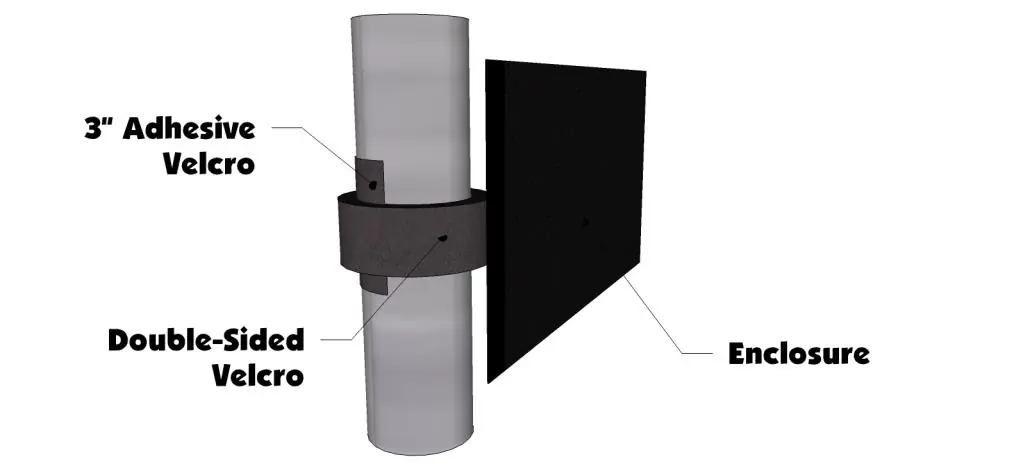
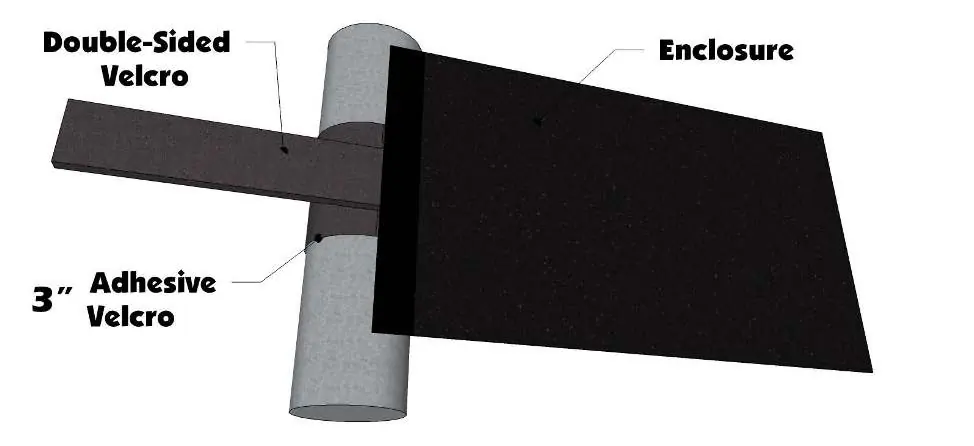
- Place 4" adhesive Velcro strips on each side of the Teryx where the side tube meets the top tube.
- Hang the Rear Window from these strips, centering it properly.
- Attach double-sided Velcro strips at the top corners, pulling the window tight from side to side.
- Use 3" adhesive strips to secure the double-sided Velcro in place.
- Work down each side of the window, attaching double-sided strips to the center side bar. Note: The window is designed to leave most of the center bar exposed for door magnet functionality; do not over-tighten.
- Attach 14" Velcro strips and straps along the bottom to the seat frame under the cushion.
Door installation
- Place 4" adhesive Velcro strips on the frame where the center side bar meets the top of the roll cage.
- Align the door with the frame and attach double-sided Velcro strips along the sides.
- Attach the strip at the top rear corner of the door. If the Rear Window is already installed, overlap the Velcro as needed.
- Place the 30" adhesive Velcro strip on the outside of the door to match the bottom of the soft door.
- Attach the 10" vertical Velcro piece at the front corner.
Cleaning and storage
To maintain the enclosure:
- Clean with a soft rag or sponge using mild liquid detergent and warm water. Never use a dry cloth on windows.
- Storage: Always roll the cab for storage; folding will damage the windows. Roll to approximately 8 inches in diameter and store at room temperature.
Practical help
Common problems
Adhesive Velcro not sticking properly
Ensure installation is done in temperatures of 70 degrees F or warmer. If cold, store Velcro at room temperature before applying.
Damage to window panels
Never rub windows with a dry cloth. Always roll the enclosure for storage instead of folding it.
Before use
- Verify all adhesive Velcro strips (3", 4", 10", 18", 30") are present.
- Ensure the installation area is clean and free of dirt.
- Check that the ambient temperature is at least 70 degrees F.
- Confirm the Rear Window is installed before the doors for easier alignment.
Specs in practice
- Storage diameter
- Roll the cab enclosure to approximately 8 inches in diameter to prevent damage.
Images and diagrams
- The manual includes diagrams showing the placement of double-sided Velcro strips on the roll cage tubes.
- Visual guides illustrate how to secure the enclosure panels using the provided adhesive strips.
Model compatibility
- Designed specifically for Kawasaki Teryx 2014-2017 models.

Manual page author
David Miller
Documentation analyst
Organizes user manual content into clear summaries, with attention to model details, product context, and everyday usability.