Power / Batteries & Chargers
User Manual for Gardena EasyCut 110/18V P4A, HighCut 250/18V P4A, and HighCut 360/18V P4A Battery Pruning Loppers
Quick guide for the Gardena EasyCut 110/18V P4A, HighCut 250/18V P4A, and HighCut 360/18V P4A battery-powered pruning loppers. Includes assembly, operation, maintenance, and troubleshooting steps.
Quick answers from the manual
Quick answer
- The Gardena EasyCut 110/18V P4A and HighCut 250/18V P4A/360/18V P4A are battery-powered pruning loppers designed for delimbing trees, hedges, and shrubs with branches up to 28 mm in diameter. p. 1, 5
Key actions
- Assembly p. 6, 12
- Starting the lopper p. 7, 13
First start
- Charge the battery fully before first use. p. 7, 13
Problems and fixes
Lopper does not start
Check battery charge, temperature, or if an obstacle blocks the motor.
p. 8, 14Maintenance and reset
- Clean the lopper with a damp cloth and the airflow slots with a soft brush. p. 8, 13
Technical specifications
| Parameter | Value | Meaning | Pages |
|---|---|---|---|
| Max. branch diameter | 28 mm | Maximum cutting capacity | p. 8, 14 |
Where to find it in the PDF
- Assembly p. 6, 12
- Operation p. 6, 12
- Maintenance p. 8, 13
- Technical Data p. 8, 14
Table of contents
Manual images
Click an image to enlargeQuick guide from the manual
This manual provides instructions for the Gardena EasyCut 110/18V P4A, HighCut 250/18V P4A, and HighCut 360/18V P4A battery-powered pruning loppers. These tools are designed for delimbing trees, hedges, shrubs, and bushes with branches up to 28 mm in diameter in private gardens. They are not intended for professional use.
Assembly
Without extension tube (Art. 14774): Slide the cutting head into the handle unit until it stops, ensuring the nose slides into the opening. Tighten the nut.
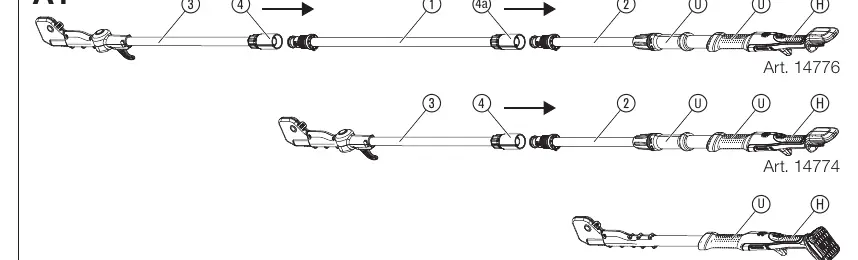
With extension tube (Art. 14776): Slide the extension tube into the handle unit until it stops, ensuring the nose slides into the opening. Tighten the nut. Then, slide the cutting head into the extension tube until it stops, ensuring the nose slides into the opening. Tighten the nut.
Branch hook (Art. 14774/14776): Slide the branch hook into the holder on the cutting head until the lock audibly engages.
Operation
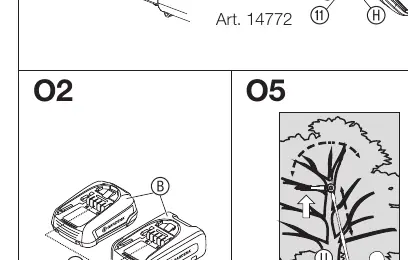
Charging the battery: Push the locking button and remove the battery from the holder. Connect the charger to a mains socket and slide the charger onto the battery. A blinking green light indicates charging; a permanent green light indicates the battery is fully charged.
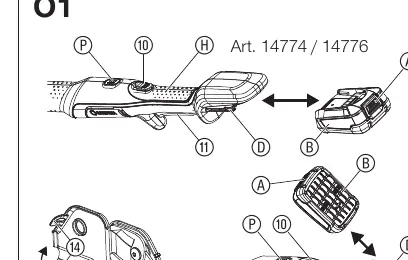
Starting the lopper: Insert the battery into the holder until it audibly engages. Remove the protective cover from the blade. Hold the lopper with one hand on the upper gripping surface and the other on the handle. Slide the safety interlock forward and pull the start lever towards the handle. The blade will perform an initialization movement. The lopper is now ready for operation.
Telescopic tube: Loosen the orange nut, extend the tube to the desired length, and tighten the nut again.
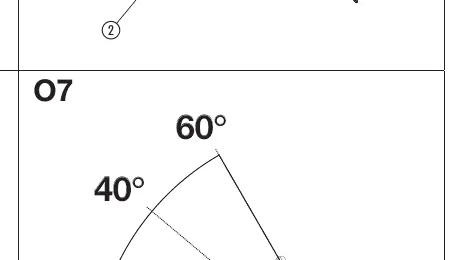
Tilting the cutting head: Press the elbow joint and adjust the cutting head to the desired angle (0° to 60° in 20° increments).
Maintenance
Clean the lopper with a damp cloth. Clean the airflow slots with a soft brush. Do not use water, high-pressure water jets, or chemical cleaners. Clean the battery and charger contacts with a soft, dry cloth.
Storage
Store the product in a dry, enclosed, and frost-free place, out of the reach of children. Remove the battery and slide the protective cover over the blade before storage.
Troubleshooting
If the lopper does not start, check if the battery is empty, if the battery temperature is outside the permissible range, or if an obstacle blocks the motor. If the error LED lights up or flashes, refer to the troubleshooting table in the full manual.
Manufacturer information
GARDENA
Practical help
Common problems
Lopper does not start or stops
Check if the battery is empty, if the battery temperature is outside the permissible range, or if an obstacle blocks the motor.
Charging not possible
Check if the battery is correctly inserted, if contacts are dirty, or if the battery is defective.
Start lever cannot be pushed
The start lever is stuck; release it.
Before use
- Wear protective gear (gloves, eye/head protection).
- Check the area for hidden wires or cables.
- Ensure all locking devices are in the locked position.
- Charge the battery fully before first use.
Specs in practice
- Max. branch diameter
- Maximum thickness of branches the lopper can cut (28 mm).
- Telescopic range
- The length by which the tube can be extended (varies by model).
- Battery voltage
- 18V DC for the POWER FOR ALL system.
Images and diagrams
- A1/A2: Assembly of the cutting head and extension tube.
- A3: Assembly of the branch hook.
- O1: Battery insertion and start lever operation.
- O5: Correct working position.
- O6: Extending the telescopic tube.
Model compatibility
- Compatible with all 18V POWER FOR ALL system batteries.

Manual page author
Michael Turner
Technical manual editor
Reviews PDF manuals for structure, safety notes, and practical product details so readers can find the right information quickly.