Industrial / Air Purifiers
User Manual for Global Industrial 436981 Portable Power Station
Quick guide for the Global Industrial 436981 Portable Power Station. Includes setup instructions, battery connection steps, charging procedures, and safety warnings.
Table of contents
Manual images
Click an image to enlargeQuick guide from the manual
This document provides essential instructions for the Global Industrial 436981 Portable Power Station. Key procedures include the initial battery connection, charging, and safe operation. Always ensure the device is grounded before use and check voltage compatibility with your appliances.
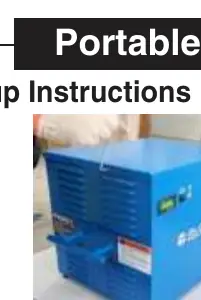
Product Overview
The unit consists of a main housing, lead-acid battery, charger, inverter, relay, power strip, power display, 12V DC power supply, and a heat dissipation fan.

Technical Specifications
- Charging Input Voltage: 100-240VAC 50/60 Hz, 5A (max)
- Load Output AC: 100-120V, 60Hz, 1000W
- USB Output DC: 5V 2.1A
- Charging Time: 5 hours for full charge
- Operating Temperature: 32-104 °F
- Dimensions: 17" x 13.5" x 13.5"
- Weight: 90lbs (Net) / 105lbs (Gross)
Safety Warnings
- Voltage Compatibility: Verify the rated voltage of your appliance matches the power supply output before connecting.
- Over-discharge: Avoid discharging the battery to the cut-off voltage to prevent power loss and shortened battery life. Charge immediately once the cut-off is reached.
- Environment: Keep away from fire, high temperatures, humidity, and rain. Do not wash the product.
- Grounding: The casing must be effectively and firmly grounded before use.
- Maintenance: Do not disassemble the unit. Disconnect the charging cord before opening the case or plugging in devices.
First Time Set-up
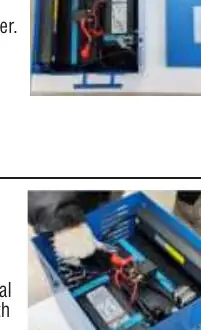
- Open Casing: Loosen the Hex Screws using the included Allen Key.
- Remove Cover: Take off the power cabinet cover.
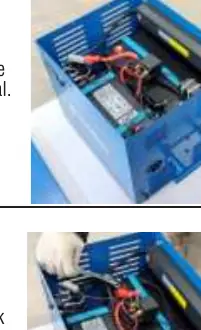
- Identify Terminals: Locate the battery wire terminals. Note that RED corresponds to the Positive (+) terminal.
- Connect Positive: Insert the bolt through the Red (+) wire terminal, add the flat washer and lock washer, then tighten securely onto the battery terminal nut with wrenches.
- Connect Negative: Insert the bolt through the Black (-) terminal. Note that sparking is normal during the first connection. Secure with washers and nut using wrenches.
- Close Casing: Replace the battery cover and securely tighten the Hex Screws.
Charging Instructions
Insert one end of the input line into the charging socket on the housing and the other into an external power source (wall outlet). Ensure the input voltage is within 100-240VAC 50/60Hz. The charger automatically protects the battery by disconnecting when fully charged.
Operation Steps
- Connect your device to the Power Strip on the housing.
- Turn on the power switch located on the front of the housing.
- Turn on the red button on the power strip.
Maintenance
- Unplug and let the unit cool for approximately 10 minutes after a full charge.
- Charge fully before first use and recharge regularly if stored for long periods.
- Periodically clean dust and dirt from the heat dissipation louvers.
- In low temperatures, ensure thermal insulation to prevent battery power loss.
Practical help
Common problems
Buzzer alarm sounds
The battery voltage is lower than 10%. Connect to an external power supply to charge.
Sparks during battery connection
This is normal for the first-time connection when setting up the battery.
Battery power loss in cold weather
Ensure thermal insulation and anti-freezing measures are taken; keep the device in a warm environment.
Inverter not working
Ensure the unit is not currently charging, as the relay disconnects the inverter from the battery during charging.
Before use
- Check that the appliance voltage is compatible with the power supply output.
- Ensure the product casing is effectively and firmly grounded.
- Charge the unit fully before the first use.
- Verify the input voltage is within 100-240VAC 50/60Hz.
Specs in practice
- 300 Charge Cycles
- Estimated service life regarding deep discharge cycles.
Images and diagrams
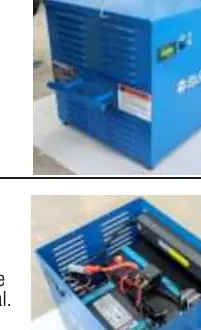
- Front View: Contains the Power Display, System Settings Button, Voltage Control/Power Switch, Inverter Output Switch, and Over-Current Protection Switch.
- Back View: Features the AC Output Sockets, USB Output, and Output Switch.
- Side View: Shows the Heat Dissipation Fan, Charging Line input socket, and Heat Dissipation Louvers.
Model compatibility
- The inverter cannot supply a load while the unit is charging.
- Only use with devices compatible with 100-120V AC output.

Manual page author
Michael Turner
Technical manual editor
Reviews PDF manuals for structure, safety notes, and practical product details so readers can find the right information quickly.