Plumbing / Showers & Tubs
Installation and Maintenance Guide for Hansgrohe Rainfinity 250 1-jet EcoSmart Shower
A comprehensive installation and maintenance guide for the Hansgrohe Rainfinity 250 1-jet EcoSmart shower. Includes technical specifications, assembly instructions, and cleaning procedures.
Quick answers from the manual
Quick answer
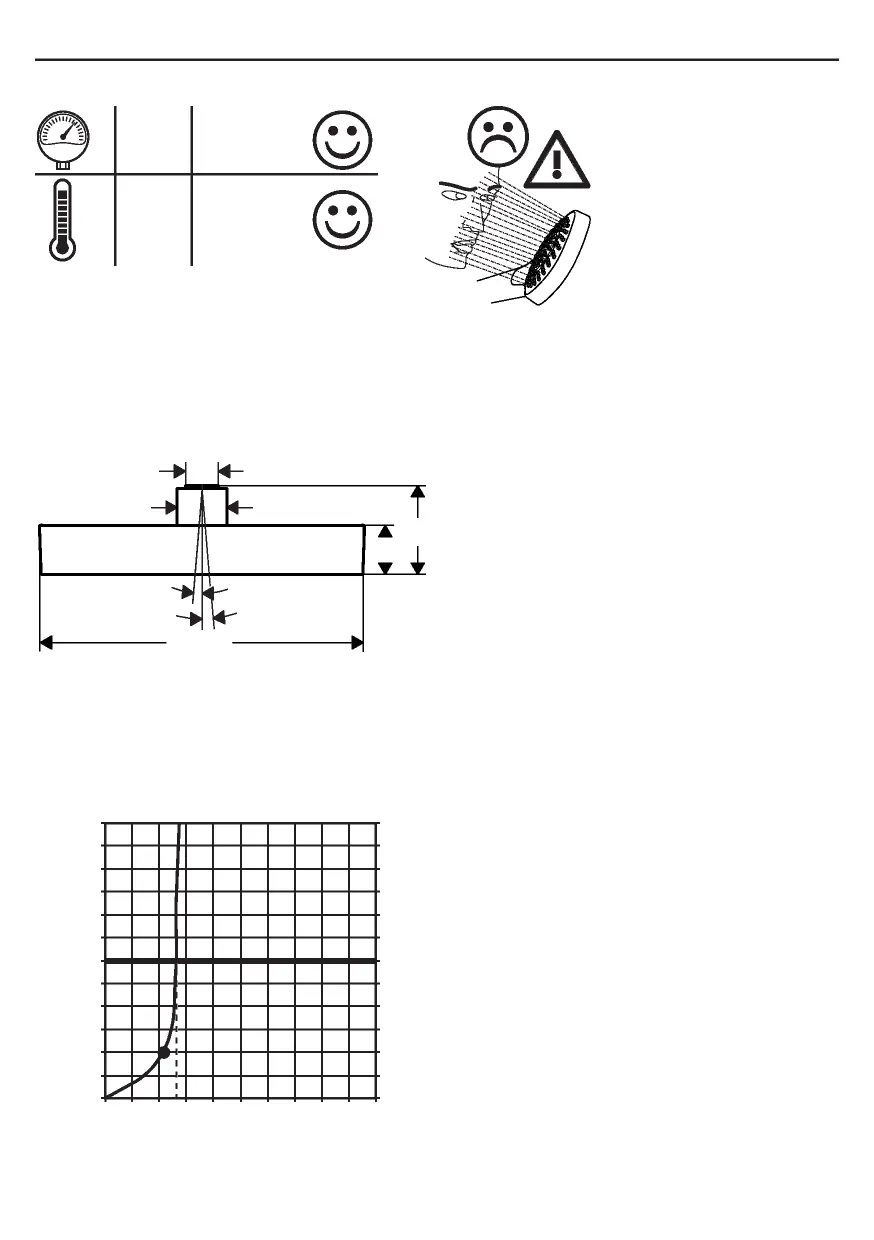
- The Hansgrohe Rainfinity 250 1-jet EcoSmart shower requires a water pressure of 0.1-0.4 MPa and a maximum temperature of 60°C. Maintenance involves rubbing the silicone nozzles to remove lime scale and cleaning the internal filter. p. 2, 3, 5, 6
Key actions
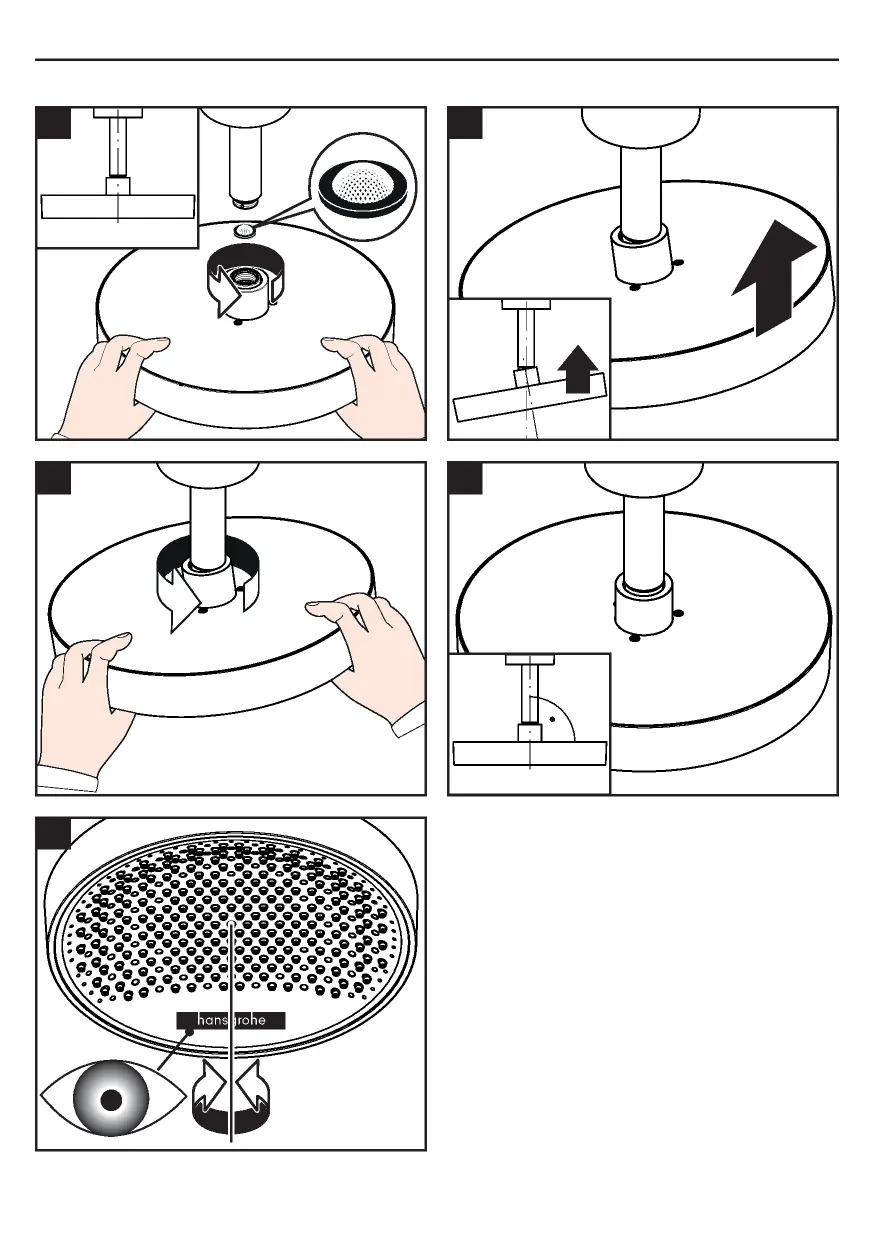
- Install the shower head using the provided assembly steps. p. 3
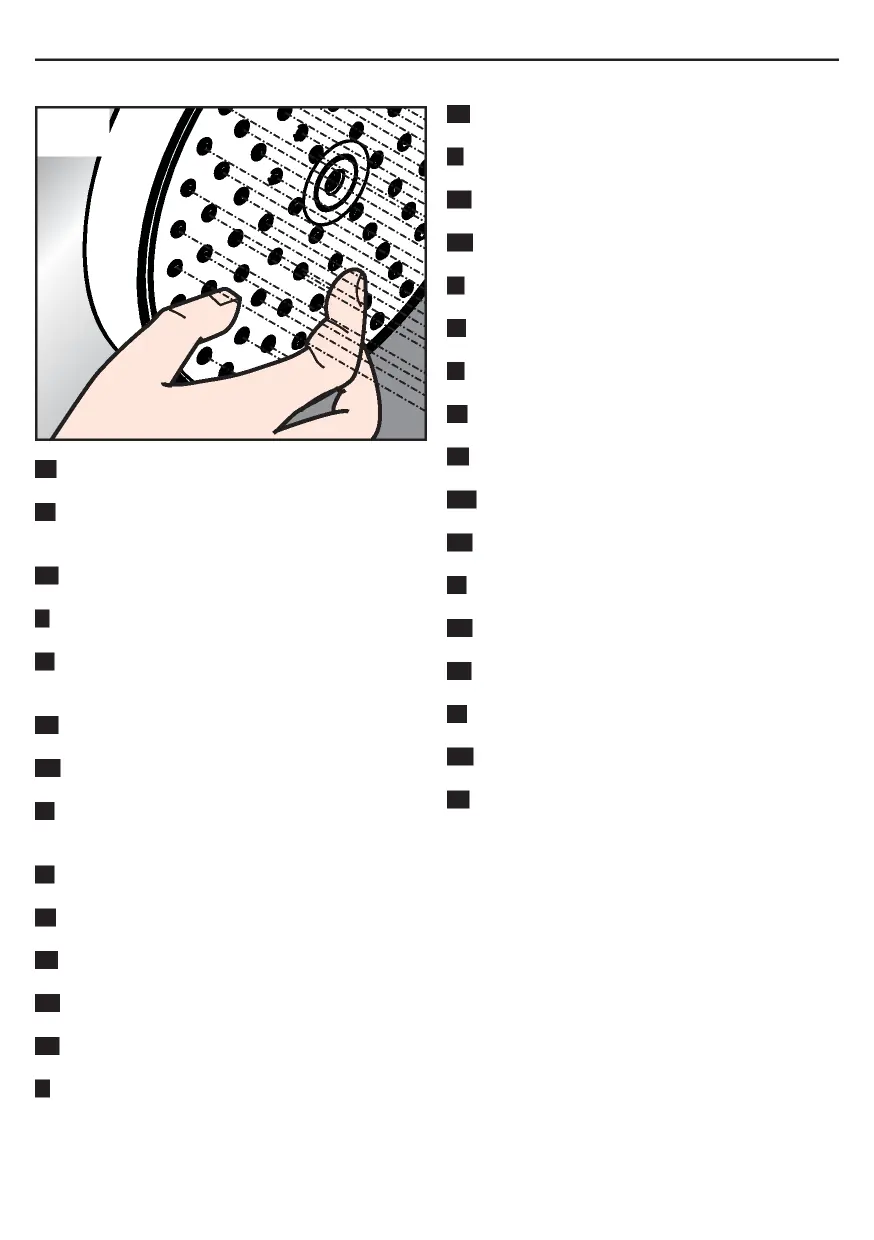
- Clean the spray nozzles by rubbing them. p. 5
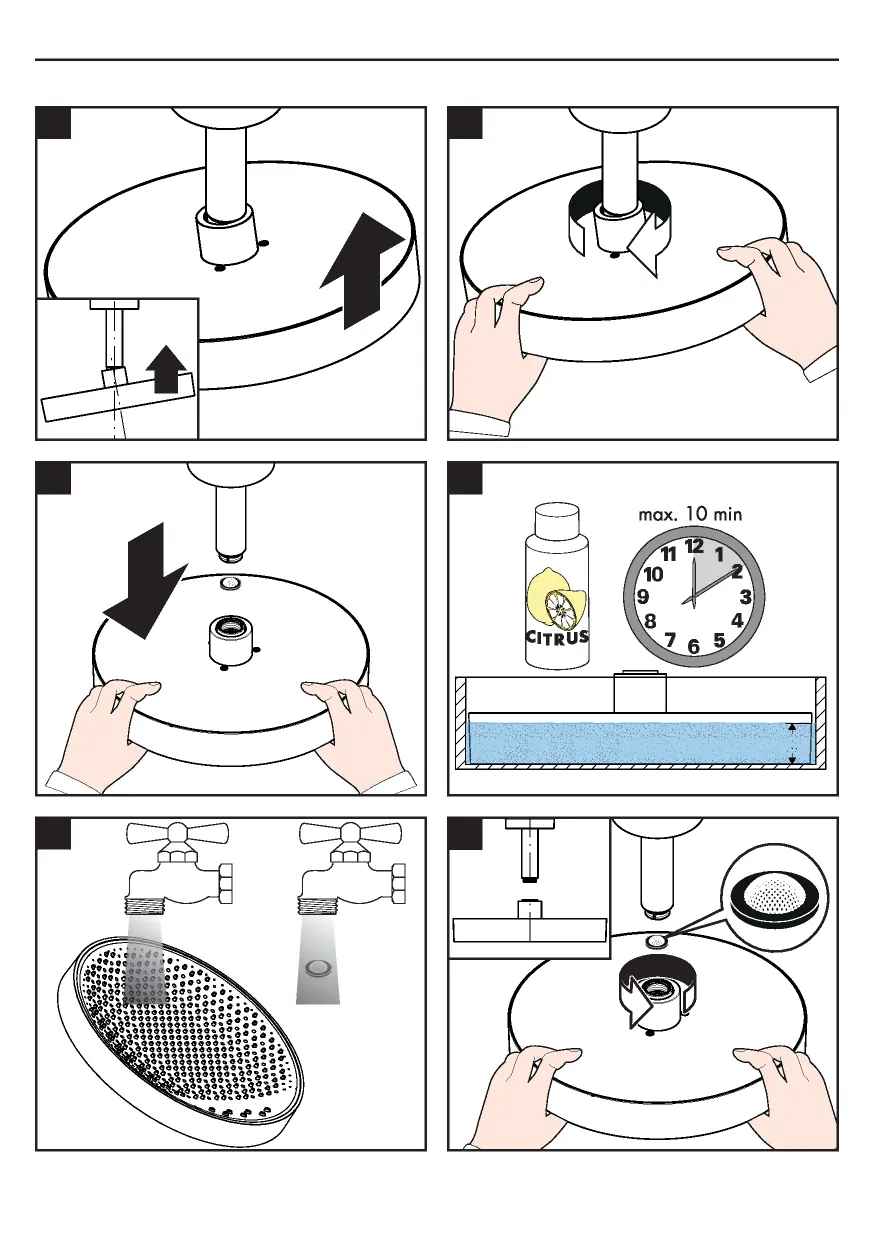
- Clean the filter insert if water flow is restricted. p. 6
Problems and fixes
Lime scale buildup
Rub the silicone nozzles to remove deposits.
p. 5Technical specifications
| Parameter | Value | Meaning | Pages |
|---|---|---|---|
| Operating Pressure | 0.1 - 0.4 MPa | Recommended pressure range | p. 2 |
| Max Temperature | 60°C | Maximum water temperature | p. 2 |
Where to find it in the PDF
- Cover and Model Info p. 1
- Technical Specifications p. 2
- Assembly Instructions p. 3
- Cleaning and Maintenance p. 5, 6, 7
- Spare Parts p. 8
Table of contents
Manual images
Click an image to enlargeQuick guide from the manual
This document provides essential installation and maintenance instructions for the Hansgrohe Rainfinity 250 1-jet EcoSmart shower. The product is designed for optimal performance within specific pressure and temperature ranges. Regular maintenance, particularly cleaning the spray nozzles, is required to ensure longevity and proper water flow.
Technical specifications
- Operating pressure: Recommended 0.1 - 0.4 MPa (1 - 4 bar).
- Maximum operating pressure: 0.6 MPa (6 bar).
- Maximum water temperature: 60°C.
- Connection: G 1/2.
Installation
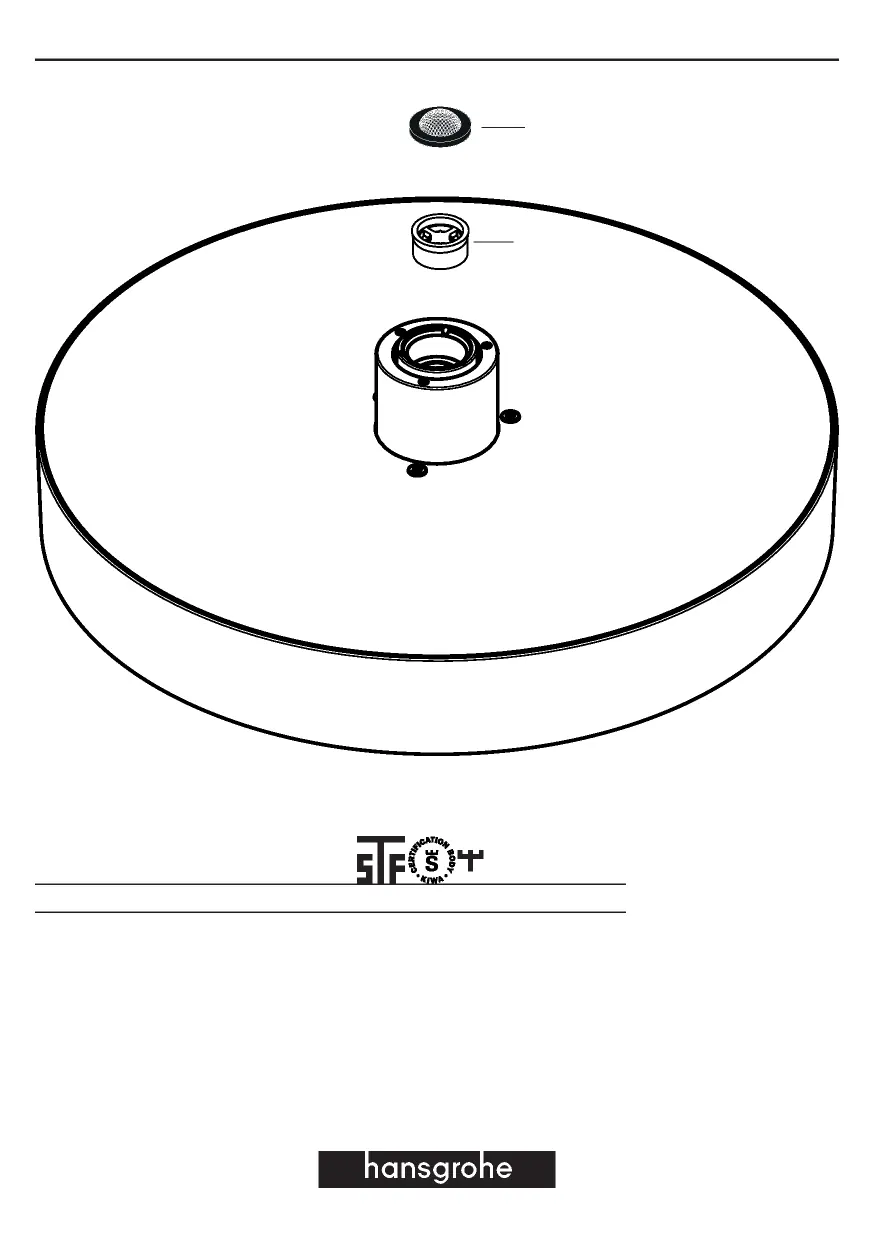
The installation process involves attaching the shower head to the supply pipe. Ensure the filter insert (#94246000) is correctly positioned during assembly. Follow the visual steps provided in the manual to ensure a secure connection and proper alignment of the shower head.

Cleaning and maintenance
The shower head features QuickClean technology, which allows for easy removal of lime scale. Simply rub over the flexible silicone spray nozzles to dislodge deposits. For more thorough cleaning or if flow is restricted, the filter insert may need to be removed and cleaned. Do not use aggressive cleaning agents; follow the manufacturer's cleaning recommendations available at www.hansgrohe.com/cleaning-recommendation.
Official resources from the manual
Manufacturer information
Hansgrohe SE
Practical help
Common problems
Reduced water flow or spray pattern issues
Check for lime scale buildup on the silicone nozzles and rub them to clean. If flow remains restricted, remove and clean the filter insert.
Before use
- Verify that the water pressure is between 0.1 and 0.4 MPa (1-4 bar).
- Ensure the water temperature does not exceed 60°C.
- Confirm the filter insert (#94246000) is installed correctly.
Specs in practice
- Operating Pressure
- The water pressure range (0.1-0.4 MPa) required for optimal shower performance.
- Max Temperature
- The maximum safe water temperature (60°C) for the shower components.
Images and diagrams
- Page 3 illustrates the assembly sequence for attaching the shower head.
- Page 6 details the maintenance procedure for cleaning the filter insert.
- Page 8 provides an exploded view of the spare parts, including the filter insert (#94246000) and the flow restrictor/connection piece (#98091000).
Model compatibility
- Designed for standard G 1/2 connections.

Manual page author
Emily Carter
User documentation editor
Prepares concise manual descriptions and highlights the most useful setup, operation, and maintenance information for readers.