HVAC / Parts & Accessories
UPS Battery Replacement Instructions for Honeywell Thor CV31
A step-by-step guide for replacing the UPS battery in the Honeywell Thor CV31. Includes removal and installation procedures, along with critical torque specifications for reassembly.
Table of contents
Manual images
Click an image to enlargeQuick Guide for Battery Replacement
This document outlines the procedure for replacing the UPS battery (part number 1021AB01) in the Honeywell Thor CV31 unit. Ensure you have the correct replacement battery and a compatible screwdriver before beginning. Follow the torque specifications strictly to avoid damaging the unit.
Battery Removal Procedure
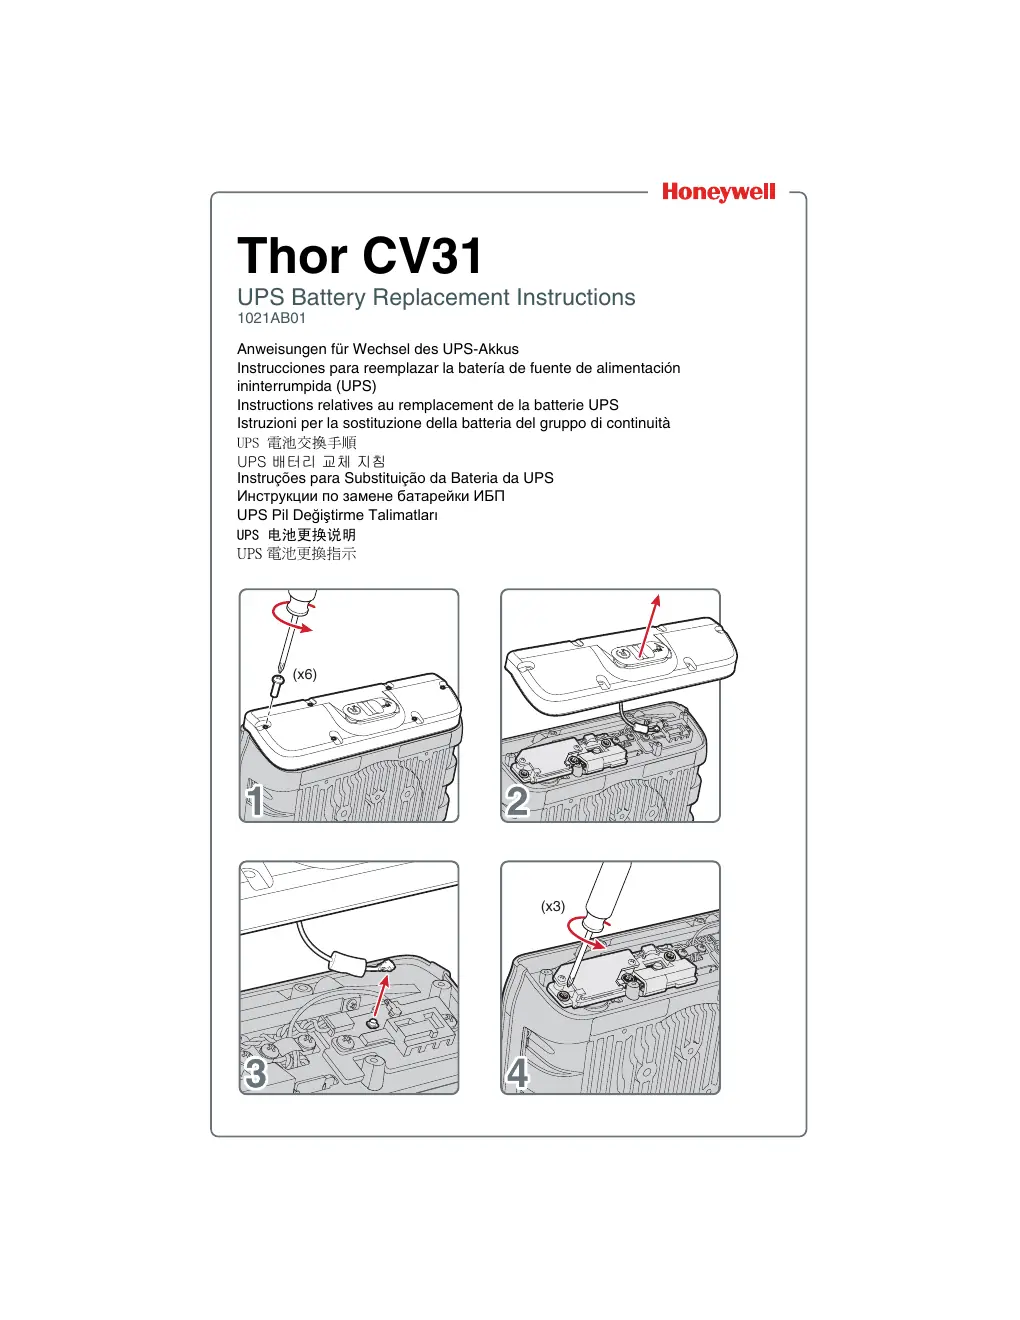
- Place the unit on a stable, clean surface.
- Remove the 6 screws securing the outer cover.
- Carefully lift and remove the cover.
- Disconnect the internal cable connected to the main board.
- Remove the 3 screws securing the battery bracket.
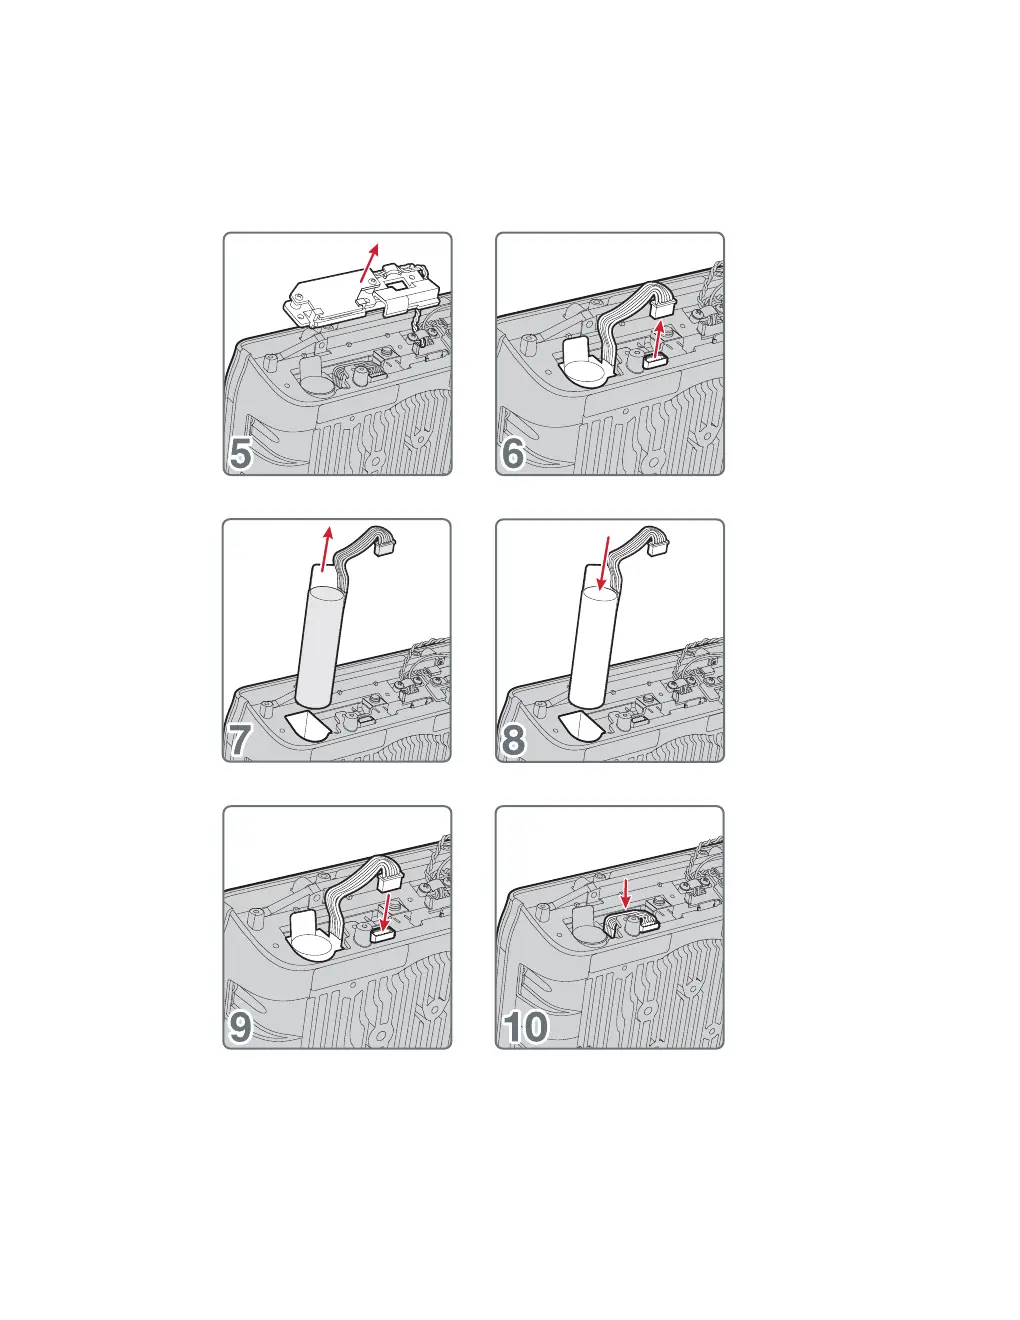
- Lift the battery bracket out of the unit.
- Disconnect the battery connector from the board.
- Remove the old battery from the compartment.
Battery Installation Procedure
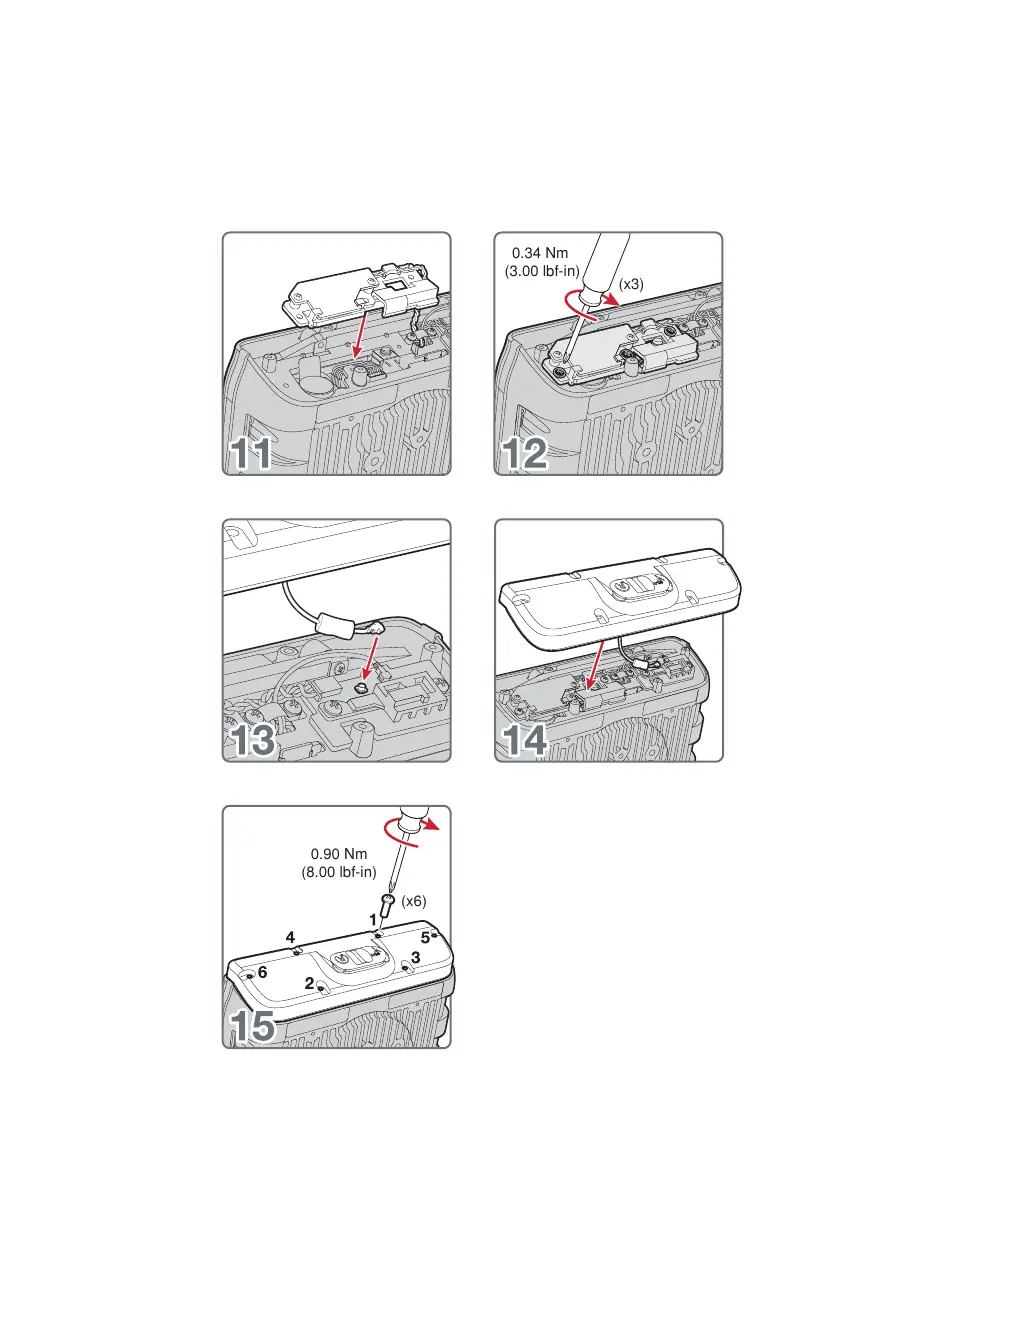
- Insert the new battery into the battery compartment.
- Connect the battery connector to the board.
- Place the battery bracket back into position.
- Secure the battery bracket using the 3 screws. Tighten to 0.34 Nm (3.00 lbf-in).
- Reconnect the internal cable to the main board.
- Replace the outer cover.
- Secure the cover using the 6 screws. Tighten to 0.90 Nm (8.00 lbf-in).
Torque Specifications
Proper torque is essential for the integrity of the unit:
- Battery Bracket Screws: 0.34 Nm (3.00 lbf-in)
- Outer Cover Screws: 0.90 Nm (8.00 lbf-in)
Manufacturer information
Honeywell International Inc.
Practical help
Common problems
Cover does not fit properly
Ensure all internal cables are routed correctly and are not pinched between the cover and the chassis.
Battery connector does not seat
Check for debris in the connector port and ensure the orientation is correct before applying gentle pressure.
Before use
- Verify the replacement battery is the correct model (1021AB01).
- Power off the Thor CV31 unit completely.
- Prepare a screwdriver suitable for the cover and bracket screws.
- Work on a clean, static-free surface to prevent damage to internal components.
Specs in practice
- 0.34 Nm (3.00 lbf-in)
- Required torque for the 3 screws securing the battery bracket.
- 0.90 Nm (8.00 lbf-in)
- Required torque for the 6 screws securing the outer cover.
Images and diagrams
- Steps 1-4: Removal of the outer cover and initial disconnection.
- Steps 5-10: Removal of the battery bracket and old battery.
- Steps 11-15: Installation of the new battery, bracket, and cover reassembly.
Model compatibility
- This procedure is specific to the Thor CV31 UPS battery replacement.

Manual page author
David Miller
Documentation analyst
Organizes user manual content into clear summaries, with attention to model details, product context, and everyday usability.