Lighting / LED Strips
Installation Guide for Integral LED Flexible 12V IP33 LED Strip
A comprehensive installation guide for the Integral LED Flexible 12V IP33 LED Strip. Includes instructions on choosing a driver, wiring configurations, cutting, mounting, and troubleshooting.
Table of contents
Manual images
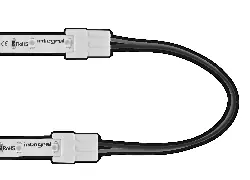
Click an image to enlargeQuick guide from the manual
This document provides installation instructions for the Integral LED Flexible 12V IP33 LED Strip. Key requirements include using a 12V constant-voltage LED driver (sold separately) and ensuring the driver wattage is at least 10% higher than the total wattage of the connected strips. The strip is for indoor use in dry areas only.
Safety and Warnings
- Do not connect the LED strip directly to the mains supply.
- Switch OFF power at the mains before installation.
- Observe correct polarity: positive (+ RED) to positive and negative (- BLACK) to negative.
- Do not twist the strip or touch the LEDs during installation.
- Do not coat the strip with paint or varnish.
- Operating temperature: -25C to +60C.
Choosing a 12V LED Driver
The strip requires a 12V DC constant-voltage power supply. The driver's power output must be at least 10% higher than the total power requirement of the connected strips. For example, if the total load is 15W, the driver must be at least 17W.
Pre-installation Planning
Plan your project before removing the backing tape. Ensure the mounting surface is stable, clean, dry, and free from grease. Test the strip by temporarily holding it in place with masking tape to check for desired illumination effects, light spots, reflections, and shadows.
Installation Instructions

- Ensure the mounting surface is clean and dry.
- Release the LED strip from the package and unreel it.
- Measure and cut the strip to the required length only at the designated cut marks while the power is OFF.
- Remove the 3M self-adhesive backing tape gradually during installation to prevent tangling.
- Stick the strip to the surface by pressing between the components, not on the LEDs themselves.
- If using optional mounting clips, secure the strip at intervals.
- Wire the strip to the 12V driver, ensuring correct polarity.
Power Supply Configurations
For optimal performance, consider the wiring configuration:
- Straight run: Driver powers the first strip, with additional strips connected in series. Be mindful of voltage drop.
- Powered from the centre: Power one or two equal lengths of strip from the center for the best results.
Joining Strips
If joining two IP33 strips, use the appropriate press-on connectors (sold separately). Ensure the strip is cut correctly and terminals make good contact with the connector. Always observe polarity.
Troubleshooting
If the LEDs do not light up, check the power supply, ensure the driver is receiving AC power, and verify that the strip wires are connected correctly with the right polarity. If the strip is dim or unevenly lit, the total wattage may exceed the driver's capacity, or the wire length may be too long; use shorter or thicker supply wires. If LEDs flash intermittently, check for loose connections at the driver or strip branch points.
Practical help
Common problems
None of the LEDs light up
Check if the driver has power, verify 12V polarity (+/-), and ensure the strip is cut correctly at the marks.
Some LEDs do not work
Check for poor connections or if the strip was bent beyond the 50mm minimum bending diameter.
Strip is dim or unevenly lit
Ensure the driver wattage is at least 10% higher than the total strip load; use shorter or thicker supply wires.
LEDs flash intermittently
Check for intermittent connections at the power supply driver or strip branch points.
Before use
- Ensure you have a 12V DC constant-voltage LED driver.
- Verify the driver wattage is at least 10% higher than the total strip load.
- Check that the mounting surface is clean, dry, and free of grease.
- Confirm you have the correct connectors if joining strips.
- Ensure power is OFF before starting installation.
Specs in practice
- Bending diameter
- Minimum 50mm; do not over-bend the strip.
Images and diagrams
- Wiring diagrams illustrate how to connect the driver to the strip, including straight runs and center-powered configurations.
Model compatibility
- Requires a 12V constant-voltage LED driver (sold separately).
- Not suitable for outdoor use or wet areas.

Manual page author
Emily Carter
User documentation editor
Prepares concise manual descriptions and highlights the most useful setup, operation, and maintenance information for readers.