Plumbing / Showers & Tubs
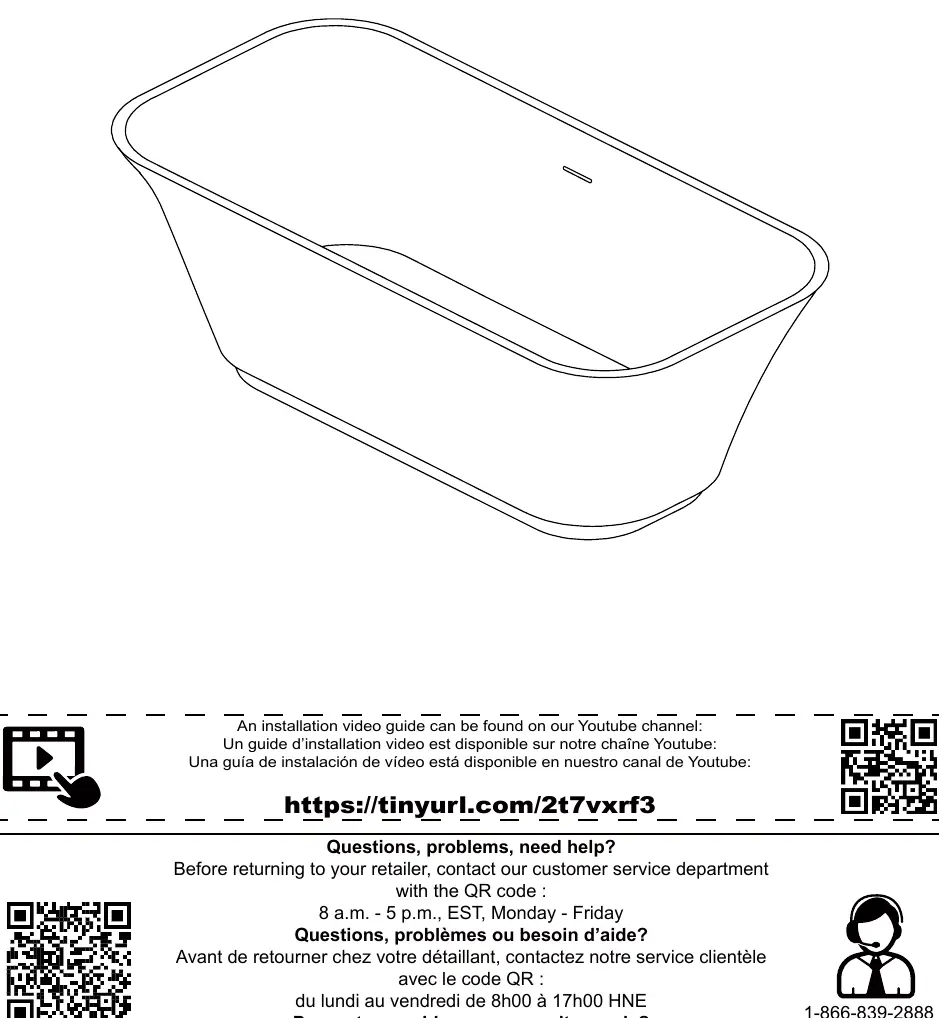
Installation Guide for OVE Aveline 60 Bathtub
A comprehensive installation and maintenance guide for the OVE Aveline 60 bathtub. This manual covers floor tracing, feet adjustment, plumbing connections, leak testing, sealing, and proper care instructions.
Table of contents
Manual images
Click an image to enlargeQuick guide from the manual
This guide provides essential installation and maintenance instructions for the OVE Aveline 60 bathtub. Important: At least two people are required for installation. The bathtub should be installed by a licensed and insured plumber to maintain the warranty. Ensure the floor is level and adequately supported before beginning.
Specifications
- Capacity: 55.4 gal (0.21 m³)
- Weight: 72.7 lbs (33 kg)
- Length: 60 inches (1524 mm)
- Drain: 1-1/2 NPSM
Tools Required
- Pencil
- Level
- Drill
- Tub & Tile Adhesive
- Measuring Tape
- Adjustable key
- Hole saw
- Silicone
- Fabric cloth (to protect the bath)
Installation
Floor Tracing & Feet Adjustment
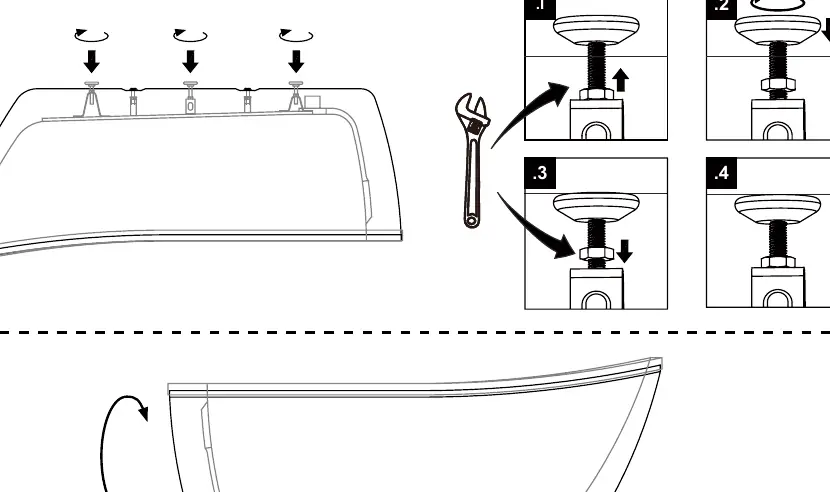
- Place the bathtub in the desired position and trace the outline on the floor.
- Flip the tub upside down on a floor mat.
- Loosen the nuts on the feet.
- Adjust the feet to be flush with the bottom of the tub.
- Tighten the nuts and turn the tub over.
Plumbing Connection
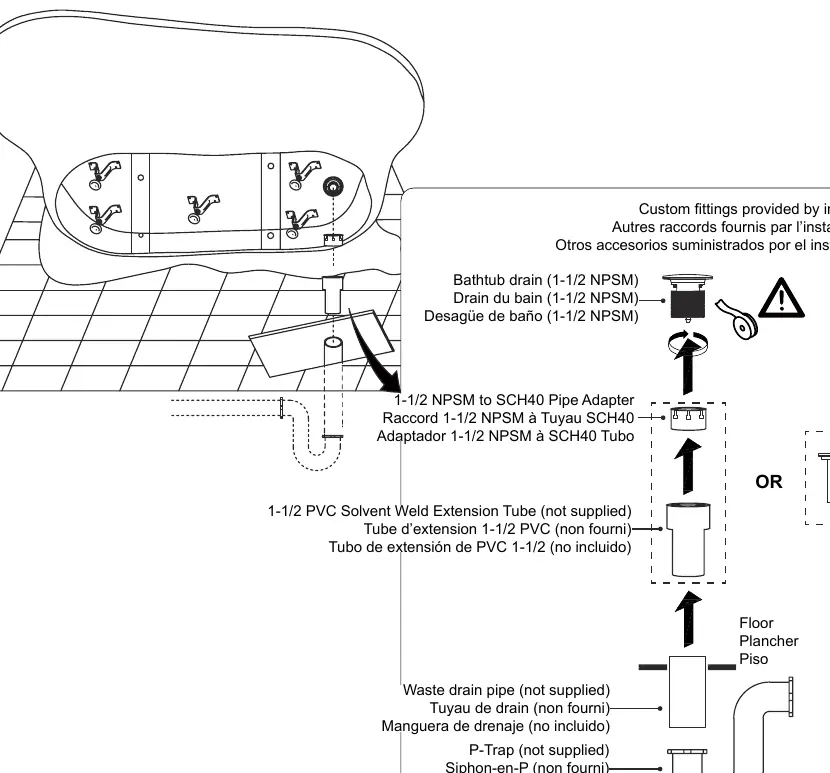
- Apply Teflon tape and/or thread sealant to the pre-installed bathtub drain.
- Screw the provided 1-1/2 NPSM to SCH40 Pipe Adapter to the drain.
- Cut a 1-1/2 PVC Extension Tube to the desired length.
- Connect the tube to the adapter using PVC pipe sealant.
- Connect the PVC tubing to the existing waste drain pipe on the floor.
Leaks Test
- Fill the tub up to the overflow to check for leaks.
- Drain the tub and check all plumbing connections.
- If the tub does not drain completely, adjust the feet (see Feet Adjustment) and repeat the test.
Sealing
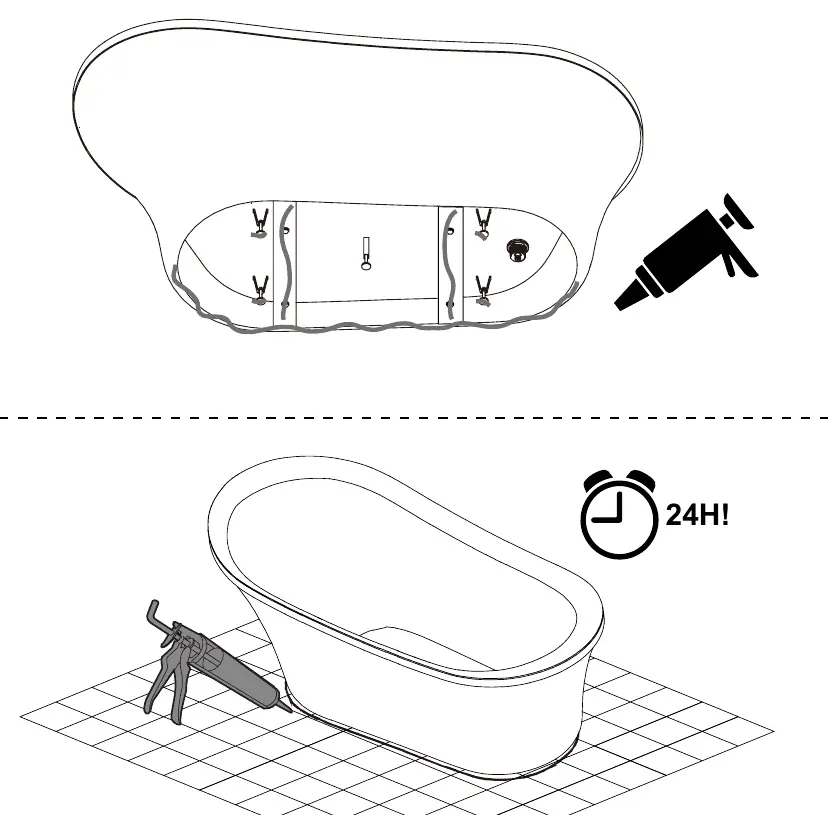
- Apply a strong Tub & Tile Adhesive under the edges of the tub in contact with the floor (rim, lateral bars, and feet).
- Apply a bead of silicone around the base for a professional finish.
- Let dry for 24 hours.
Maintenance and Care
Do not use any type of drain snake or drain cleaner if you have installed the provided flexible pipe.
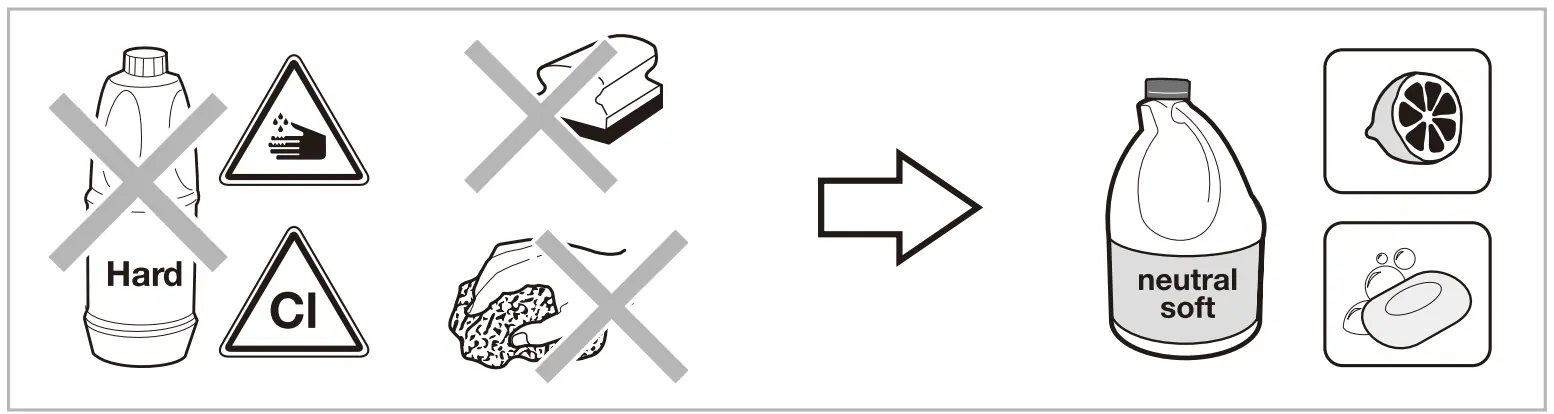
- Cleaning: Use mild, non-abrasive soap and warm water. Avoid cleaners with sand or silica to prevent scratches.
- Prohibited: Do not use metal or abrasive scrubbing brushes, acid cleaners, petrol thinner, industrial detergents, or chlorine-based solutions.
- Regular Maintenance: Check regularly for wear and leaks.
Warranty
The product includes a limited 25-year warranty for the bathtub and acrylic surface against defects in materials or workmanship under normal use. Hardware and accessories (drain, adapter, decorative trim) are covered for 1 year. The warranty is void if the product is installed by anyone other than a licensed plumber or if modifications are made.
Practical help
Common problems
Tub does not drain completely
Adjust the feet (step 1.2-1.3) to ensure the tub is level and has the correct slope.
Leaks after installation
Check all plumbing connections and ensure the tub is properly sealed to the floor.
Before use
- Ensure at least two people are available for installation.
- Verify the floor drain is already installed and compliant with local regulations.
- Inspect the bathtub for damage before installation.
- Ensure the floor is level and adequately supported.
- Have a licensed plumber perform the installation to validate the warranty.
Images and diagrams
- Floor Tracing Template: Shows the required cut-out area for the P-trap and waste pipe.
- Feet Adjustment: Shows how to loosen nuts and adjust feet to be flush with the tub bottom.
Model compatibility
- Requires 1-1/2 NPSM to SCH40 pipe adapter (included).
- Piping and drain trap are not supplied.

Manual page author
David Miller
Documentation analyst
Organizes user manual content into clear summaries, with attention to model details, product context, and everyday usability.