Plumbing / Showers & Tubs
Installation Manual for OVE Della Arch Walk In Panel 36
A comprehensive installation and maintenance guide for the OVE Della Arch Walk In Panel 36. Includes step-by-step assembly instructions, required tools, safety precautions, and care guidelines.
Table of contents
Manual images
Click an image to enlargeQuick Guide and Safety Information
This product should be installed by a professional. Before starting, ensure at least two people are available for the installation. Always wear safety glasses and gloves during handling. Inspect all contents and glass for damage before installation. The shower must be installed on a level floor capable of supporting the weight of the unit and an occupant. Always consult local building and plumbing codes before installation.
Tools Required
The following tools are required for installation (not supplied):
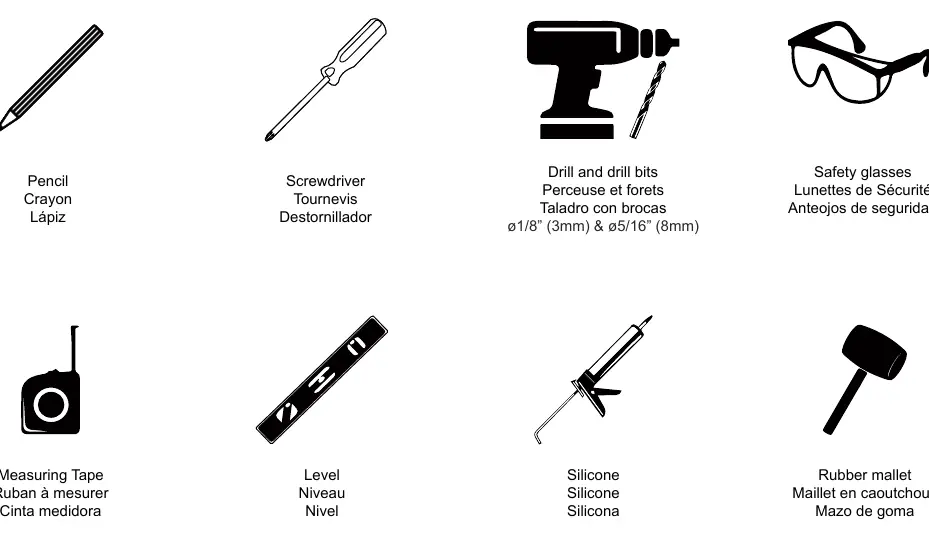
- Pencil
- Screwdriver
- Drill and drill bits (ø1/8" / 3mm and ø5/16" / 8mm)
- Safety glasses
- Measuring tape
- Level
- Silicone sealant
- Rubber mallet
Installation Overview
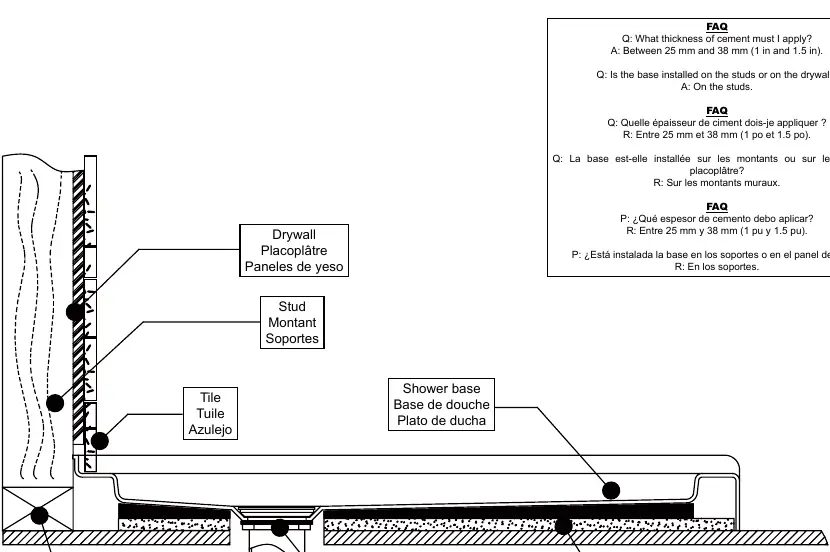
The installation requires careful preparation. Ensure the shower base is installed on studs. If a composite shower wall is installed, screws must be installed on studs; do not use wall anchors. The side-view illustration in the manual shows the correct relationship between the drywall, studs, tile, shower base, and drain.
Frame Installation
1. Position the frame track (E) as illustrated, level it, and mark the hole positions.
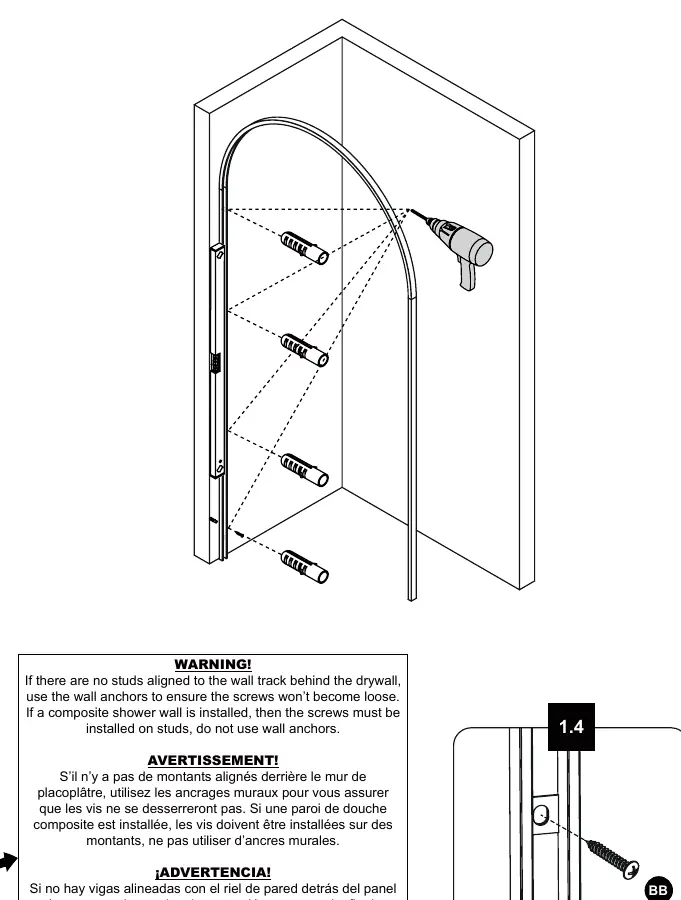
2. Drill pilot holes using a ø5/16" (8mm) drill bit.
3. If there are no studs behind the track, insert wall anchors (AA) using a rubber mallet.
4. Secure the track (E) with screws (BB). Do not overtighten.
5. Repeat the process for the bottom frame track (F) using a ø1/8" (3mm) drill bit and screws (CC).
Seal Strips Installation
1. Install the vertical seal strips (C) and top seal strip (B) onto the fixed panel (A).
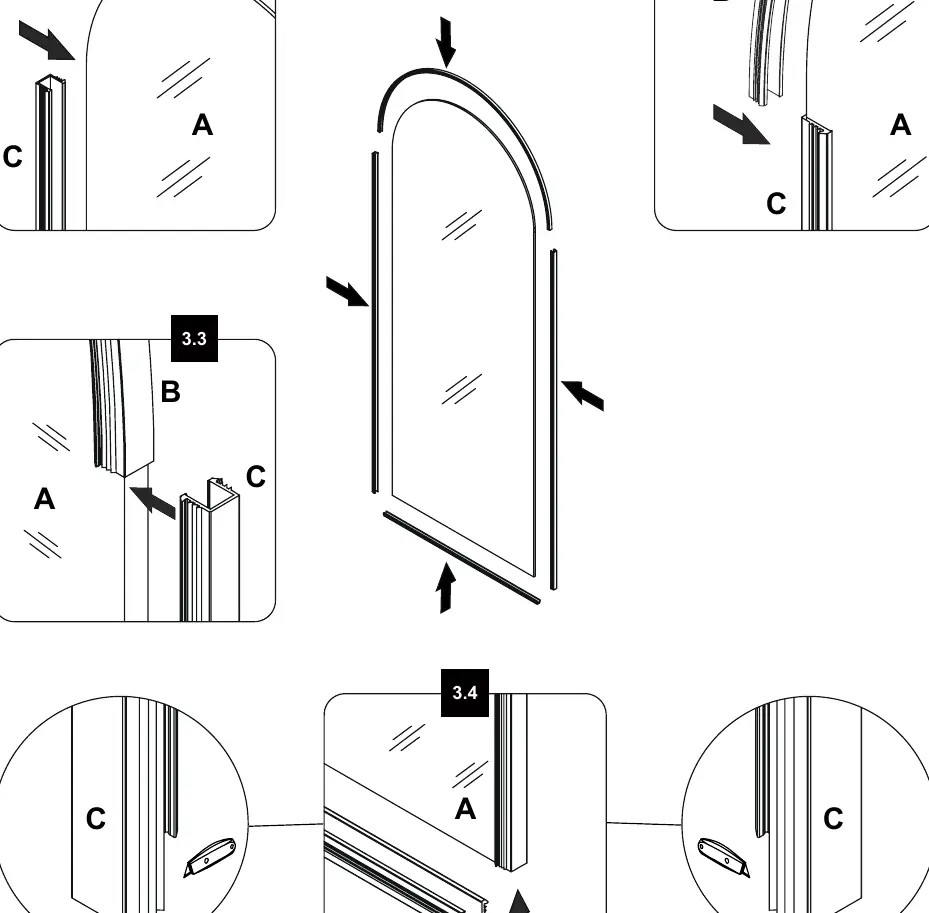
2. Install the bottom seal strip (D) onto the fixed panel (A), cutting any surplus at the bottom of the vertical seal strips to accommodate the bottom strip.
3. Firmly insert the fixed panel (A) into the frame tracks (E & F). Use a rubber mallet to secure the frame track (E) into the fixed panel.
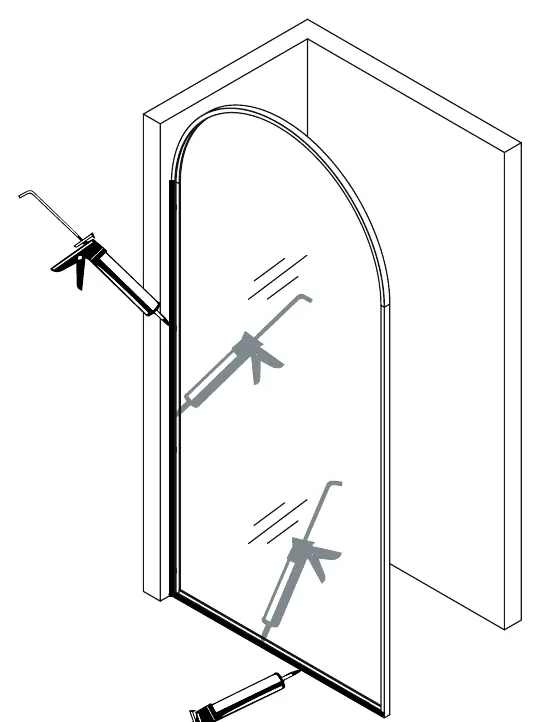
Sealing
Apply a clear silicone water sealant around the outside perimeter of any fixed shower components. Allow 24 hours for the silicone to dry completely before using the shower. Improper application may cause leaks.
Maintenance and Care
For daily maintenance, use a wet cloth and a soft liquid cleaner. Never use abrasive cleaners containing acetone, chlorine, or strong bleach, nor scrapers or metallic brushes. Use a ratchet to tighten support bolts for fixed glass panels or doors (up to 250 lbf*in of torque). Check these bolts every 4 months and re-tighten if necessary.
Practical help
Common problems
Shower leaks
Ensure clear silicone sealant is applied around the outside perimeter of all fixed components and allowed to dry for 24 hours.
Screws becoming loose
Check support bolts every 4 months and re-tighten if necessary.
Before use
- Ensure at least two people are available for installation.
- Verify all parts are present against the package content list.
- Inspect all glass and components for damage before starting.
- Ensure the floor is level and can support the weight.
- Consult local building and plumbing codes.
Specs in practice
- Support bolts torque
- Can withstand up to 250 lbf*in (28.25 N.m).
- Cement thickness
- Apply between 25 mm and 38 mm (1 in and 1.5 in) for the base.
Images and diagrams
- Page 3 shows the side-view of the completed installation, including the relationship between studs, drywall, tile, and the shower base.
- Page 9-10 details the frame track installation process.
Model compatibility
- If a composite shower wall is installed, screws must be installed on studs; do not use wall anchors.

Manual page author
David Miller
Documentation analyst
Organizes user manual content into clear summaries, with attention to model details, product context, and everyday usability.