Computers / Storage
OWC Express 1M2 Support Manual
Comprehensive support guide for the OWC Express 1M2 NVMe M.2 SSD enclosure. Includes installation steps, system requirements, formatting instructions, and troubleshooting.
Quick answers from the manual
Quick answer
- The OWC Express 1M2 is an NVMe M.2 SSD enclosure. It comes pre-formatted for Mac (APFS). Users on other operating systems must reformat the drive before use. It supports USB4 and Thunderbolt (USB-C) connections. p. 1, 2, 5
Key actions
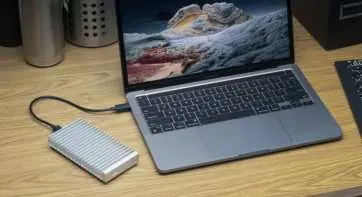
- Connect the device to a host using the included USB4 cable. p. 4
- Install an NVMe M.2 SSD into the enclosure. p. 6, 7, 8
First start
- Connect the device to your computer. If using Windows, ChromeOS, or Android, reformat the drive to the appropriate file system. p. 5, 14
Problems and fixes
Slow read/write speeds
Change the Windows disk removal policy to 'Better performance'.
p. 14, 16Technical specifications
| Parameter | Value | Meaning | Pages |
|---|---|---|---|
| Interface | USB4 40Gb/s | Data transfer interface | p. 3 |
| Supported SSDs | NVMe M.2 (2280, 2242, 2230) | Compatible drive form factors | p. 2, 7 |
Where to find it in the PDF
- System Requirements p. 1, 2
- Assembly Steps p. 6, 7, 8, 9
- Troubleshooting p. 16
Table of contents
Manual images
Click an image to enlargeQuick guide from the manual
The OWC Express 1M2 is an NVMe M.2 SSD enclosure designed for high-speed data transfer. It comes pre-formatted as APFS for Mac systems. Users on Windows, ChromeOS, or Android will need to reformat the drive to begin use. If you purchased the unit with a pre-installed drive, opening the enclosure will void the warranty.
System Requirements
The device is compatible with USB4 or Thunderbolt (USB-C) equipped hosts:
- Mac: macOS 10.13 or later
- PC: Windows 10 or later
- iPad: iPadOS 13 or later
- Android: Android OS 10 or later
- ChromeOS: Current version recommended
Note: Thunderbolt 3 hosts are compatible but will experience limited performance up to 10Gb/s.
Assembly Steps
To install or replace an NVMe M.2 SSD:
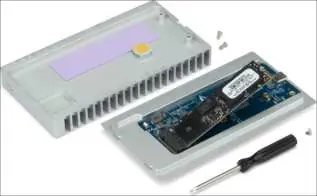
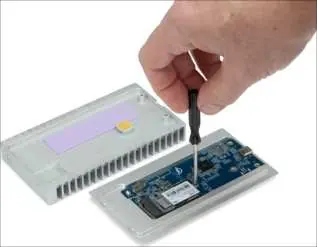
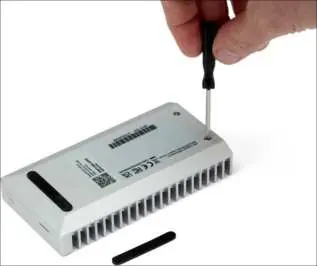
- Place the enclosure upside down on a flat, static-free surface.
- Remove the two case screws using the included driver.
- Push the bottom tray away from the rubber foot to separate it from the top cover.
- If installing a 2242 or 2230 form factor drive, loosen the drive post with a 5mm hex socket (not included) and move it to the correct position.
- Align the drive at a slight angle into the board connection and slide it forward until fully seated.
- Secure the drive using the included drive screw.
- Align the bottom tray and top cover so the thermal pad rests over the SSD. Slide the pieces together and press down to ensure a strong bond.
- Secure the cover with the two case screws and reattach the rubber foot.
Device Management
To ensure data integrity, always eject or unmount the volume from your operating system before disconnecting the device. If you experience slow read/write speeds on Windows, check the Disk Removal Policy. Changing the setting from 'Quick removal' to 'Better performance' can improve disk performance.
Troubleshooting
- Verify the USB4 cable is securely connected to both the enclosure and the host.
- Try using a different USB4 cable.
- Connect the device to a different host computer.
- If issues persist, contact OWC support via their website.
Safety Precautions
- Do not expose the device to temperatures outside the operating range of 5°C to 35°C (41°F to 95°F).
- Use proper anti-static precautions when handling the device.
- Keep the device away from water, rain, or damp conditions.
- Never insert metallic objects into the device.
Practical help
Common problems
Slow read/write speeds on Windows
Change the Windows disk removal policy from 'Quick removal' to 'Better performance'.
Device not mounting
Verify cable connection, try a different cable, or connect to a different host.
Drive not recognized on non-Mac systems
The drive is pre-formatted as APFS; you must reformat it for Windows, ChromeOS, or Android.
Before use
- Ensure your host system has a USB4 or Thunderbolt (USB-C) port.
- Check that your OS version meets the minimum requirements.
- If installing your own SSD, ensure it is an NVMe M.2 drive (2280, 2242, or 2230).
- Have a screwdriver ready for assembly.
- Back up your data before formatting the drive.
Specs in practice
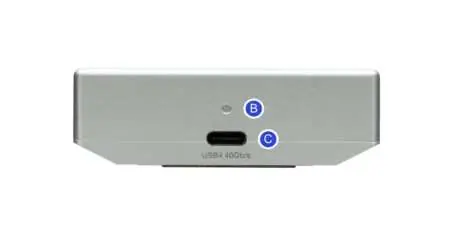
- USB4 40Gb/s Port
- The primary data connection port; supports high-speed transfers.
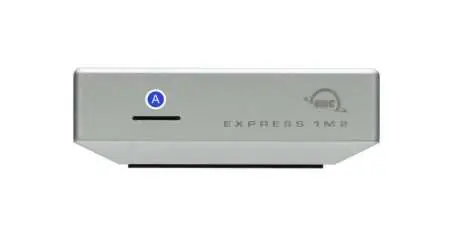
- LED Indicator
- Solid White indicates power/connection; Blinking White indicates data activity.
- NVMe M.2 Support
- Compatible with 2280, 2242, and 2230 form factors.
Images and diagrams
- The LED indicator is located on the front of the enclosure.
- The USB4 port is located on the back of the enclosure.
- The drive post position must be adjusted based on the SSD form factor (2280, 2242, or 2230).
Model compatibility
- Thunderbolt 3 hosts are limited to 10Gb/s performance.
- NVMe SSDs with a heatsink are not supported.
- Not compatible with front USB-C or USB-A ports on a Sony Playstation 5.

Manual page author
Emily Carter
User documentation editor
Prepares concise manual descriptions and highlights the most useful setup, operation, and maintenance information for readers.