Electronics / Networking
Installation Guide for Ubiquiti UNAS-2 Compact 2-Bay NAS
Comprehensive installation and setup guide for the Ubiquiti UNAS-2 Compact 2-Bay NAS. Includes hardware specifications, drive installation, wall mounting, and initial configuration steps.
Quick answers from the manual
Quick answer
- The UNAS-2 is a compact 2-bay NAS. Installation involves inserting 3.5" drives into the trays, connecting to a PoE++ power source and network, and configuring via the UniFi app. p. 4, 6, 7, 11
Key actions
- Install hard drives p. 6, 7
- Wall mount the device p. 15, 16, 17
- Configure via UniFi app p. 12, 13, 14
First start
- Connect to PoE++ power and network, then use the UniFi app to configure. p. 11, 12, 13, 14
Technical specifications
| Parameter | Value | Meaning | Pages |
|---|---|---|---|
| Processor | Quad-Core ARM Cortex-A55 at 1.7 GHz | Main processing unit | p. 2 |
| System memory | 4 GB | RAM capacity | p. 2 |
| Power method | PoE++ | Power requirement | p. 2 |
Where to find it in the PDF
- Specifications p. 2
- Installation p. 4, 5, 6, 7
- Wall Mounting p. 15, 16, 17
Table of contents
Manual images
Click an image to enlargeQuick guide from the manual
This document provides installation and setup instructions for the Ubiquiti UNAS-2 Compact 2-Bay NAS. It covers hardware preparation, drive installation, wall mounting, and initial configuration using the UniFi app.
Package contents
Ensure you have the following items before starting installation:
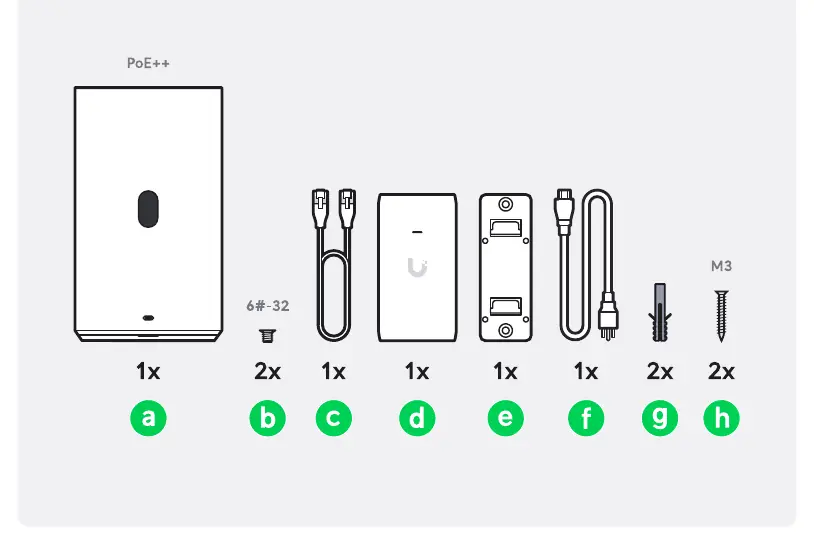
- UNAS-2 device
- (2) 6#-32 screws
- Ethernet cable
- Wall mount bracket
- Wall anchors and screws (M3)
Hardware installation
HDD Installation:
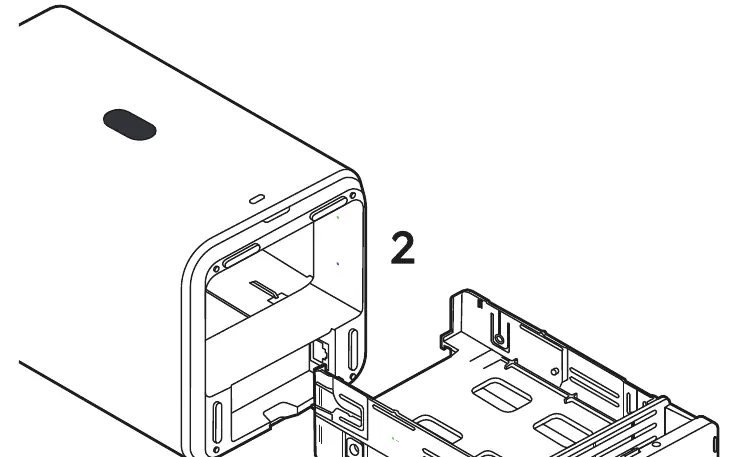
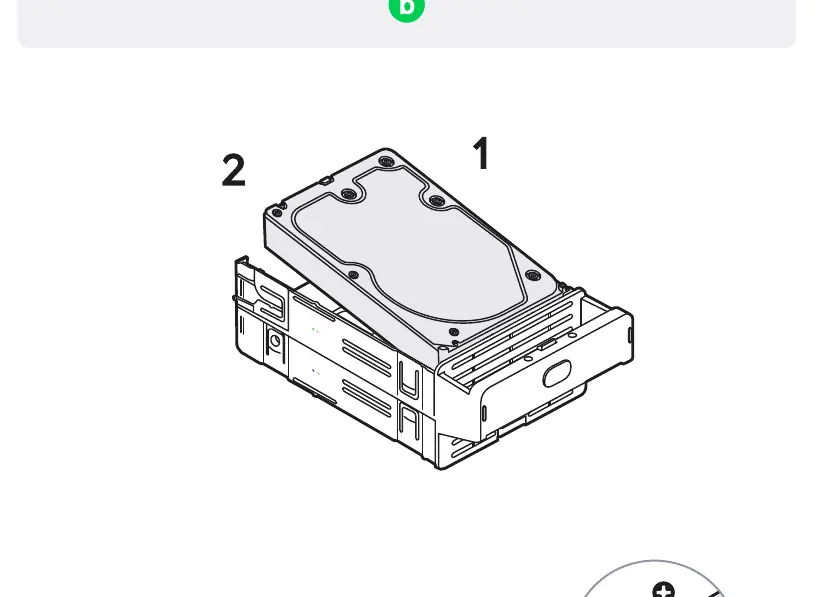
- Unlock and remove the drive tray from the UNAS-2 unit.
- Place the 3.5" hard drive into the tray.
- Secure the drive using the provided 6#-32 screws.
- Slide the tray back into the unit and lock it.
Wall mounting
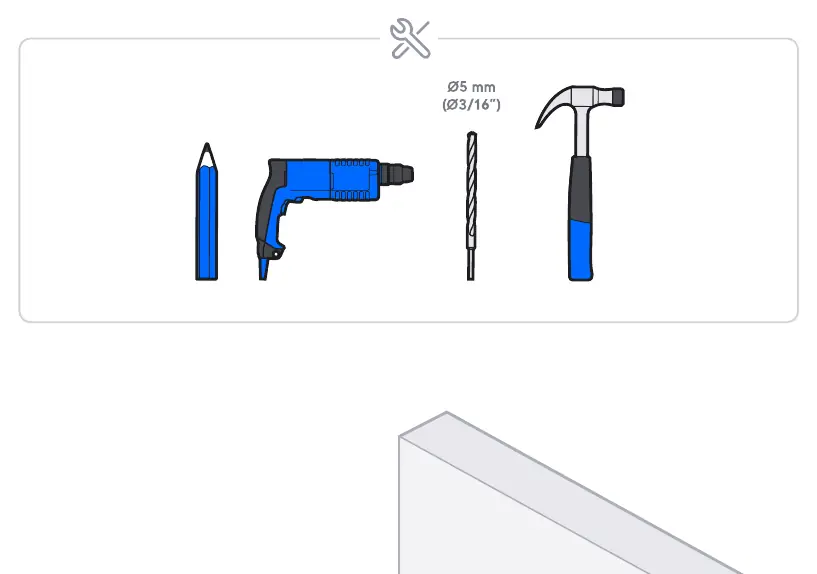
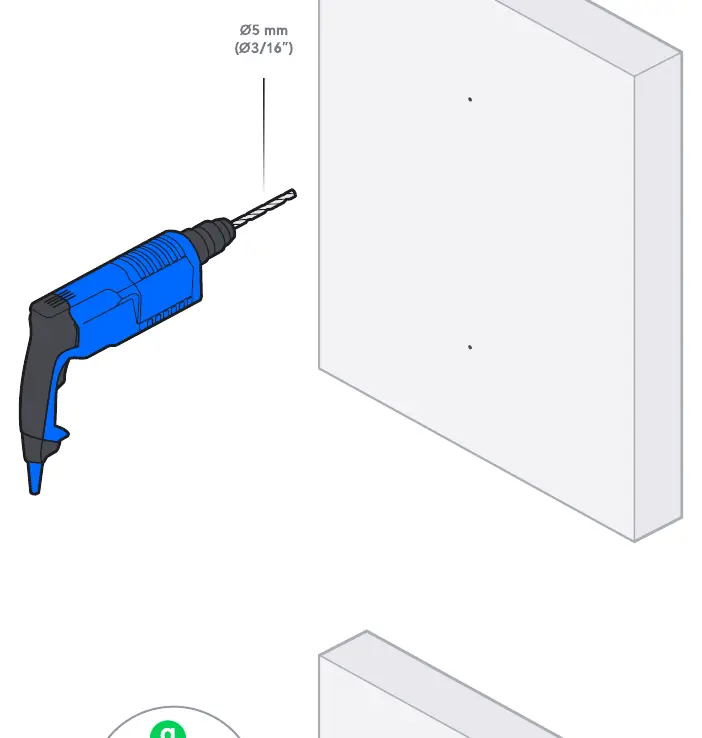
- Use the wall mount bracket as a template to mark the drilling locations on the wall.
- Drill holes using a 5 mm (3/16") drill bit.
- Insert the wall anchors into the holes.
- Secure the bracket to the wall using the provided M3 screws.
- Attach the UNAS-2 unit to the mounted bracket.
Setup and configuration
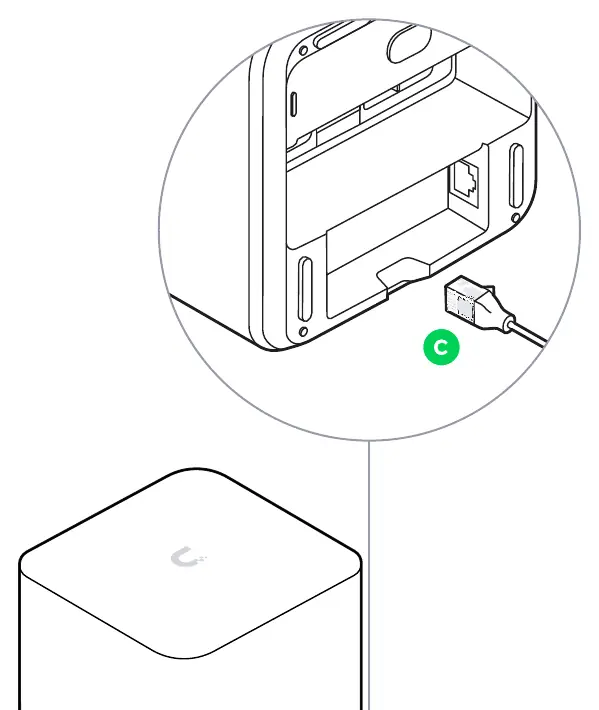
- Connect the UNAS-2 to your network using the 2.5 GbE RJ45 port.
- Ensure the device is powered via a PoE++ source.
- Download and open the UniFi app on your mobile device.
- Follow the in-app instructions to complete the setup via Bluetooth (BLE).
Technical specifications
- Processor: Quad-Core ARM Cortex-A55 at 1.7 GHz
- System memory: 4 GB
- Storage capacity: (2) 3.5" drive bays
- Power method: PoE++
- Networking interface: (1) 2.5 GbE RJ45 port, (1) USB-C port
- Dimensions: 135 x 129 x 223.7 mm
- Weight: 1.3 kg
Safety information
- Ensure adequate ventilation by keeping at least 20 mm of clearance around ventilation holes.
- Do not expose the product to rain or moisture.
- Avoid using the device during electrical storms.
- Hard drive trays must be installed at all times for fire safety.
Practical help
Common problems
Insufficient ventilation
Ensure at least 20 mm of clearance around ventilation holes to prevent fire hazards.
Power issues
Ensure the device is connected to a PoE++ power source.
Before use
- Verify all package contents (a-h) are present.
- Ensure you have a screwdriver for HDD installation.
- Confirm you have a PoE++ power source.
- Ensure you have a 5 mm (3/16") drill bit if wall mounting.
Images and diagrams
- HDD tray removal and locking mechanism.
- Wall mounting bracket installation steps.
- Cabling connection diagram.
Model compatibility
- Supports (2) 3.5" drive bays.
- Requires PoE++ power source.

Manual page author
David Miller
Documentation analyst
Organizes user manual content into clear summaries, with attention to model details, product context, and everyday usability.