Automotive / Dash Cams
User Manual for REDTIGER F3 Dash Camera
Comprehensive user guide for the REDTIGER F3 dash camera. Includes installation instructions, app setup, recording settings, troubleshooting, and technical specifications.
Quick answers from the manual
Quick answer
- The REDTIGER F3 is a dash camera that records in up to 1600P resolution. It is operated via a single power button and controlled through the RedTiger smartphone app via WiFi. p. 1, 10, 11
Key actions
- Install the electrostatic sticker on the windshield before mounting the camera to ensure easy removal and strong adhesion. p. 9, 10
- Format the Micro SD card in the camera before first use to prevent errors. p. 8
First start
- Insert a Micro SD card, connect the power cable to the cigarette lighter, and the camera will automatically turn on when the engine starts. p. 8, 10, 11
Problems and fixes
Reset to factory settings
Press and hold the power key for 3 seconds until you hear the voice prompt.
p. 11, 16Maintenance and reset
- Format the Micro SD card every two weeks to maintain performance. p. 8
Technical specifications
| Parameter | Value | Meaning | Pages |
|---|---|---|---|
| Power | 12V/24V | Vehicle power input | p. 19 |
| Resolution | 720P/1080P/1440P/1600P | Video recording quality | p. 15, 19 |
Where to find it in the PDF
- Installation p. 10
- Specifications p. 19
Table of contents
Manual images
Click an image to enlargeQuick guide from the manual
The REDTIGER F3 is a compact dash camera designed for vehicle recording. Before first use, it is mandatory to format your Micro SD card within the camera to ensure smooth operation. The device supports 12V/24V power sources and uses a super capacitor. Always ensure the camera is mounted in a location that does not obstruct your view while driving.
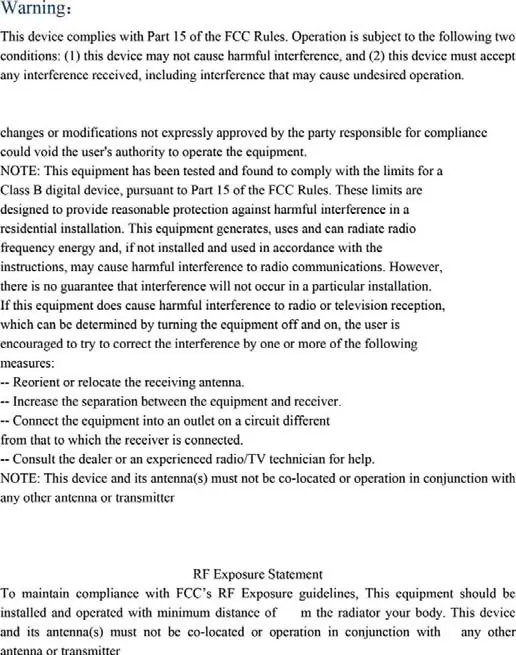
Safety Precautions
- Do not expose the product to rain, moisture, or water.
- Avoid using the camera in extreme temperatures.
- Do not disassemble, modify, or attempt to repair the device yourself.
- Ensure the camera is installed in a location that complies with local laws regarding windshield obstructions.
- Use only the provided charger to avoid power issues.
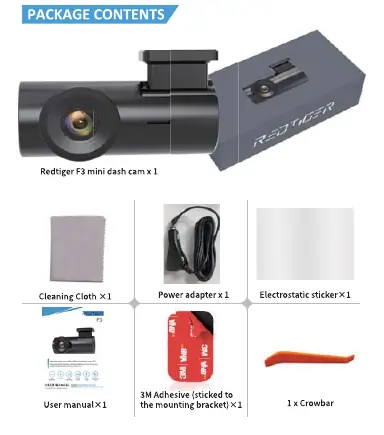
Package Contents
The package includes the REDTIGER F3 mini dash cam, a power adapter, an electrostatic sticker, a cleaning cloth, a crowbar for cable management, and 3M adhesive for the mounting bracket.
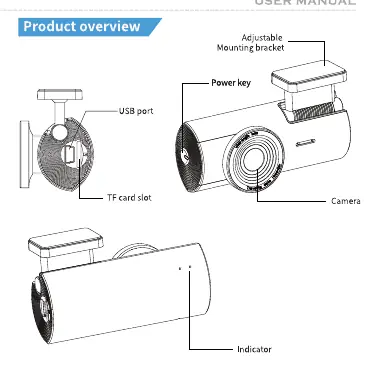
Product Overview
The camera features an adjustable mounting bracket, a power key, a USB port for power, a TF (Micro SD) card slot, and an indicator light on the back that flashes red when recording.
Micro SD Card Setup
Use high-quality Class 10 or above Micro SD cards with a capacity between 16GB and 128GB. Always format the card in the camera before first use. It is recommended to format the card every two weeks to prevent file system errors.


Installation
- Clean the windshield and apply the electrostatic sticker to the desired area.
- Peel off the 3M tape from the GPS-enabled bracket and attach it to the electrostatic sticker. Ensure the camera body is parallel to the ground.
- Connect the USB cable to the cigarette lighter receptacle and route the cable along the passenger side.
Key Functions
The device is operated via a single power key:
- Press once: Start/Stop recording.
- Press and hold 3 seconds: Reset factory settings.
WiFi & App
Download the RedTiger app from the Google Play Store or Apple App Store. To connect: ensure the camera is recording, open the app, and select the WiFi named "REDTIGER-F3_XXX" (default password: 1234567890). Through the app, you can preview footage, take photos, start/stop recording, and access the album.
Settings and Recording
Within the app settings, you can adjust:
- Video Resolution: Choose between 720P, 1080P, 1440P, or 1600P.
- Loop Recording: Set duration to 1, 2, or 3 minutes.
- Collision Sensitivity: Adjust the G-sensor sensitivity (High, Middle, Low, or Off) to trigger emergency video saving.
- Anti-Flicker: Select 50Hz or 60Hz.
Troubleshooting
If you experience issues such as the camera not turning on, missing items, or damage, please contact customer service via email at [email protected] or call +1 888 966 8028 (Mon-Fri 9am-5pm PST). Ensure the power cable is connected in the correct orientation.
Technical Specifications
The F3 model operates on 12V/24V power, supports 4GB-128GB Micro SD cards, and functions in temperatures ranging from -20°C to 70°C. It uses a super capacitor and records in TS video format.
Practical help
Common problems
Camera does not turn on
Check the cigarette lighter connection and ensure the power cable is inserted in the correct orientation.
Video recording errors
Format the Micro SD card in the camera. Ensure you are using a high-quality Class 10 card (16GB-128GB).
Camera frequently reboots or LCD flickers
This is likely due to insufficient power. Use only the original REDTIGER car charger.
Before use
- Format the Micro SD card inside the camera.
- Clean the windshield surface thoroughly.
- Apply the electrostatic sticker before sticking the 3M adhesive.
- Ensure the camera is parallel to the ground.
- Download the RedTiger app.
Images and diagrams
- The power key is located on the top of the camera unit.
- The USB port and TF card slot are located on the side of the camera.
- The indicator light is on the back of the camera, flashing red during recording.
Model compatibility
- Compatible with 12V and 24V vehicle power systems.
- Requires Micro SD card (4GB-128GB, Class 10 or above).
- App compatible with Android and iOS.

Manual page author
David Miller
Documentation analyst
Organizes user manual content into clear summaries, with attention to model details, product context, and everyday usability.