Power / Batteries & Chargers
User Manual for SAL VBT 1100/BL & VBT 1100/RD Car Radio
Quick guide for the SAL VBT 1100/BL and VBT 1100/RD car radio. Includes installation instructions, wiring diagrams, Bluetooth pairing, radio tuning, and troubleshooting tips.
Table of contents
Manual images
Click an image to enlargeQuick guide from the manual
This document provides essential instructions for the installation and operation of the SAL VBT 1100/BL and VBT 1100/RD car radio. The device is designed for 12V vehicles with a negative ground system. Before installation, ensure the vehicle's negative battery terminal is disconnected to prevent short circuits.
Installation and Wiring
Installation should be performed by a qualified professional. Ensure the unit is not exposed to direct heat, moisture, or excessive dust. Route cables at least 10 cm away from the vehicle's instrument panel wiring harness. Connect the power and speaker cables according to the provided wiring diagram. Do not connect speaker wires to the vehicle's chassis or negative ground.

Controls and Operation
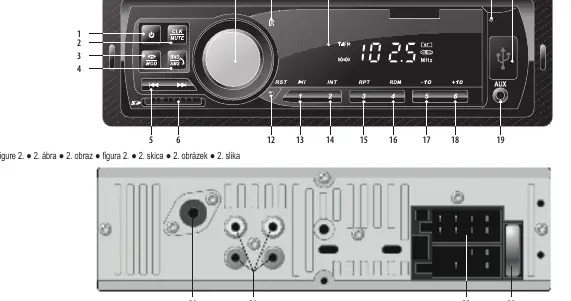
The front panel features a rotary knob for volume and menu navigation. Use the POWER button to turn the unit on or off. The MOD button allows you to switch between FM radio, USB/SD playback, Bluetooth, and AUX input. The unit supports 18 FM radio presets.
Bluetooth Functions
To pair your device, select BT mode using the MOD button. Search for the car radio on your mobile device and connect. Once paired, you can stream music (A2DP) and handle hands-free phone calls. The radio has a built-in microphone; speak towards the upper right corner of the unit for best results.
USB and SD Playback
Insert a USB or SD memory device (FAT32 format recommended) to start playback automatically. Use the playback controls to skip tracks, fast forward/rewind, or navigate folders. Do not remove the memory device while playback is in progress.
Maintenance and Safety
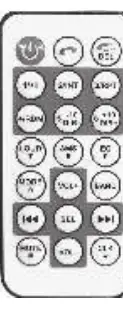
Clean the unit with a soft, dry cloth. Do not use cleaning agents or liquids. The remote control uses a CR2025 3V button battery. Keep batteries out of reach of children due to the risk of chemical burns if swallowed.
Practical help
Common problems
Device does not turn on
Check ignition, verify red/yellow wire connections, and check the 10A fuse.
Radio does not tune automatically
Ensure the antenna is connected, properly grounded, and fully extended. If the signal is weak, use manual tuning.
No sound or noisy playback
Check if the file format is supported (MP3/WMA), ensure the USB/SD slot is clean, and verify speaker connections.
Settings are lost after turning off the engine
Verify that the yellow memory wire is connected directly to a constant 12V power source.
Before use
- Ensure vehicle has a 12V system with negative ground.
- Disconnect the negative battery terminal before starting installation.
- Check that all wiring connections are secure and properly insulated.
- Ensure the unit is installed in a location that does not obstruct driving.
- Remove the insulation strip from the remote control battery compartment.
Specs in practice
- FM Frequency Range
- 87.5-108.0 MHz
- Power Output
- 4 x 45 W max.
- Operation Voltage
- 14.4 V DC (11-15 V)
- Operating Temperature
- 0°C to +40°C
Images and diagrams
- Figure 1: Front panel controls including power, volume/menu selector, and source buttons.
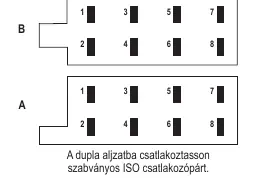
- Figure 2: Rear panel connections including antenna socket, RCA outputs, and ISO power/speaker connectors.
Model compatibility
- Compatible with 12V negative ground vehicles only.
- Supports USB/SD memory up to 32GB (FAT32 format).
- Bluetooth V4.1 + EDR.

Manual page author
David Miller
Documentation analyst
Organizes user manual content into clear summaries, with attention to model details, product context, and everyday usability.