Plumbing / Toilet Flushers
User Manual for Sanela SLW 10PB and SLW 10PBX Toilet Flush System
Quick guide for the Sanela SLW 10PB and SLW 10PBX concealed toilet flush system. Includes installation steps, battery replacement, water flow adjustment, and system settings.
Table of contents
Manual images
Click an image to enlargeQuick Guide
This document provides installation and maintenance instructions for the Sanela SLW 10PB and SLW 10PBX concealed toilet flush systems. Before beginning installation, it is essential to read the attached safety instructions. The system requires proper mounting of the frame, water connection, and battery installation for operation.
Installation
The installation process involves mounting the frame, connecting the water supply, and attaching the toilet. Follow these steps:
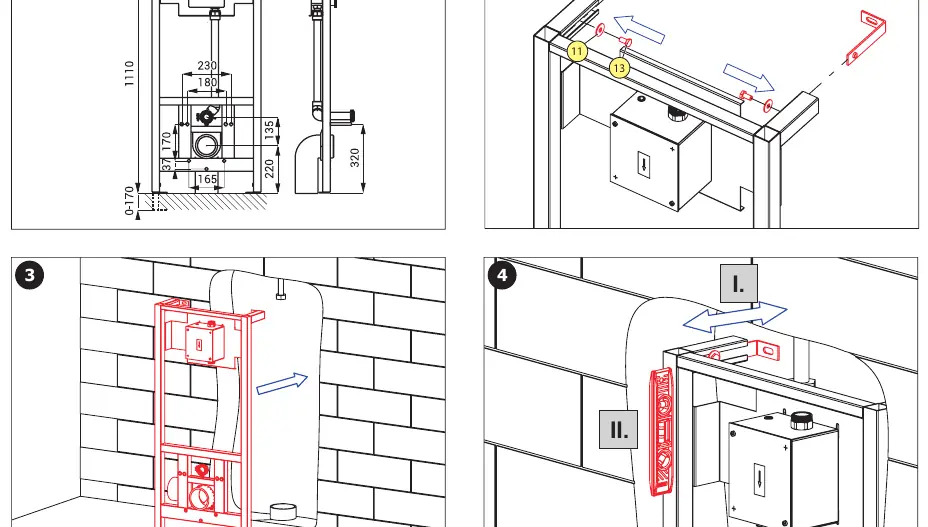
- Frame Mounting: Secure the frame to the wall and floor using the provided mounting hardware (steps 1-8). Ensure the frame is level.
- Drilling and Anchoring: Mark and drill holes for the frame anchors (steps 9-12).
- Water Connection: Connect the water supply to the flushing unit (steps 13-14).
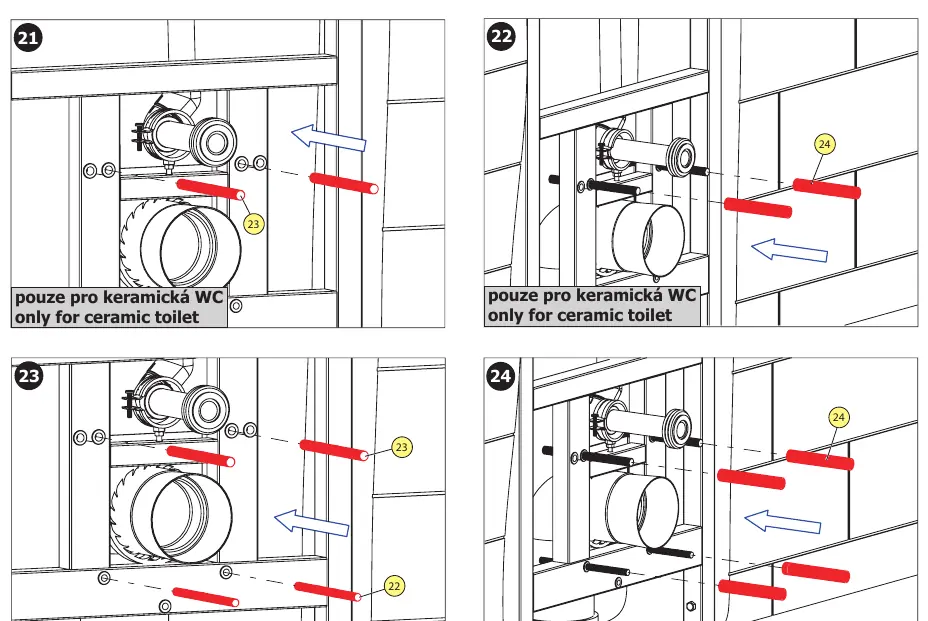
- Toilet Mounting: Depending on whether you are installing a ceramic or stainless steel toilet, use the appropriate mounting hardware provided (steps 21-24).
- Final Assembly: Complete the installation by attaching the toilet and the control panel (steps 25-31).
Battery Replacement
The system is battery-operated. To replace the batteries:
- Remove the control panel cover (step 32).
- Disconnect the battery pack (step 33).
- Remove the old batteries and insert new 1.5V AA alkaline batteries (steps 34-35).
- Reconnect the battery pack and reattach the cover (steps 38-39).
Settings and Adjustments
The system allows for water flow adjustment and configuration:
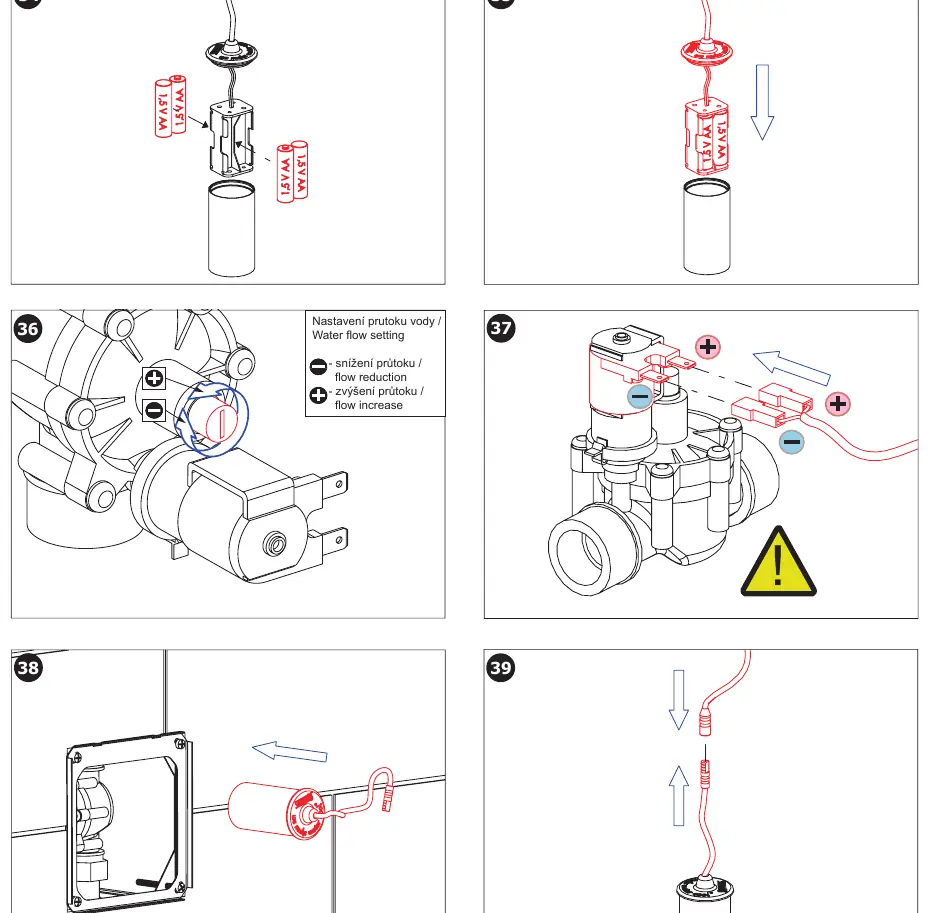
- Water Flow Setting: Use the adjustment valve on the flushing unit to increase or decrease the water flow (step 36).
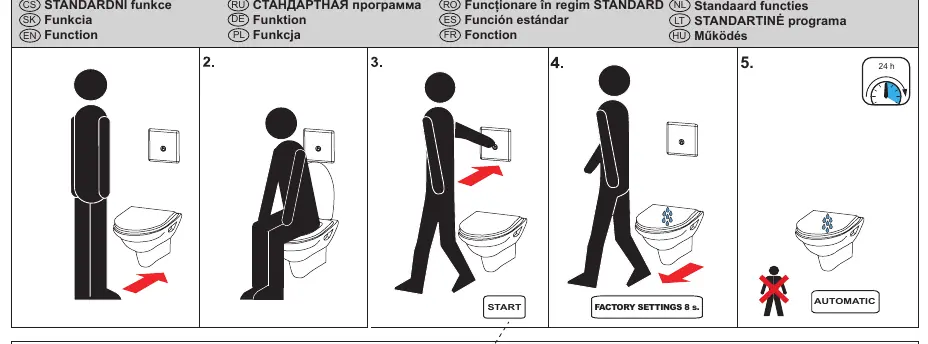
- SLD 04 Remote Control: The optional SLD 04 remote control can be used to configure settings such as the hygienic flush interval (24h) and flush duration.
Maintenance and Troubleshooting
Monitor the battery status using the LED indication on the control panel:
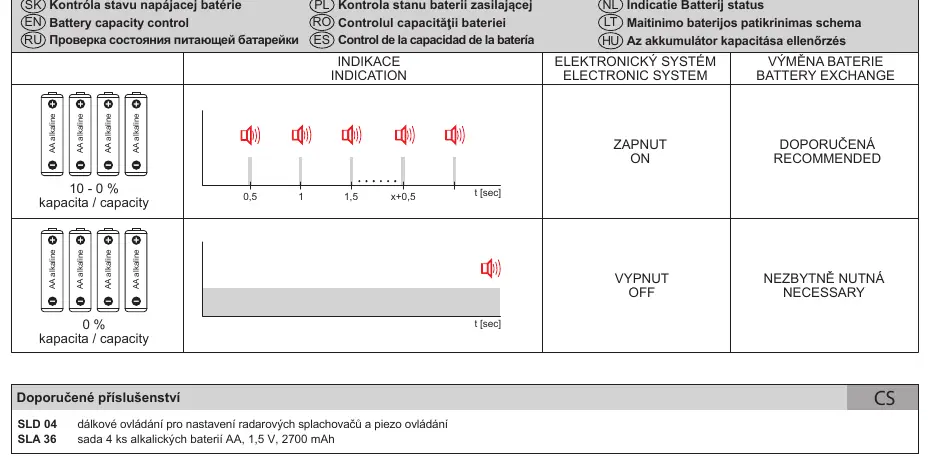
- Normal Operation: The system functions as expected.
- Battery Low: If the indicator shows low capacity, replace the batteries immediately to ensure continued operation.
Manufacturer information
SANELA spol. s r. o.
Practical help
Common problems
System not flushing
Check battery capacity and replace if necessary. Ensure the battery pack is correctly connected.
Water flow too high or low
Adjust the water flow valve located on the flushing unit (see step 36).
Before use
- Read all attached safety instructions.
- Verify all parts listed in the supplied equipment section are present.
- Ensure water supply is turned off before starting installation.
- Check that you have the correct mounting hardware for your toilet type (ceramic vs. stainless steel).
Specs in practice
- Hygienic Flush
- Automatic flush interval set to 24 hours to maintain hygiene.
Images and diagrams
- Steps 1-31 detail the physical installation of the frame and toilet.
- Steps 32-39 illustrate the battery replacement process and water flow adjustment.
- Page 8 provides a visual guide for interpreting battery status indicators.
Model compatibility
- The system is compatible with both ceramic and stainless steel toilets, but requires specific mounting hardware for each type.

Manual page author
Emily Carter
User documentation editor
Prepares concise manual descriptions and highlights the most useful setup, operation, and maintenance information for readers.