Toys / RC Models & Drones
User Manual for Scorpion Tribunus 06-120A ESC
Comprehensive user guide for the Scorpion Tribunus 06-120A ESC. Includes installation instructions, wiring diagrams, PC/Android configuration, helicopter and airplane mode settings, and troubleshooting via Morse code.
Table of contents
Manual images
Click an image to enlargeQuick Guide from the Manual
The Scorpion Tribunus 06-120A ESC is a high-performance electronic speed controller available in SBEC and OPTO versions. Before first use, you must perform a throttle range calibration. Always remove the propeller or pinion gear when working on the model with the battery connected to prevent accidental injury. The ESC uses Morse code via the motor to indicate status and errors.
Installation and Wiring
Refer to the wiring diagrams on page 3 for specific connections. Ensure battery polarity is correct (red to red, black to black). Solder quality connectors to the motor and battery wires. Mount the ESC with the heatsink facing outward, ensuring adequate airflow. If using zip ties, secure them around the metal heatsink, not the components.
Throttle Calibration
Throttle calibration is required before the first flight. Turn on your transmitter and set the throttle curve to 0% minimum and 100% maximum. Connect the battery, wait for the beep, then move the throttle to the lowest position. You will hear two beeps and a Morse code signal confirming calibration is stored.
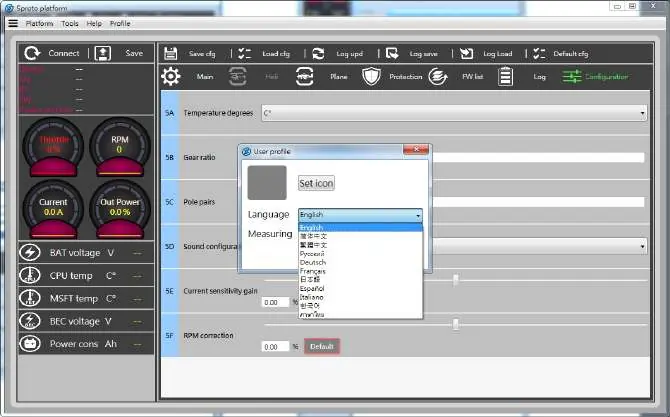
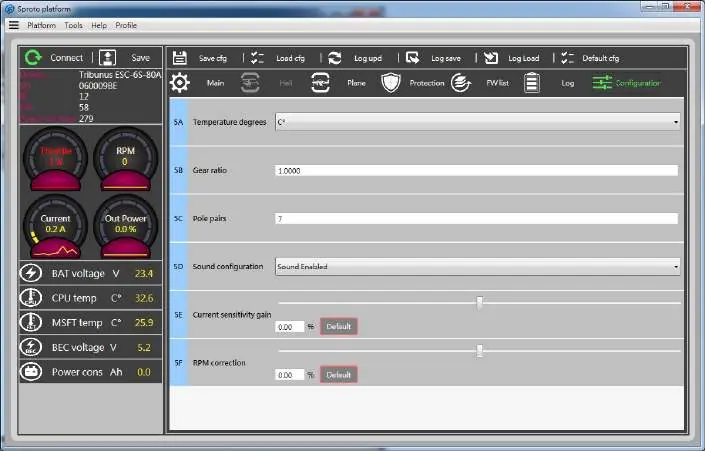
PC and Android Configuration
The ESC can be configured via PC or Android using the Scorpion Sproto platform. Download the software from the official Scorpion website. You will need the Scorpion V-Link II cable and, for Android, an OTG cable. Always click the SAVE button after changing settings on any page to write the data to the ESC.
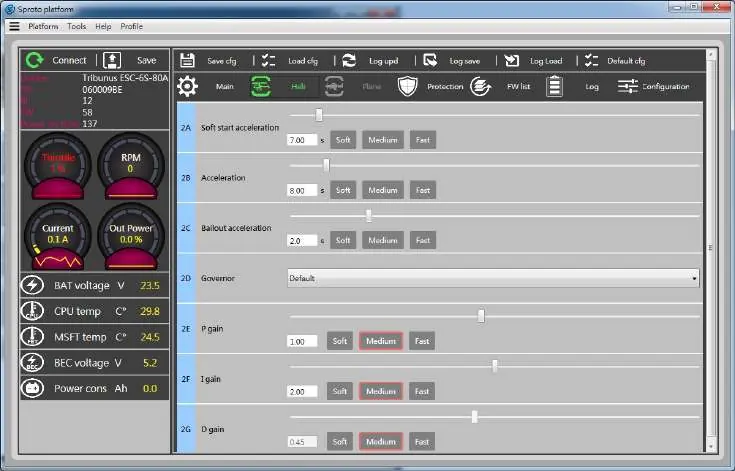
Helicopter Mode
This mode enables the internal governor. Key settings include Soft Start Acceleration (0-30% spool-up), Acceleration (30-100% spool-up), and Bailout Acceleration for autorotation recovery. Ensure you calibrate the throttle range before setting up the bailout switch.
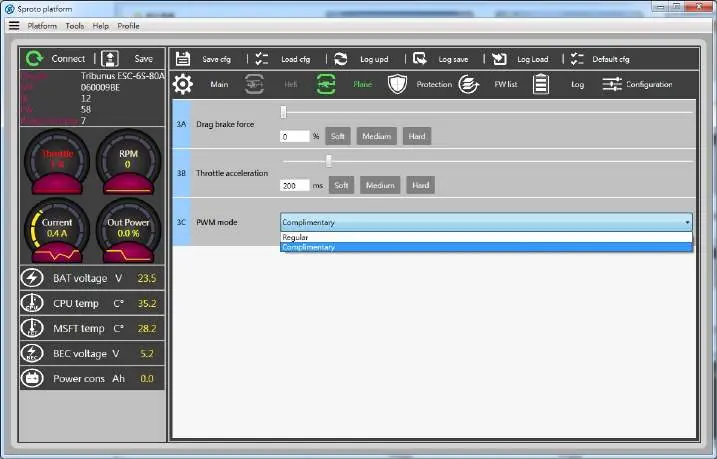
Airplane Mode
Configure Drag Brake to control propeller behavior at 0% throttle. Adjust Throttle Acceleration based on aircraft size (e.g., 500ms for large planes, 350ms for smaller ones). Select PWM mode (Regular or Complimentary) based on whether regenerative braking is required.
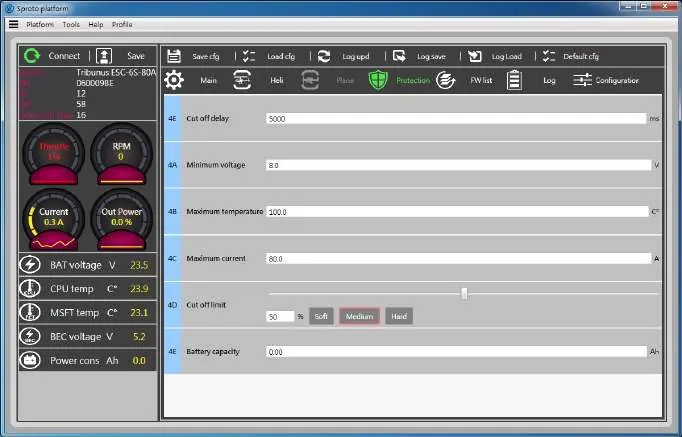
Protection Settings
Configure safety limits to protect your equipment. Key parameters include Cutoff Delay, Minimum Voltage, Maximum Temperature, and Maximum Current. The ESC can also track Battery Max Capacity to trigger a power reduction when a set amount of capacity is consumed.
VBar Integration
The Tribunus ESC supports integration with Mikado VBar Control. Connect the slave cable to the RPM port of the VBar NEO. Ensure the latest firmware is installed on the ESC. Use the VBar Control manager to download the Scorpion ESC Support app to enable telemetry and setup features.
Anti-Spark DIY Kit
The included Anti-Spark kit helps prevent sparks when connecting high-voltage batteries. Follow the instructions on page 16 or 17 to solder the PTC resettable fuse to the positive wire and insulate it with the provided heat shrink.
Practical help
Common problems
ESC beeps Morse code upon power up
Check the LED and Morse code table. N=No throttle signal, Z=Throttle not in zero position, V=Voltage error, I=Current error, P=Power error, T=Temperature error.
Motor will not start
Ensure the throttle stick is at the zero position (all the way down) when powering up. If the ESC does not sense a zero throttle signal, it will not arm.
ESC overheating
Ensure the heatsink has clear airflow. Check that the motor rating does not exceed the ESC's capacity. Do not use a motor rated higher than the ESC.
Before use
- Remove propeller or pinion gear before initial setup
- Ensure battery polarity is correct
- Calibrate throttle range
- Check firmware version
- Ensure BEC voltage is set correctly (if using SBEC version)
Images and diagrams
- Wiring diagrams for SBEC and OPTO versions are located on page 3.
- Morse code table for error diagnostics is located on page 2.
Model compatibility
- Compatible with 3S-6S LiPo batteries (11.1-25.2V).
- Android connectivity requires an OTG cable.
- VBar integration requires a specific telemetry cable.

Manual page author
Emily Carter
User documentation editor
Prepares concise manual descriptions and highlights the most useful setup, operation, and maintenance information for readers.