Toys / RC Models & Drones
User Manual for Team Associated Reflex 14R RC Car
Quick guide for the Team Associated Reflex 14R RC car. Includes assembly steps, battery installation, radio tuning, gear mesh adjustment, and maintenance tips.
Table of contents
Manual images
Click an image to enlargeQuick Start Guide
This section covers the essential steps to get your Reflex 14R ready for operation.
- Battery Charging: Always remove the battery from the vehicle before charging. Use a compatible charger on a fire-resistant surface. Never leave the battery unattended while charging.
- Battery Installation: Install the battery with the wires directed towards the rear of the vehicle and secure the battery strap using two body clips.
- Radio System: Always turn the transmitter on first and the vehicle second. When finished, turn the vehicle off first and the transmitter off last. Do not hold the trigger when turning on the radio.
- Steering Trim: If the vehicle does not drive straight, adjust the steering trim knob on the transmitter until the wheels point straight.
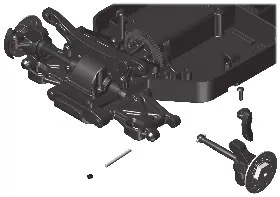
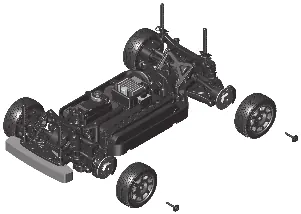
Assembly Overview
The Reflex 14R is a high-performance RC vehicle. The manual provides 33 detailed assembly steps covering the chassis, drivetrain, suspension, and body installation.
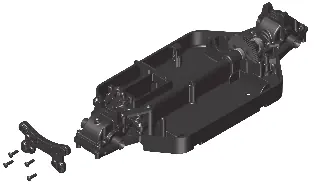

- Hardware Identification: Use the 1:1 scale view on page 3 to identify screws and parts by lining them up with the drawings.
- Suspension: Assembly involves installing front and rear suspension arms, hinge pins, and shock towers.
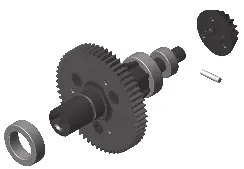
- Drivetrain: The drivetrain includes sealed gear differentials, a center spool, and universal drive shafts.
- Body: The final steps involve mounting the Hoonicorn body, spoiler, and detailing parts like the turbo and manifold.
Gear Mesh Adjustment
Proper gear mesh is critical for performance and longevity.
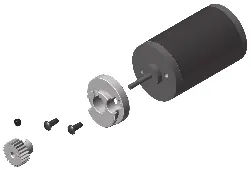
- Push the teeth of the motor mount cam into the corresponding tooth pattern of the motor mount insert.
- Once seated, you should be able to rock the spur gear back and forth slightly without moving the pinion gear.
- If the mesh is too tight, there will be no movement, which can damage gear teeth.
- If the mesh is too loose, excessive movement will cause premature gear failure.
Maintenance and Tips
Regular maintenance ensures optimal performance.
- Cleaning: Keep the chassis and drivetrain clean of debris.
- Inspection: Periodically check all screws and fasteners to ensure they are tight.
- Fluids: Use the recommended silicone shock and diff fluids as specified in the assembly steps.
- Battery Safety: LiPo batteries require special care and a peak detection charger. Always charge in LiPo mode.
Practical help
Common problems
Gear mesh too tight or too loose
Adjust the motor mount cam; ensure the spur gear can rock slightly without moving the pinion gear.
Radio system not responding
Ensure the transmitter is turned on first, check battery levels in both transmitter and vehicle, and verify connections.
Vehicle pulling to one side
Adjust the steering trim knob on the transmitter until the wheels point straight.
Before use
- Charge 6-cell NiMh or 2S LiPo battery using a compatible charger.
- Install 4 AA batteries in the transmitter.
- Ensure transmitter is turned on before the vehicle.
- Check gear mesh adjustment.
- Verify all screws and fasteners are tightened.
- Install body and body clips.
Images and diagrams
- 1:1 Hardware View: Use page 3 to match screws and parts to their actual size.
- Exploded Views: Steps 1-33 show the assembly sequence of the chassis and drivetrain.
Model compatibility
- Requires 6-cell NiMh or 2S LiPo battery.
- Requires 4 AA batteries for transmitter.
- LiPo batteries recommended for advanced users only.

Manual page author
David Miller
Documentation analyst
Organizes user manual content into clear summaries, with attention to model details, product context, and everyday usability.