Power / Wireless Chargers
Vivitar Camelio 7" Android Family Tablet Quick Start Guide
Quick start guide for the Vivitar Camelio 7" Android Family Tablet. Learn how to set up your device, manage users, configure parental controls, and customize themes.
Quick answers from the manual
Quick answer
- The Vivitar Camelio is an Android tablet supporting up to 5 users with individual themes and parental controls. Initial setup involves charging, language selection, WiFi connection, and Google account sign-in. p. 2, 3, 4
Key actions
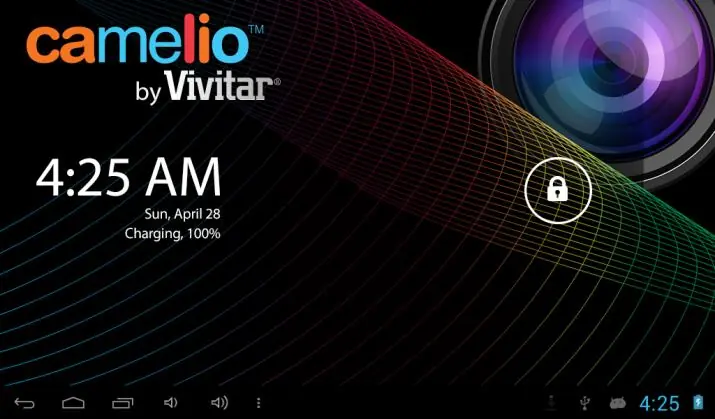
- Unlock the screen p. 3
- Add a new user p. 20
- Enable Parental Control p. 13
First start
- Charge the tablet fully, power it on, select your language, connect to WiFi, and sign in with your Google account. p. 3, 4
Maintenance and reset
- Use the Reset button located on the bottom edge of the tablet. p. 2
Technical specifications
| Parameter | Value | Meaning | Pages |
|---|---|---|---|
| Display | 7 inch, 1024x600 | Screen size and resolution | p. 2 |
Where to find it in the PDF
- Features and Diagrams p. 2
- Initial Setup p. 3, 4, 5, 6
- Interface p. 10, 11, 12
- Parental Control p. 13, 14
- Theme Manager p. 15, 16, 17, 18
- User Management p. 19, 20, 21, 22
Table of contents
Manual images
Click an image to enlargeGetting to Know Your Tablet
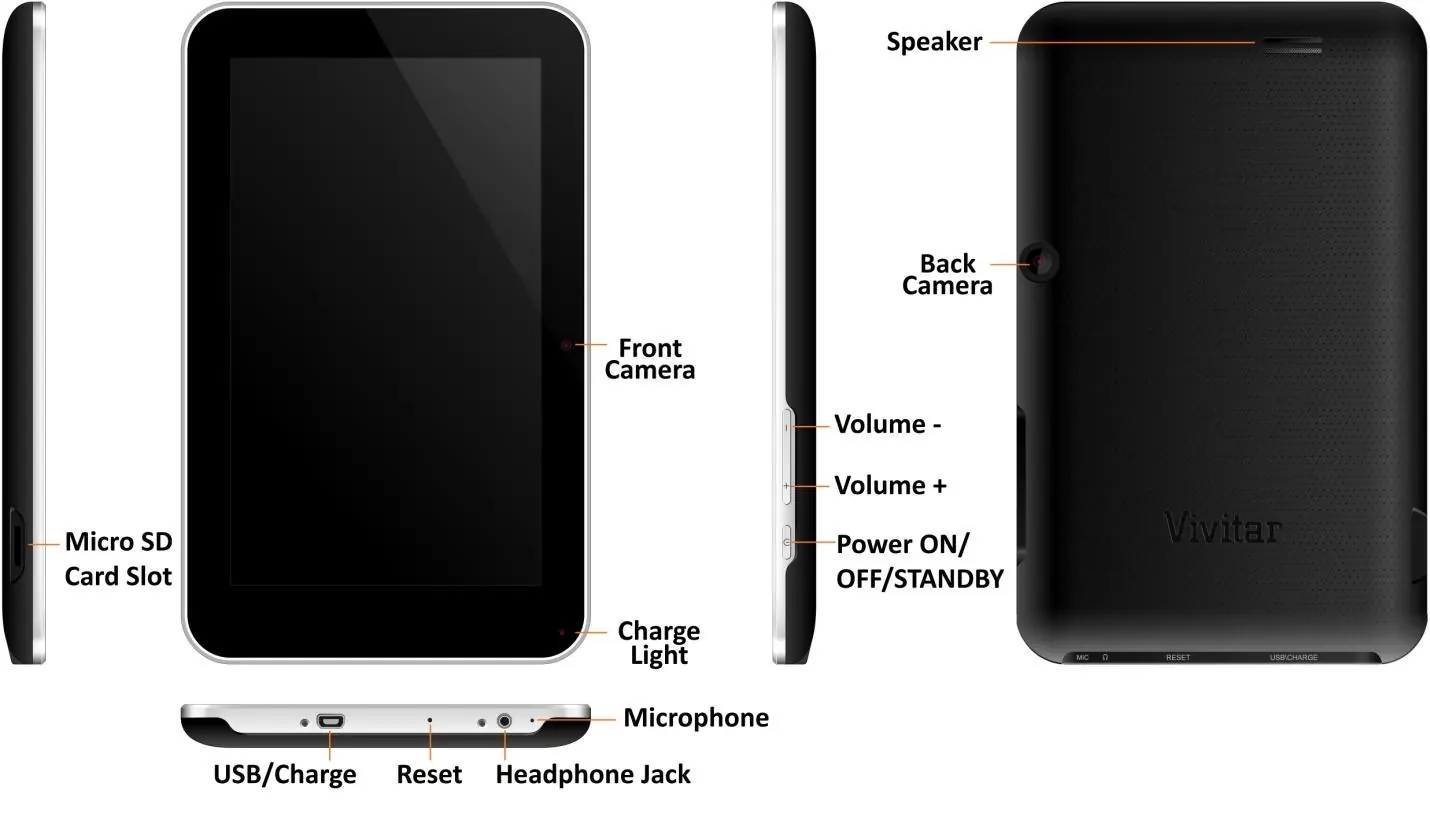
The Vivitar Camelio 7" Android Tablet features a high-resolution 1024x600 display, dual front and rear cameras, and a built-in Google Play Store. The device includes a Micro SD card slot on the side, and the bottom edge houses the USB/Charge port, Reset button, and Headphone jack. The back panel contains the speaker and rear camera.
Initial Setup
It is recommended to fully charge your tablet before the first use. Upon powering on the device for the first time, follow the on-screen prompts:

- Language: Select your preferred language (English, Spanish, French, or Portuguese).
- WiFi: Select your network and enter the password if required. You may choose to skip this step and configure it later in Settings.
- Google Account: Sign in with an existing Google account or create a new one to access Gmail, Google Talk, and the Google Play Store.
- Google Services: Configure backup and restore options, location services, and date/time settings.
- Setup Completion: Agree to Google updates and touch Finish to begin using the tablet.
Interface and Navigation
Once setup is complete, the Home Screen appears. The display orientation rotates automatically as you turn the tablet. The Tabbed Apps Manager allows you to organize shortcuts into categories: Apps, Games, Social, and Tools. To manage apps, touch a tab, then use the Add App icon to select and display your favorite applications.
Parental Control
The Parental Control feature allows you to restrict which apps can be launched by children. By default, this feature is turned OFF.
- Access the Parental Control icon on the Home screen.
- Turn the feature ON and touch Set Up.
- Enter your user information (name and email).
- Set a 4-digit Parental Lock Code.
- Select which apps require the lock code to launch.
An email notification with your lock code will be sent to your registered Google account.
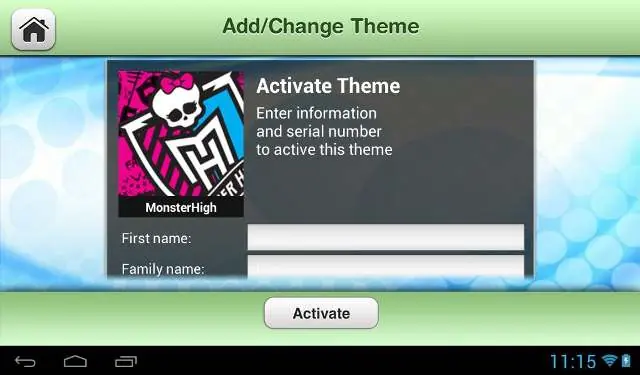
Theme Manager
The Theme Manager allows you to personalize your tablet with different character themes. You can purchase and download new themes from the online catalog. To change a theme, launch the Theme Manager, select Add/Change Theme, and choose your desired theme. Once downloaded, you can switch between themes at any time.
User Management
The tablet supports up to 5 different users, each with their own theme, profile picture, and application preferences.
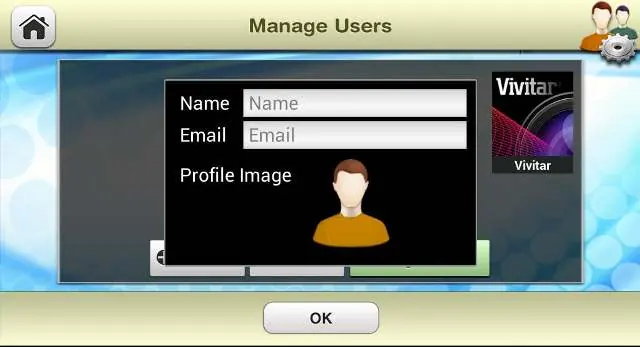
- Launch the Theme Manager and touch Manage Users.
- Touch Add User to create a new profile.
- Enter the user's name and email, and select a profile picture.
- To switch users, highlight the user name from the list and touch Switch to this User.
Practical help
Common problems
Tablet won't connect to WiFi
Ensure WiFi is enabled in settings and the correct password is entered. You can skip this during setup and configure it later.
Forgot parental control code
The code is sent to the email address associated with the Google account used during setup.
Need to change language
Language can be set during initial setup or changed later in the tablet's Settings menu.
Before use
- Fully charge the tablet before first use.
- Ensure you have a Google account ready.
- Have your WiFi network name and password available.
Images and diagrams
- The tablet features a Micro SD card slot on the side.
- The top/bottom edge contains the USB/Charge port, Reset button, and Headphone jack.
- The back panel houses the speaker and rear camera.
Model compatibility
- Theme App Cards are sold separately.
- Requires an active Google Account for full functionality.

Manual page author
Emily Carter
User documentation editor
Prepares concise manual descriptions and highlights the most useful setup, operation, and maintenance information for readers.