Furniture / Chairs & Seating
Assembly Instructions for Living Spaces Ellory Dining Table and Side Chair Set
Comprehensive assembly guide for the Living Spaces Ellory Dining Table (2135T-4287) and CRWN Side Chair (2135S). Includes step-by-step installation procedures, parts lists, and maintenance tips for ensuring stability and longevity.
Quick answers from the manual
Quick answer
- This manual provides assembly instructions for the Living Spaces Ellory Dining Table (2135T-4287) and the CRWN Side Chair (2135S). p. 1, 2, 3, 4
Key actions
- Assemble on a flat and soft surface to protect the finish. p. 3
- Do not fully tighten screws until the furniture is leveled on a hard surface. p. 3
Problems and fixes
Wobbling furniture
Adjust the levelers or loosen screws, level on a hard surface, and re-tighten.
p. 3, 4Maintenance and reset
- Periodically check to ensure that all connectors (bolts, screws, etc.) are tight. p. 1, 3, 4
Where to find it in the PDF
- Ellory Dining Table Assembly p. 1, 4
- CRWN Side Chair Assembly p. 2, 3
Table of contents
Manual images
Click an image to enlargeImportant Information
Before beginning assembly, carefully check all packing material for small parts that may have come loose during shipment. Identify and count all parts and hardware against the provided lists. It is recommended to assemble the furniture on a flat and soft surface to prevent damage to the finish.
Note: Do not fully tighten all screws until the furniture has been placed on a flat, hard surface and leveled to ensure it does not wobble. Periodically check to ensure that all connectors, including bolts and screws, remain tight.
Ellory Dining Table Assembly
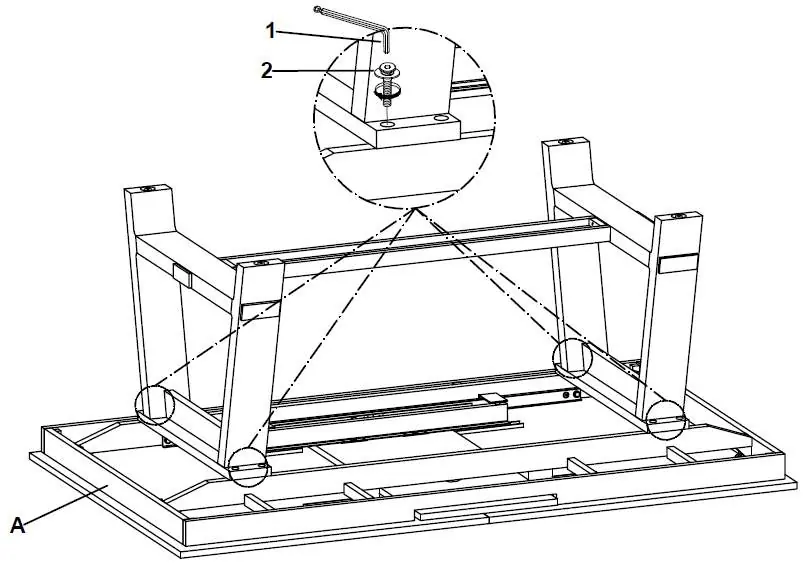
- Preparation: Ensure you have all parts (A, B, C) and hardware (D, E, F) ready.
- Step 1: Insert dowels (F) into the side rails (C).
- Step 2: Attach the side rails (C) to the table legs (B) using bolts (E) and the Allen wrench (D).
- Step 3: Secure the table top (A) to the assembled base using the remaining hardware.
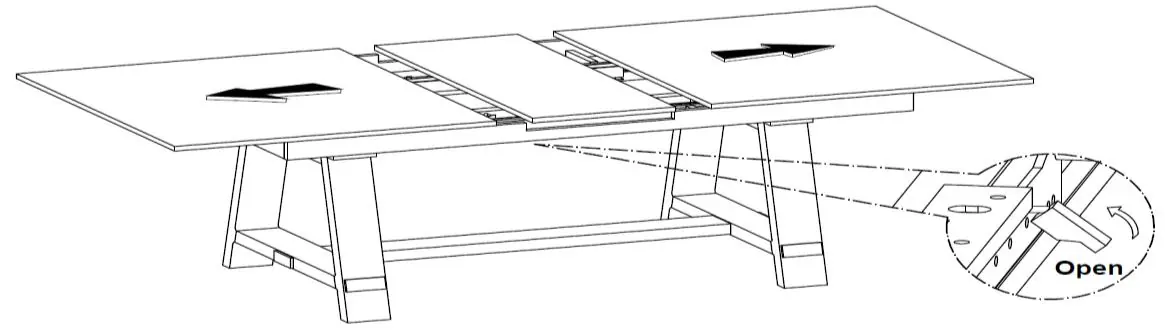
- Step 4-5: Extend the table top by opening the locking mechanism, sliding the sections apart, and closing the lock once adjusted.
- Step 6: If the table is uneven, use the adjustable levelers located on the bottom of the legs to balance the table.
- Step 7: Ensure all connections are secure.
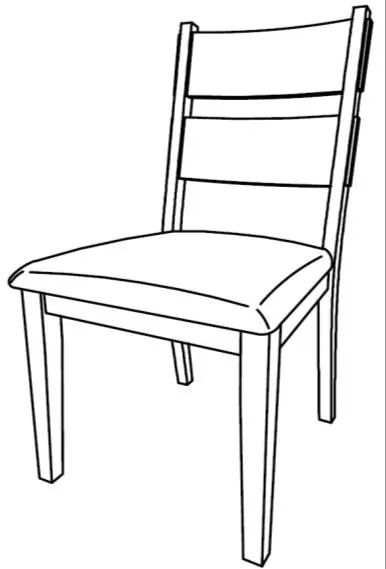
CRWN Side Chair Assembly
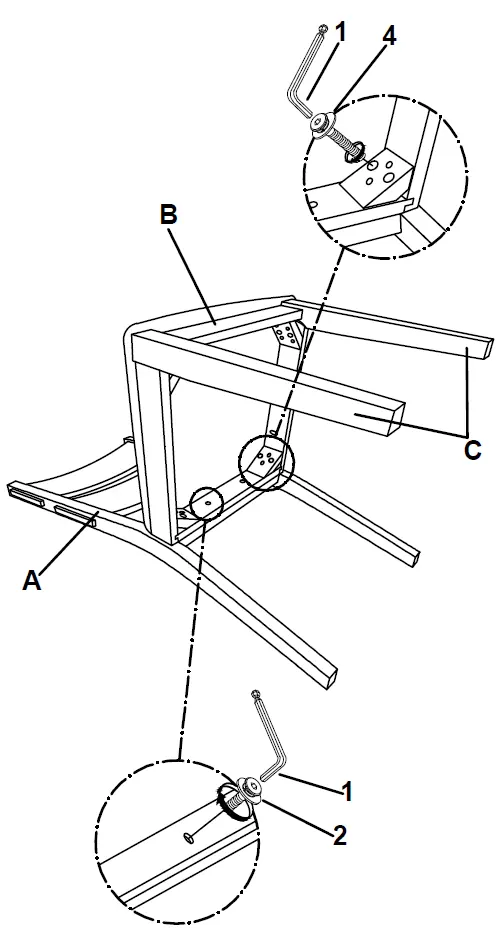
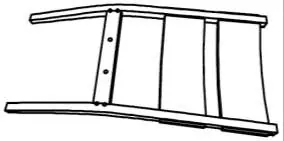
- Step 1: Align the front legs (C) with the seater frame (B). Insert the appropriate bolts and tighten partially using the Allen wrench (1).
- Step 2: Attach the back rest (A) to the seater frame (B) using the remaining bolts.
- Step 3: Once all parts are connected, place the chair on a flat, hard surface to level the legs. After ensuring the chair does not wobble, fully tighten all screws.
Maintenance and Care
To maintain the stability and safety of your furniture, perform the following:
- Periodically check all connectors (bolts, screws, etc.) to ensure they are tight.
- If the table or chair wobbles, adjust the levelers or loosen the screws slightly, level the furniture on a hard surface, and re-tighten the screws.
Practical help
Common problems
Furniture wobbles after assembly
Loosen all screws slightly, place the furniture on a flat, hard surface to level the legs, and then fully tighten all screws.
Missing hardware or parts
Check all packing materials carefully, as small parts may have come loose inside the carton during shipment.
Before use
- Verify all parts against the provided Part List.
- Verify all hardware against the Hardware List.
- Prepare a flat and soft surface for assembly.
- Ensure the provided Allen wrench is available.
- Do not fully tighten screws until the final leveling step.
Images and diagrams
- The diagrams illustrate the step-by-step connection of legs to the frame using specific bolt sizes.
- The table diagram shows the operation of the extension mechanism (Open/Close).
- The chair diagram highlights the importance of leveling before final tightening.

Manual page author
David Miller
Documentation analyst
Organizes user manual content into clear summaries, with attention to model details, product context, and everyday usability.