Industrial / Access Control
Installation Guide for Salto DIN Type Mortise Locks
Step-by-step installation guide for Salto DIN type mortise locks. Includes handing selection, mounting instructions, battery installation, and important programming warnings.
Table of contents
Manual images
Click an image to enlargeQuick Guide
This document provides installation instructions for Salto DIN type mortise locks. Before beginning, ensure your mortise lock has a maximum 4-degree pre-turn. Important: Do not close the door after installation until the lock has been programmed.
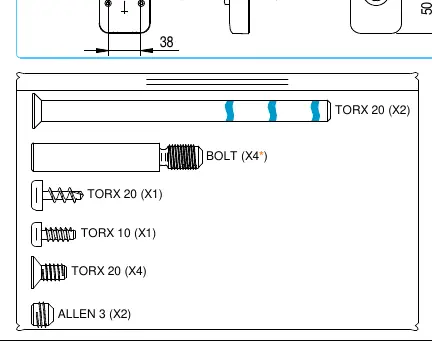
Parts and Tools
Ensure you have the necessary tools before starting, including a TORX 20 screwdriver, TORX 10 screwdriver, and an Allen 3 key. The kit includes various screws and bolts required for mounting.
Handing Selection
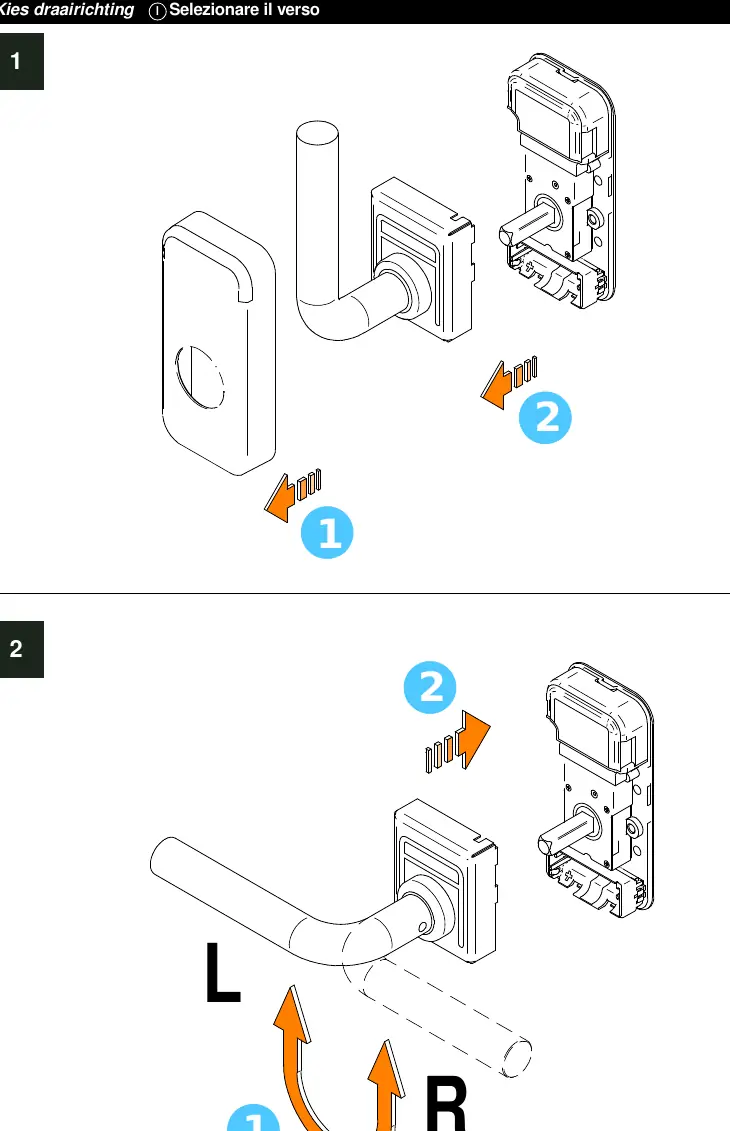
- Identify the required handing (Left or Right) for your door.
- Adjust the handle direction according to the diagrams provided in the manual to match your door configuration.
Installation
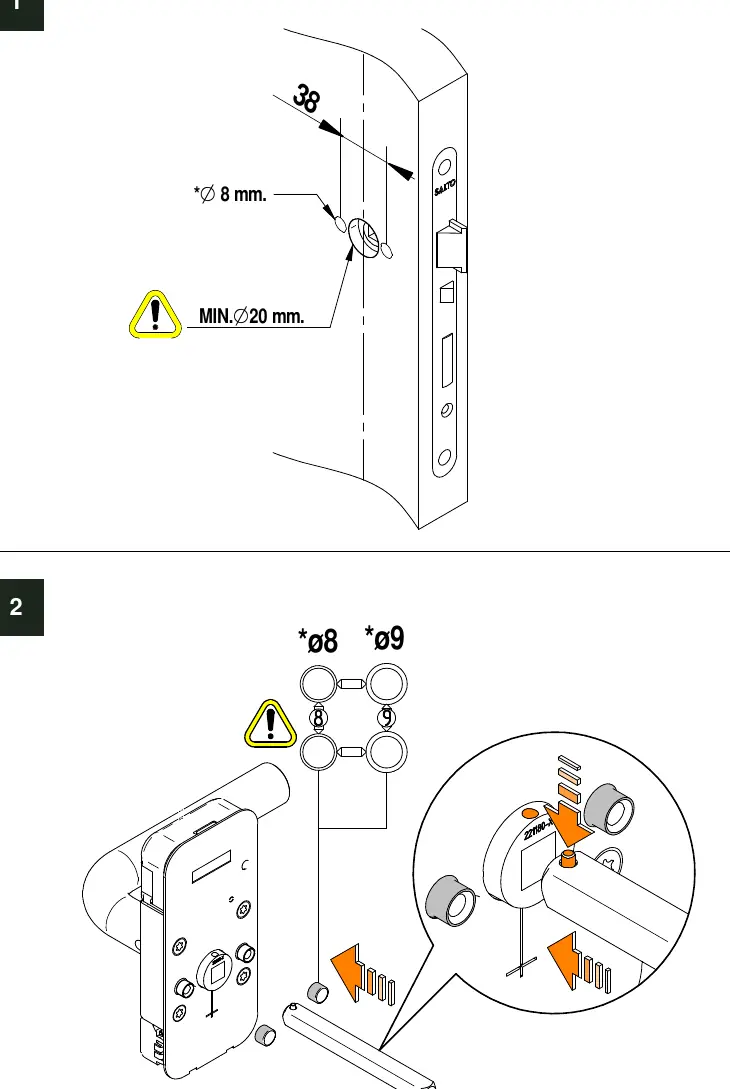
- Prepare the door by drilling the necessary holes as indicated in the installation diagrams (minimum 20mm diameter for the main hole).
- Insert the mortise lock into the door.
- Mount the electronic lock assembly onto the door, ensuring proper alignment with the mortise lock.
- Secure the assembly using the provided screws and tools (TORX 20).
- Ensure the assembly is flush and correctly oriented.
Battery Installation
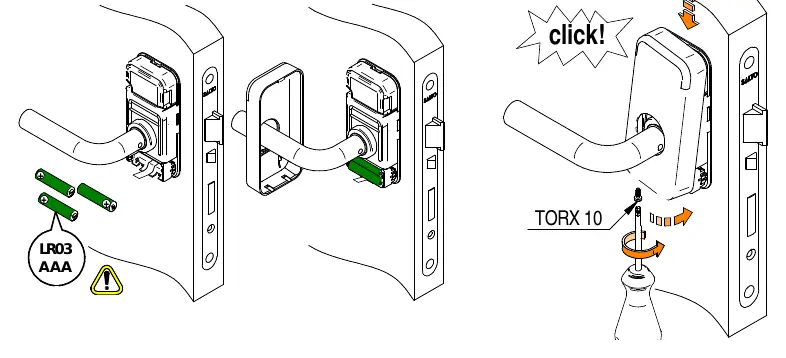
- Insert the required LR03 AAA batteries into the battery compartment.
- Ensure correct polarity as indicated in the diagram.
- Secure the battery cover using the TORX 10 screw.
- Warning: Do not close the door until the lock is programmed.
Battery Replacement
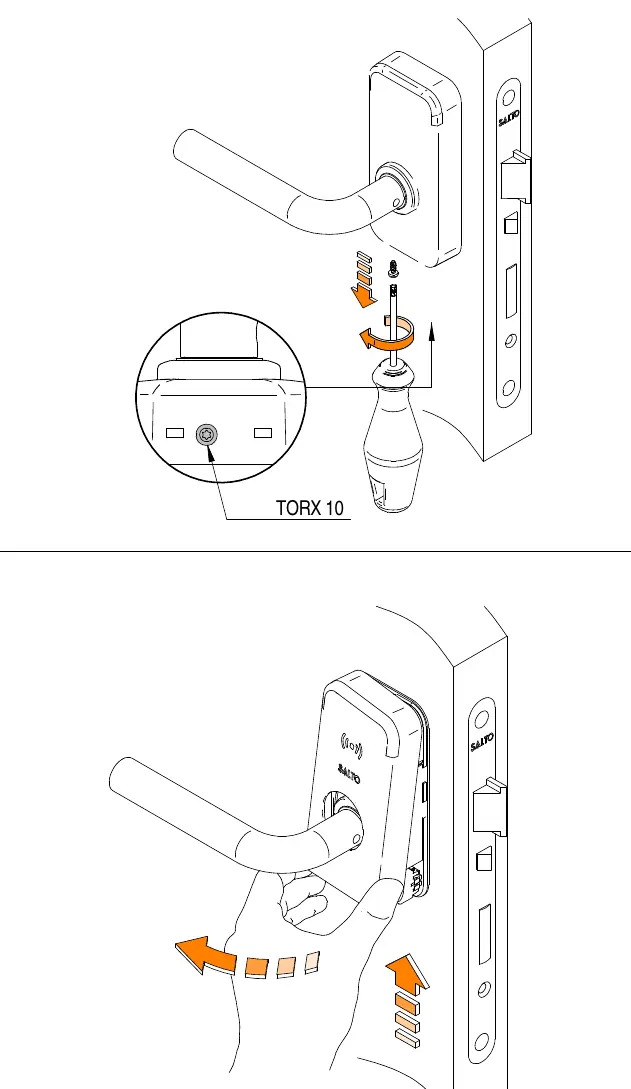
- Use a TORX 10 screwdriver to remove the screw securing the battery cover.
- Remove the cover to access the batteries.
- Replace the old batteries with new LR03 AAA batteries.
- Reattach the cover and secure it with the screw.
Practical help
Common problems
Lock not functioning after installation
Ensure the door was not closed before the lock was programmed. Programming must be completed first.
Mortise lock compatibility
The mortise lock must have a maximum 4-degree pre-turn to be compatible with this system.
Before use
- Verify the mortise lock has a maximum 4-degree pre-turn.
- Ensure door thickness is suitable (t > 60mm).
- Have LR03 AAA batteries ready.
- Have TORX 10, TORX 20, and Allen 3 tools ready.
- Do not close the door until programming is complete.
Specs in practice
- 4-degree pre-turn
- The maximum allowable rotation of the mortise lock mechanism before the handle engages.
Images and diagrams
- Handing selection: Shows how to adjust the handle direction (L/R) before mounting.
- Installation sequence: Illustrates the order of mounting components and securing with screws.
- Battery compartment: Shows the correct orientation for inserting AAA batteries.
Model compatibility
- Compatible with DIN type mortise locks.
- Requires specific programming before closing the door.

Manual page author
David Miller
Documentation analyst
Organizes user manual content into clear summaries, with attention to model details, product context, and everyday usability.